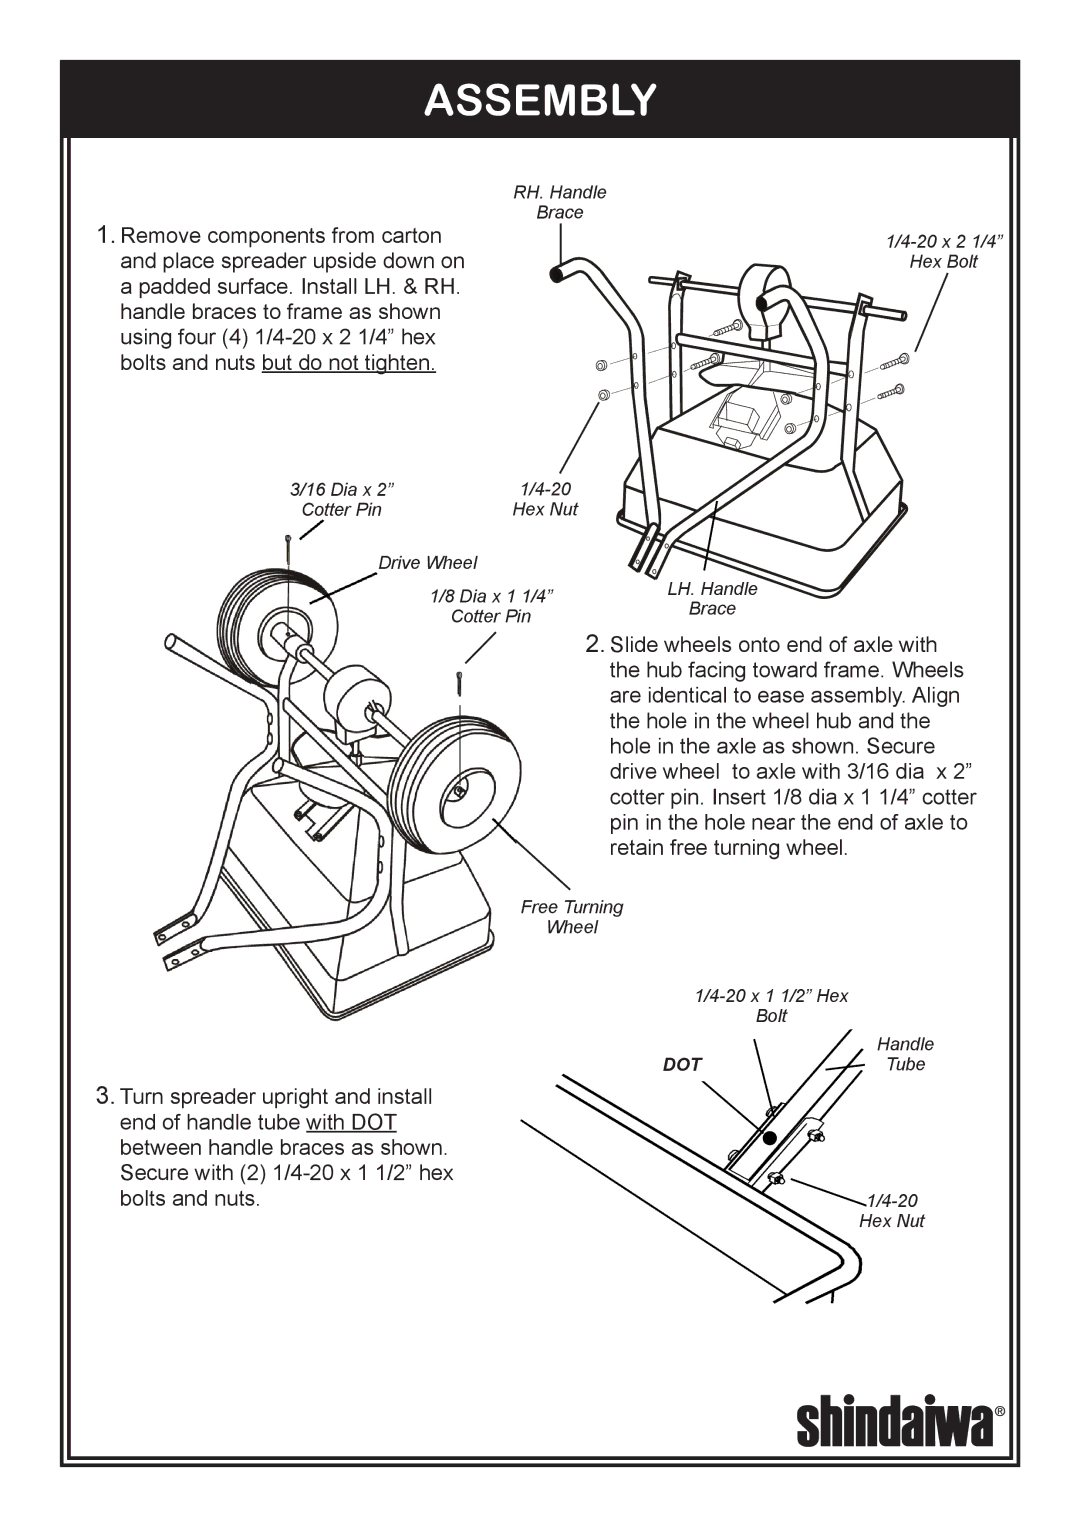
ASSEMBLY
| RH. Handle | |
1. Remove components from carton | Brace | |
| ||
and place spreader upside down on |
| Hex Bolt |
| ||
a padded surface. Install LH. & RH. |
|
|
handle braces to frame as shown |
|
|
using four (4) |
|
|
bolts and nuts but do not tighten. |
|
|
3/16 Dia x 2” | |
Cotter Pin | Hex Nut |
Drive Wheel |
| |
1/8 Dia x 1 1/4” | LH. Handle | |
Brace | ||
Cotter Pin | ||
2. Slide wheels onto end of axle with | ||
| ||
| the hub facing toward frame. Wheels | |
| are identical to ease assembly. Align | |
| the hole in the wheel hub and the | |
| hole in the axle as shown. Secure | |
| drive wheel to axle with 3/16 dia x 2” | |
| cotter pin. Insert 1/8 dia x 1 1/4” cotter | |
| pin in the hole near the end of axle to | |
| retain free turning wheel. |
3.Turn spreader upright and install end of handle tube with DOT between handle braces as shown. Secure with (2)
Free Turning
Wheel
Bolt
Handle
DOTTube
Hex Nut