![4.Feed control knob/wire through the T-handle until spring touches the round hole. CAUTION: Do Not Compress Spring At This Time. Feed wire through the square handle tube. Be sure wire passes above the bolts in the handle brace. Secure T-handle to the tube with 1/4-20 x 2 1/4” hex bolts, washers, and hex nuts as shown. Remove caution label and push the thumb release toward the center and push down knob and shutoff spring until knob latches.](/images/new-backgrounds/101786/1017865x1.webp)
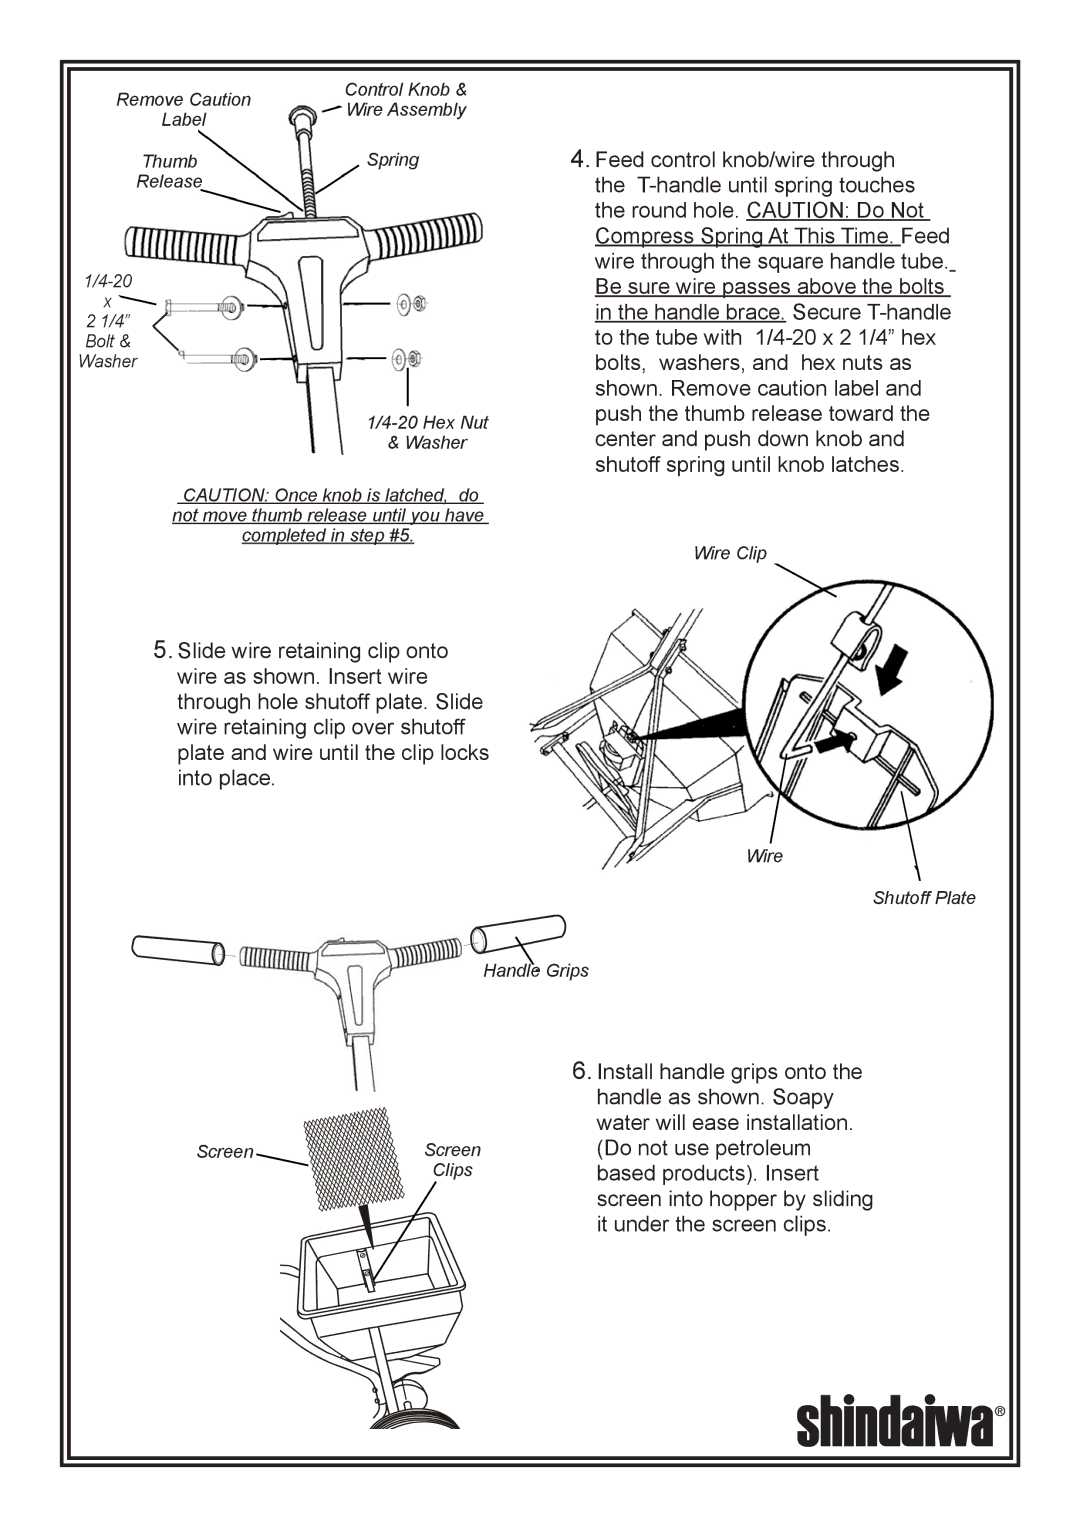
Remove Caution | Control Knob & | |
Wire Assembly | ||
Label | ||
| ||
Thumb | Spring | |
Release |
|
x
2 1/4” Bolt & Washer
& Washer
4.Feed control knob/wire through the T-handle until spring touches the round hole. CAUTION: Do Not Compress Spring At This Time. Feed wire through the square handle tube. Be sure wire passes above the bolts in the handle brace. Secure T-handle to the tube with 1/4-20 x 2 1/4” hex bolts, washers, and hex nuts as shown. Remove caution label and push the thumb release toward the center and push down knob and shutoff spring until knob latches.
CAUTION: Once knob is latched, do not move thumb release until you have completed in step #5.
Wire Clip
5.Slide wire retaining clip onto wire as shown. Insert wire through hole shutoff plate. Slide wire retaining clip over shutoff plate and wire until the clip locks into place.
Wire
Shutoff Plate
Handle Grips
Screen | Screen |
| Clips |
6.Install handle grips onto the handle as shown. Soapy water will ease installation. (Do not use petroleum based products). Insert screen into hopper by sliding it under the screen clips.