SECTION
4.While holding the unit together rotate the XPO2 and position it so that the back panel label is facing down.
NOTE: The ribbon cable is connected to the front cover and the pc board. Only open the XPO2 as shown in Details “B” and “C”.
5.Slowly, open the front cover ensuring not to damage the ribbon cable (Detail “B” and Detail “C” in FIGURE 2.3).
Replacing the Inlet Filter
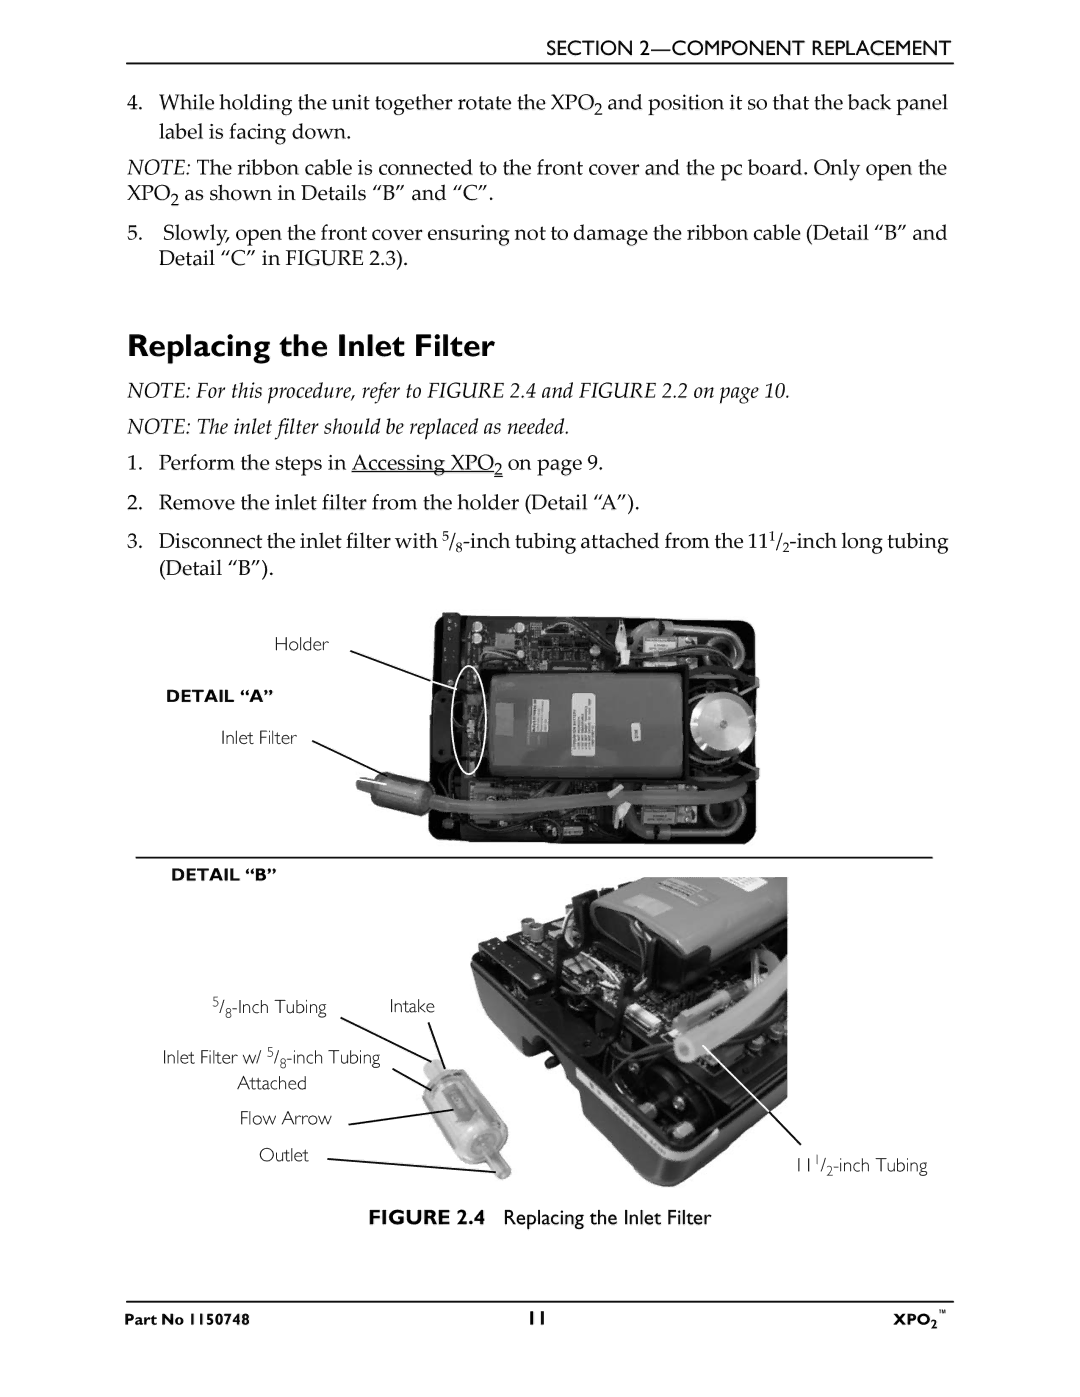
NOTE: For this procedure, refer to FIGURE 2.4 and FIGURE 2.2 on page 10.
NOTE: The inlet filter should be replaced as needed.
1.Perform the steps in Accessing XPO2 on page 9.
2.Remove the inlet filter from the holder (Detail “A”).
3.Disconnect the inlet filter with
Holder
DETAIL “A”
Inlet Filter
DETAIL “B”
Intake | |
Inlet Filter w/ |
|
Attached |
|
Flow Arrow |
|
Outlet |
FIGURE 2.4 Replacing the Inlet Filter
Part No 1150748 | 11 | XPO2™ |