SECTION
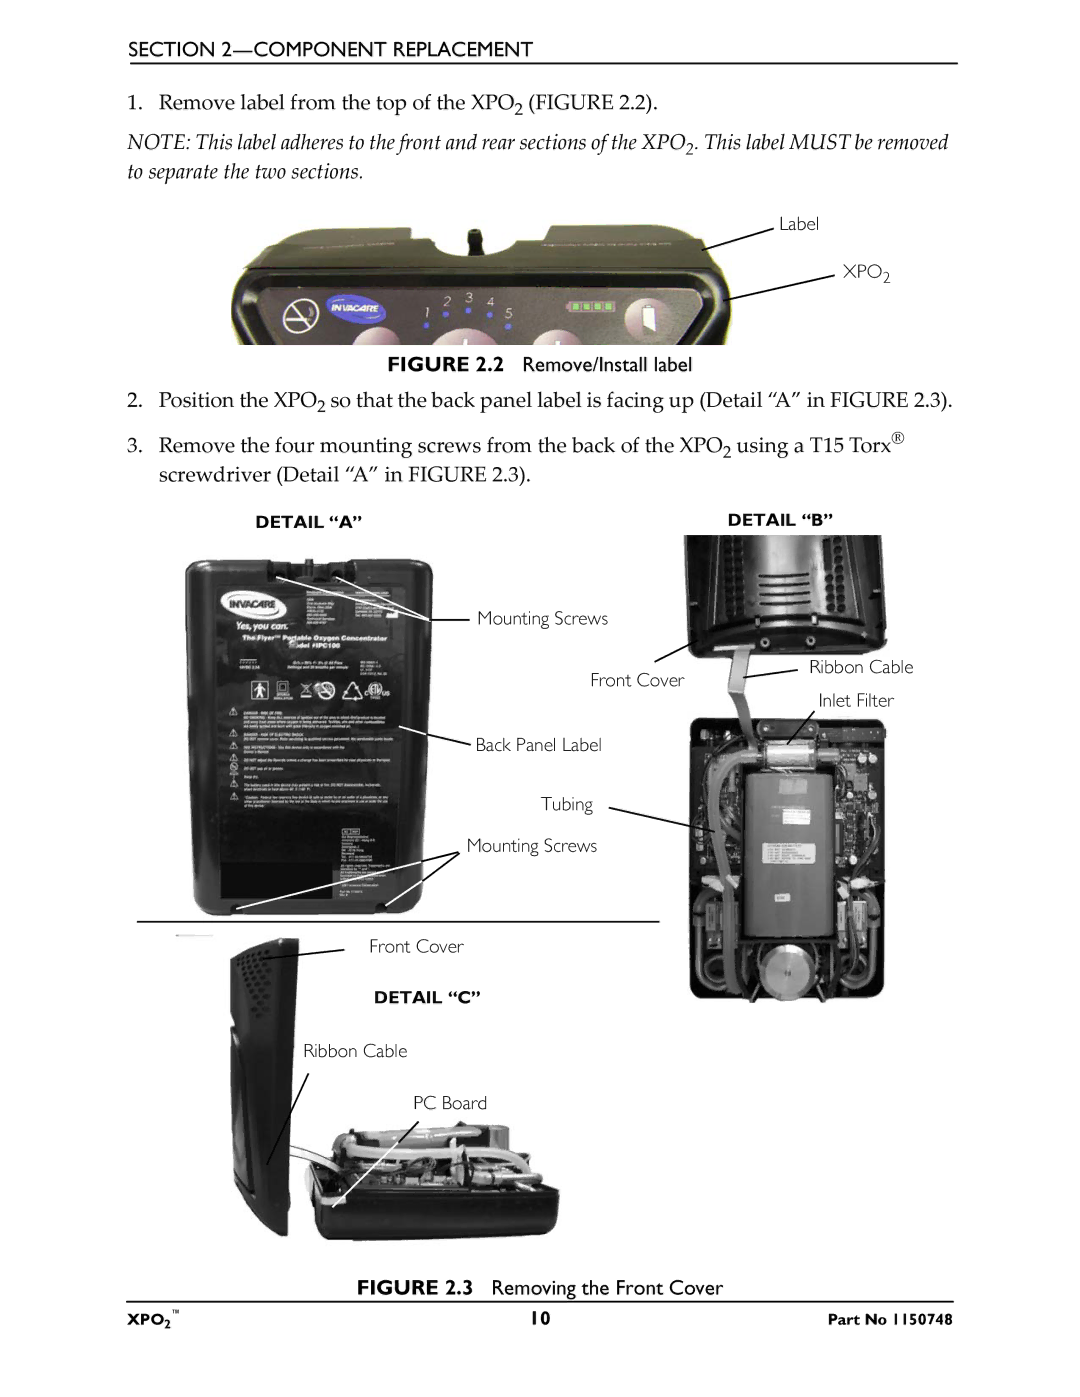
1. Remove label from the top of the XPO2 (FIGURE 2.2).
NOTE: This label adheres to the front and rear sections of the XPO2. This label MUST be removed to separate the two sections.
Label
XPO2
FIGURE 2.2 Remove/Install label
2.Position the XPO2 so that the back panel label is facing up (Detail “A” in FIGURE 2.3).
3.Remove the four mounting screws from the back of the XPO2 using a T15 Torx® screwdriver (Detail “A” in FIGURE 2.3).
DETAIL “A” | DETAIL “B” |
Mounting Screws
Front Cover
![]() Back Panel Label
Back Panel Label
Tubing
Mounting Screws
Front Cover
DETAIL “C”
Ribbon Cable
PC Board
Ribbon Cable
Inlet Filter
FIGURE 2.3 Removing the Front Cover
XPO2™ | 10 | Part No 1150748 |