ENGLISH
POWER AND INITIALIZATION
Power Mains Connections
Use the supplied power cable to connect the DFR22 Audio Proces- sor to an active
NOTE: The DFR22 Audio Processor is designed to operate contin- uously. Therefore, there is no power on/off switch.
..
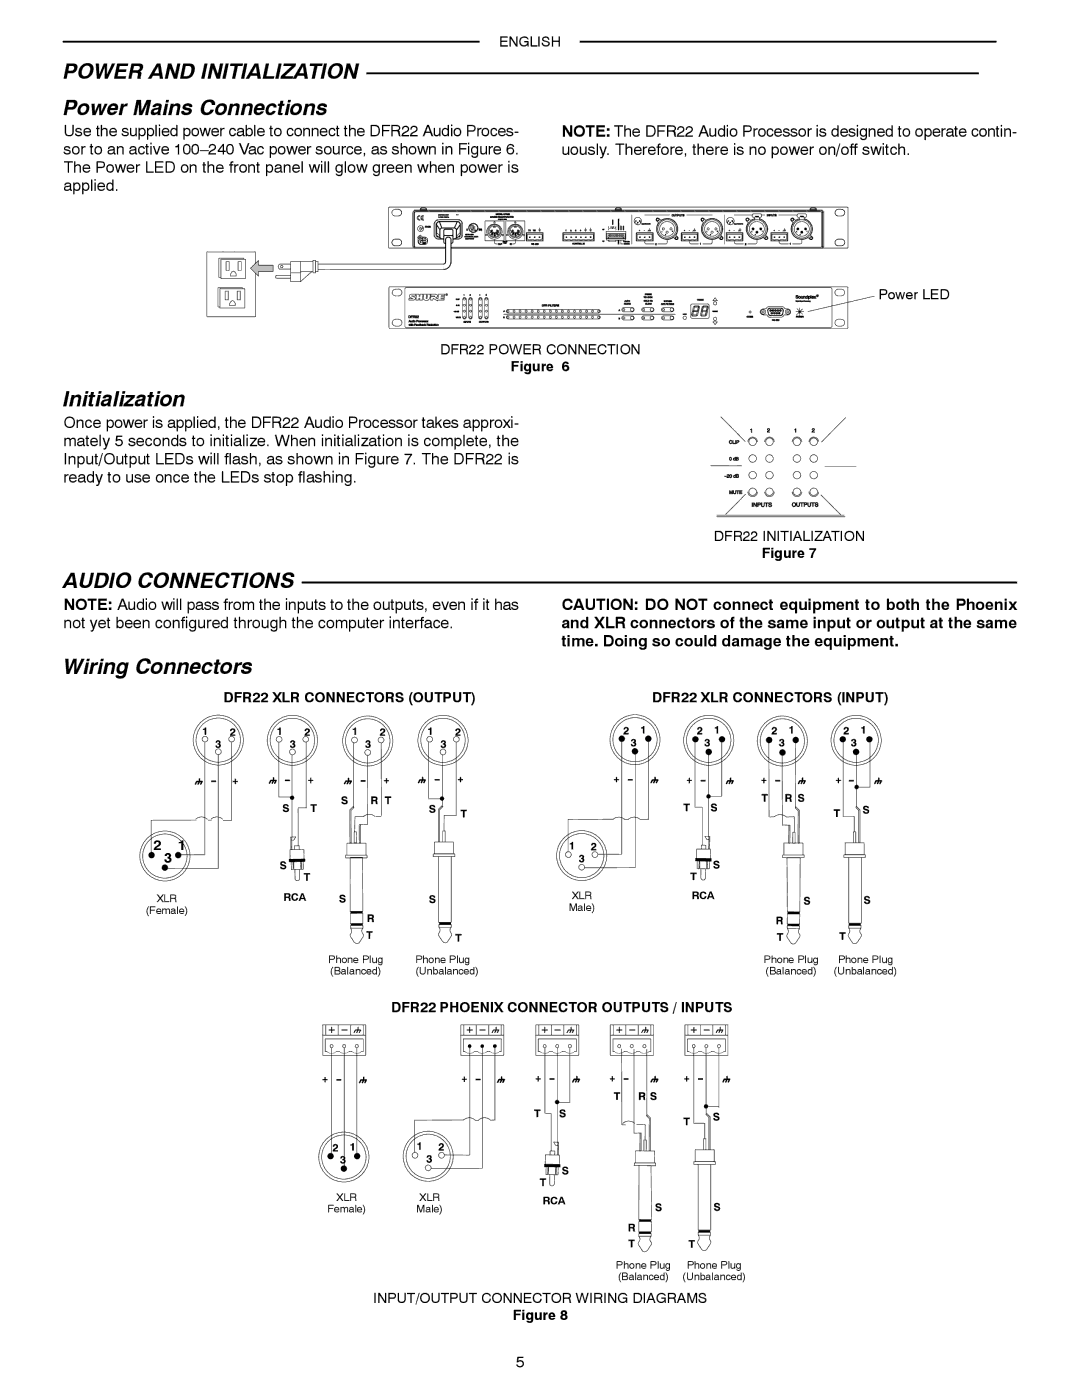
Power LED
DFR22 POWER CONNECTION
Figure 6
Initialization
Once power is applied, the DFR22 Audio Processor takes approxi- mately 5 seconds to initialize. When initialization is complete, the Input/Output LEDs will flash, as shown in Figure 7. The DFR22 is ready to use once the LEDs stop flashing.
DFR22 INITIALIZATION
Figure 7
AUDIO CONNECTIONS
NOTE: Audio will pass from the inputs to the outputs, even if it has not yet been configured through the computer interface.
CAUTION: DO NOT connect equipment to both the Phoenix and XLR connectors of the same input or output at the same time. Doing so could damage the equipment.
Wiring Connectors
DFR22 XLR CONNECTORS (OUTPUT) | DFR22 XLR CONNECTORS (INPUT) |
![]() 2 3 1
2 3 1
XLR | RCA |
| XLR | RCA |
|
(Female) |
|
| Male) |
|
|
| Phone Plug | Phone Plug |
| Phone Plug | Phone Plug |
| (Balanced) | (Unbalanced) |
| (Balanced) | (Unbalanced) |
DFR22 PHOENIX CONNECTOR OUTPUTS / INPUTS
XLR | XLR | RCA | |
Female) | Male) | ||
|
Phone Plug | Phone Plug |
(Balanced) | (Unbalanced) |
INPUT/OUTPUT CONNECTOR WIRING DIAGRAMS
Figure 8
5