ENGLISH |
| ENGLISH |
CHECKING BATTERIES
UP4 Receiver
1.Turn the receiver power ON/OFF switch to the ON position.
2.Observe the PWR LED on front panel (See figure 8). If it is glowing red, the battery power is low and the battery should be changed immediately.
PWR LED
(Red Indicates Low Receiver Battery)
FIGURE 8
UC1 and UC2 Transmitter
1.Turn the transmitter ON/OFF switch to the ON position.
2.Observe the three LED battery gauge (figure 9). Verify that one LED is glowing. The amount of battery life remaining is indicated by which LED is lit, as shown in the table below:
| Battery Gauge |
| FIGURE 9 |
Transmitter LED Color | Remaining Transmitter Operating Time |
Green | 2 to 8 hours |
Amber | 45 minutes to 2 hours |
Red | 45 minutes or less |
U1 and U2 Transmitter
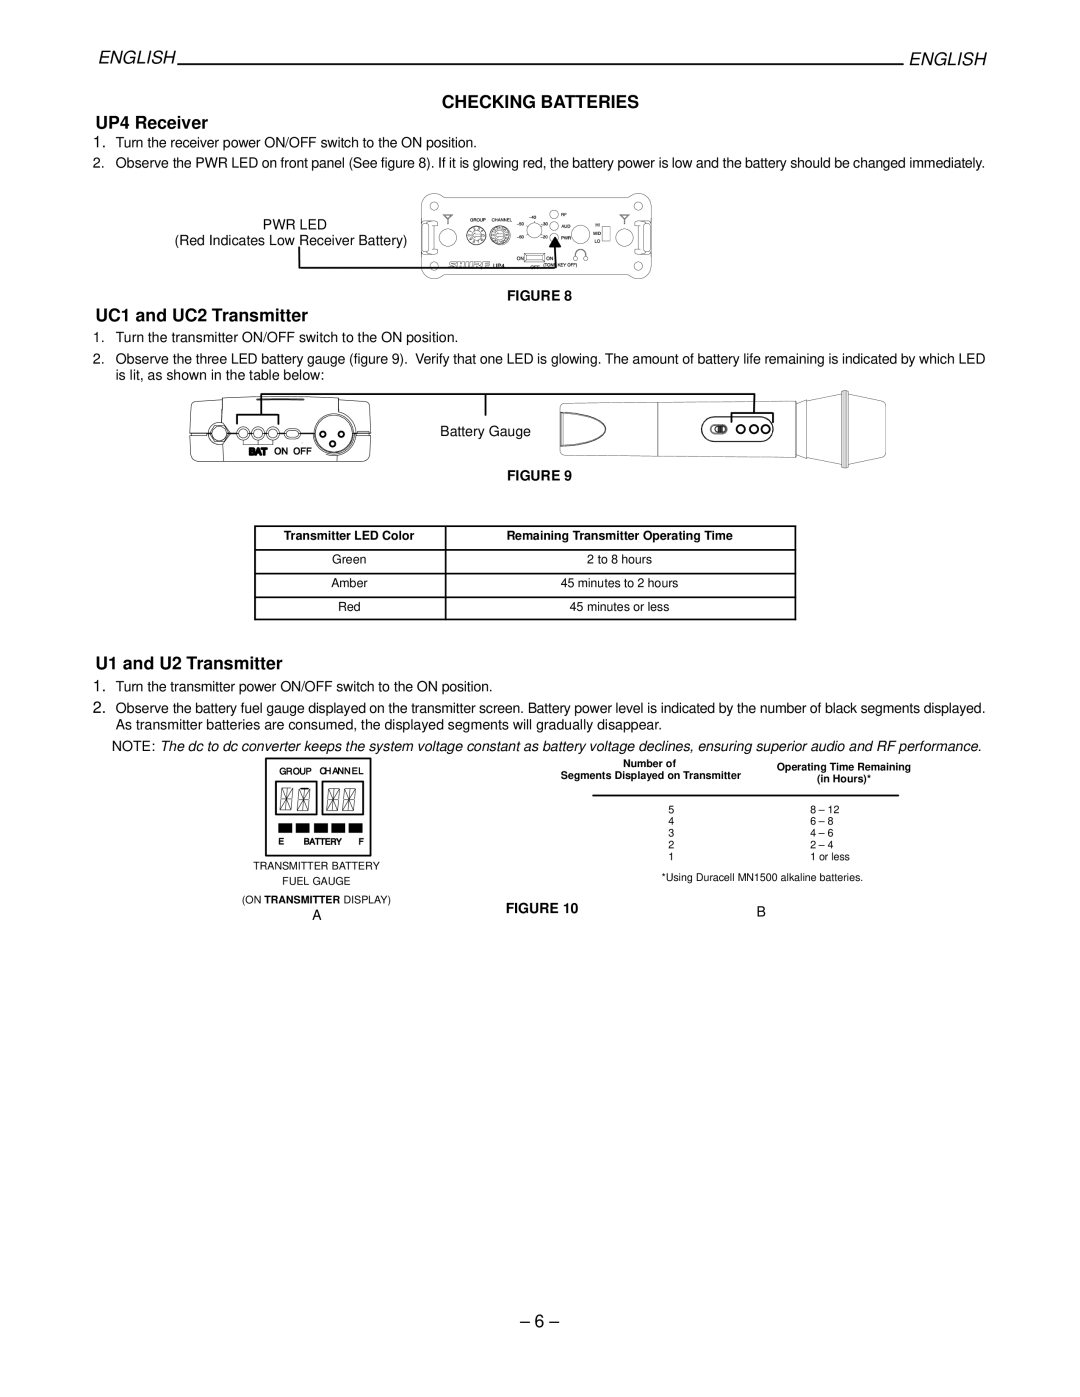
1.Turn the transmitter power ON/OFF switch to the ON position.
2.Observe the battery fuel gauge displayed on the transmitter screen. Battery power level is indicated by the number of black segments displayed. As transmitter batteries are consumed, the displayed segments will gradually disappear.
NOTE: The dc to dc converter keeps the system voltage constant as battery voltage declines, ensuring superior audio and RF performance.
| Number of | Operating Time Remaining | |||
Segments Displayed on Transmitter | |||||
| (in Hours)* | ||||
|
|
| |||
|
|
|
|
| |
5 | 8 | – 12 | |||
4 | 6 | – 8 | |||
3 | 4 | – 6 | |||
2 | 2 | – 4 | |||
|
|
| 1 | 1 or less | |
TRANSMITTER BATTERY | |||||
*Using Duracell MN1500 alkaline batteries. | |||||
| FUEL GAUGE | ||||
|
|
| |||
(ON TRANSMITTER DISPLAY) | FIGURE 10 | B | |||
| A | ||||
– 6 –