ENGLISH |
| ENGLISH |
CHANGING GROUP AND CHANNEL SETTINGS
IMPORTANT: Transmitter GROUP and CHANNEL settings must match receiver GROUP and CHANNEL settings.
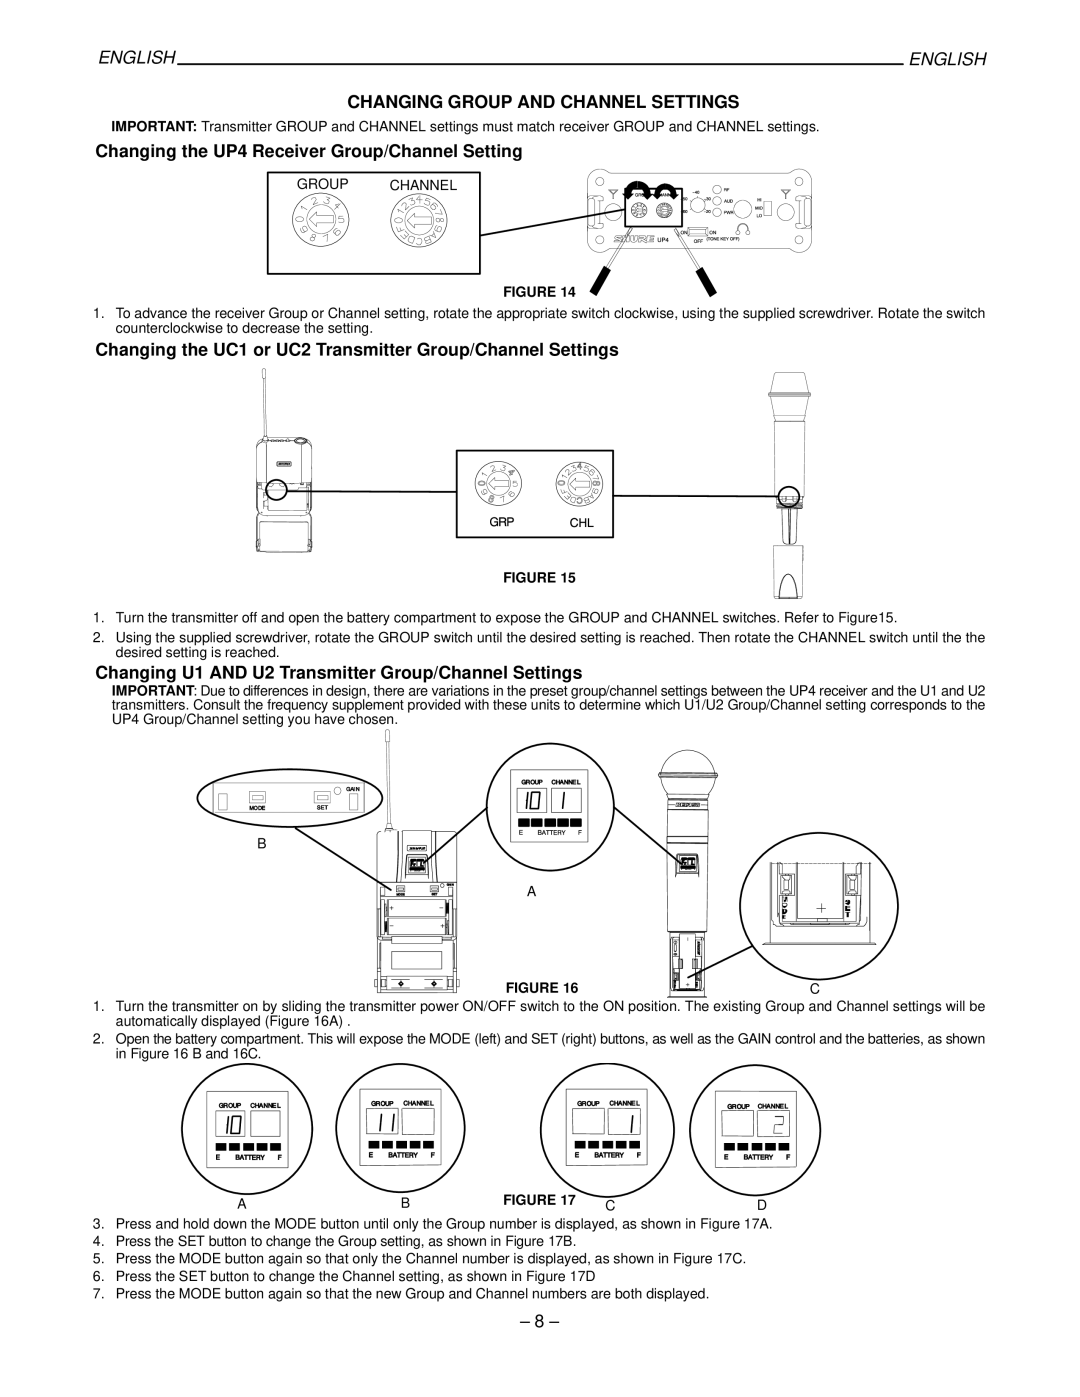
Changing the UP4 Receiver Group/Channel Setting
GROUP CHANNEL
FIGURE 14
1.To advance the receiver Group or Channel setting, rotate the appropriate switch clockwise, using the supplied screwdriver. Rotate the switch counterclockwise to decrease the setting.
Changing the UC1 or UC2 Transmitter Group/Channel Settings
FIGURE 15
1.Turn the transmitter off and open the battery compartment to expose the GROUP and CHANNEL switches. Refer to Figure15.
2.Using the supplied screwdriver, rotate the GROUP switch until the desired setting is reached. Then rotate the CHANNEL switch until the the desired setting is reached.
Changing U1 AND U2 Transmitter Group/Channel Settings
IMPORTANT: Due to differences in design, there are variations in the preset group/channel settings between the UP4 receiver and the U1 and U2 transmitters. Consult the frequency supplement provided with these units to determine which U1/U2 Group/Channel setting corresponds to the UP4 Group/Channel setting you have chosen.
B
A
FIGURE 16 | C |
1.Turn the transmitter on by sliding the transmitter power ON/OFF switch to the ON position. The existing Group and Channel settings will be automatically displayed (Figure 16A) .
2.Open the battery compartment. This will expose the MODE (left) and SET (right) buttons, as well as the GAIN control and the batteries, as shown in Figure 16 B and 16C.
A | B | FIGURE 17 C | D |
3.Press and hold down the MODE button until only the Group number is displayed, as shown in Figure 17A.
4.Press the SET button to change the Group setting, as shown in Figure 17B.
5.Press the MODE button again so that only the Channel number is displayed, as shown in Figure 17C.
6.Press the SET button to change the Channel setting, as shown in Figure 17D
7.Press the MODE button again so that the new Group and Channel numbers are both displayed.
– 8 –