17
1
NOTICE
2
2
4
3
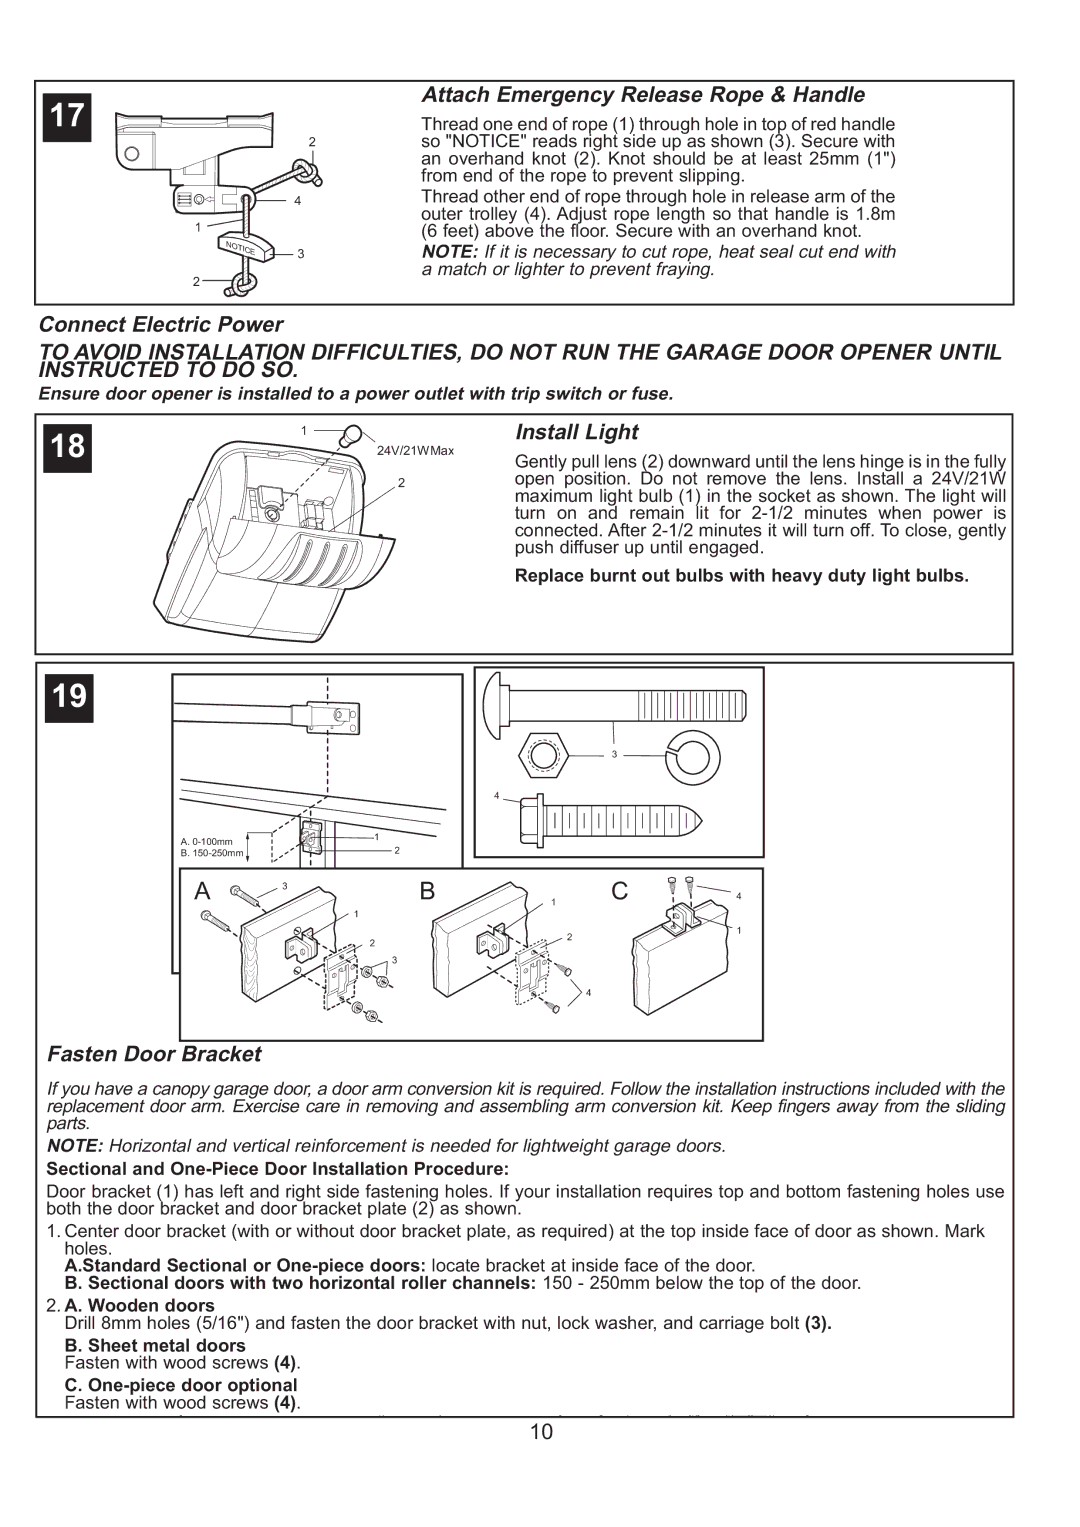
Attach Emergency Release Rope & Handle
Thread one end of rope (1) through hole in top of red handle so "NOTICE" reads right side up as shown (3). Secure with an overhand knot (2). Knot should be at least 25mm (1") from end of the rope to prevent slipping.
Thread other end of rope through hole in release arm of the outer trolley (4). Adjust rope length so that handle is 1.8m (6 feet) above the floor. Secure with an overhand knot.
NOTE: If it is necessary to cut rope, heat seal cut end with a match or lighter to prevent fraying.
Connect Electric Power
TO AVOID INSTALLATION DIFFICULTIES, DO NOT RUN THE GARAGE DOOR OPENER UNTIL INSTRUCTED TO DO SO.
Ensure door opener is installed to a power outlet with trip switch or fuse.
1
18![]()
![]()
![]()
![]()
![]() 24V/21WMax
24V/21WMax
2
Install Light
Gently pull lens (2) downward until the lens hinge is in the fully open position. Do not remove the lens. Install a 24V/21W maximum light bulb (1) in the socket as shown. The light will turn on and remain lit for
Replace burnt out bulbs with heavy duty light bulbs.
19 |
|
|
|
|
|
|
|
|
| 3 |
|
|
|
| 4 |
|
|
A. |
| 1 |
|
|
|
| 2 |
|
|
| |
B. |
|
|
|
| |
A | 3 | B |
| C | 4 |
| 1 | ||||
|
| 1 |
|
|
|
|
|
|
| 2 | 1 |
|
| 2 |
|
| |
|
|
|
|
| |
|
| 3 |
|
|
|
|
|
|
| 4 |
|
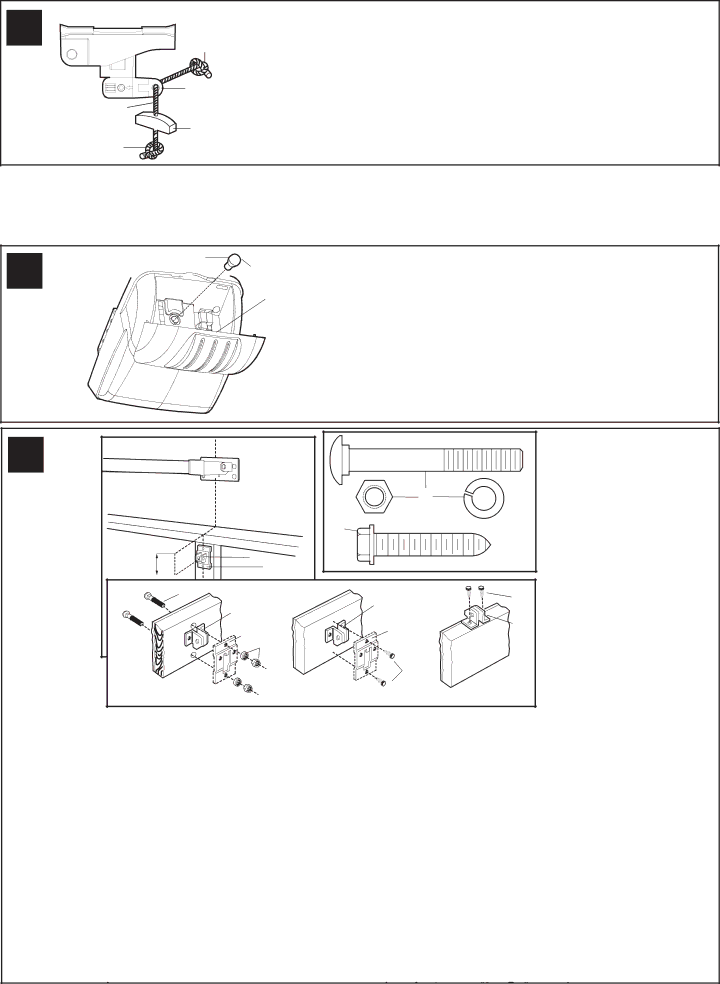
Fasten Door Bracket
If you have a canopy garage door, a door arm conversion kit is required. Follow the installation instructions included with the replacement door arm. Exercise care in removing and assembling arm conversion kit. Keep fingers away from the sliding parts.
NOTE: Horizontal and vertical reinforcement is needed for lightweight garage doors.
Sectional and One-Piece Door Installation Procedure:
Door bracket (1) has left and right side fastening holes. If your installation requires top and bottom fastening holes use both the door bracket and door bracket plate (2) as shown.
1.Center door bracket (with or without door bracket plate, as required) at the top inside face of door as shown. Mark holes.
A.Standard Sectional or
B. Sectional doors with two horizontal roller channels: 150 - 250mm below the top of the door.
2.A. Wooden doorsA
Drill 8mm holes (5/16") and fasten the door bracket with nut, lock washer, and carriage bolt (3). | |
4 | B |
7 |
|
B. Sheet metal doors | 1 |
Fasten with wood screws (4). |
|
6 |
|
C. |
|
Fasten with wood screws (4). | 3 |
|
5
7
2
10
4 | 6 |