11
31
4 5
6
2
36
2 ![]()
![]()
8
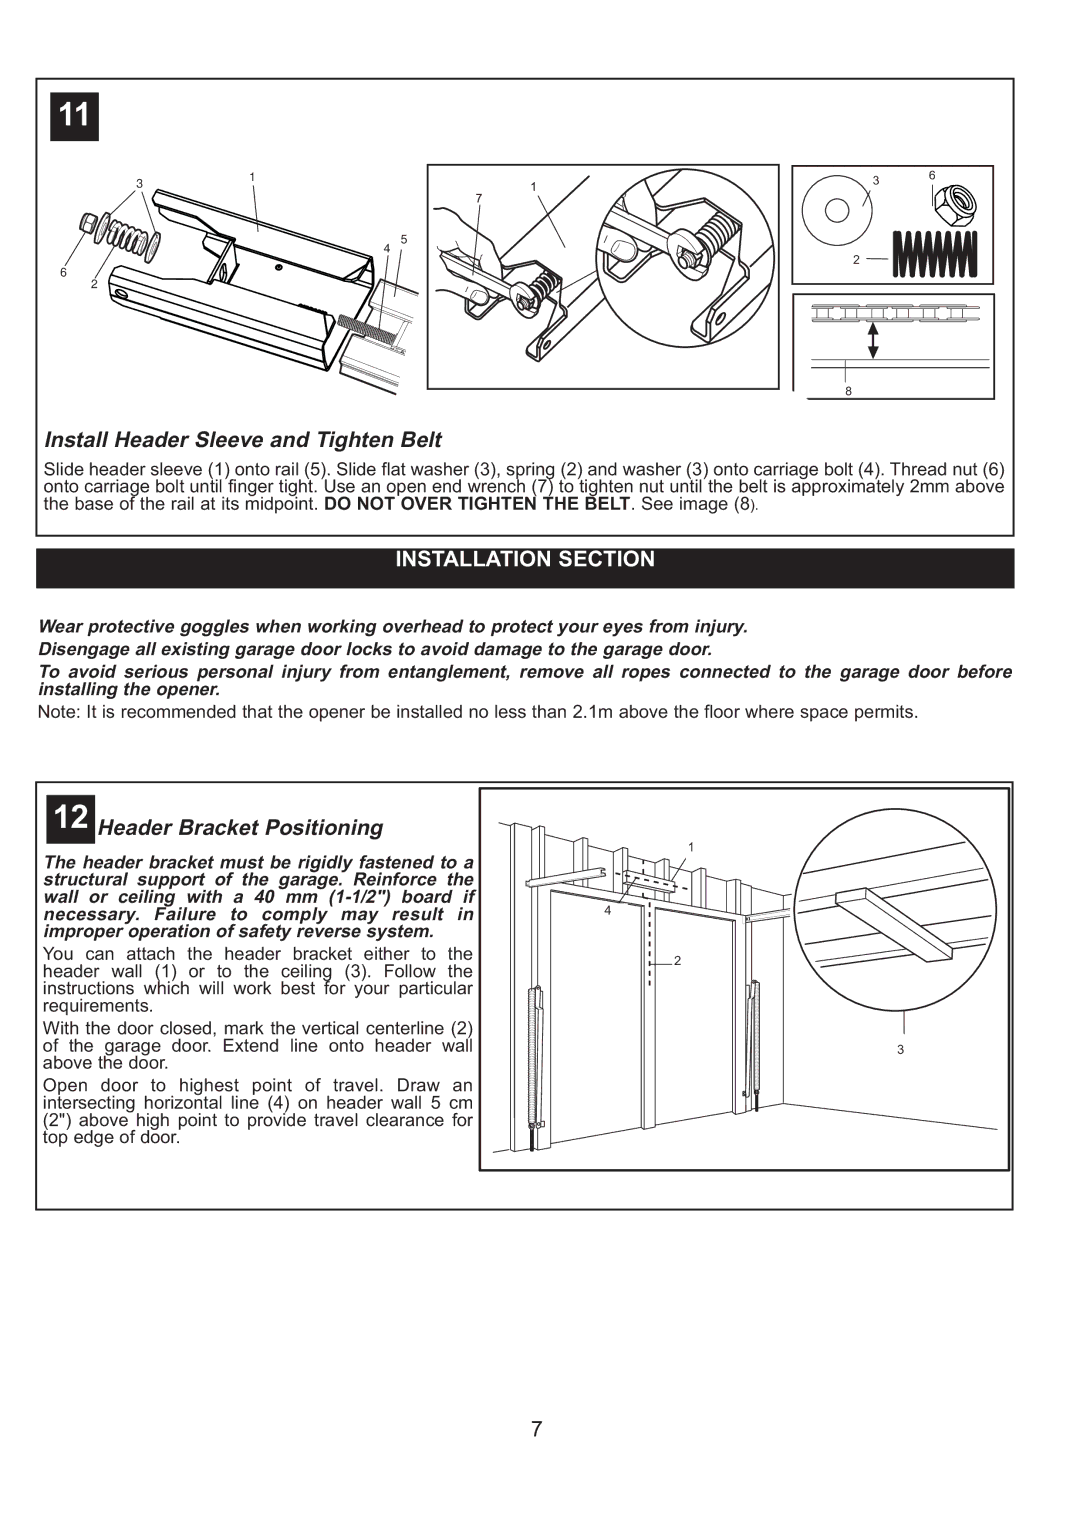
Install Header Sleeve and Tighten Belt
Slide header sleeve (1) onto rail (5). Slide flat washer (3), spring (2) and washer (3) onto carriage bolt (4). Thread nut (6) onto carriage bolt until finger tight. Use an open end wrench (7) to tighten nut until the belt is approximately 2mm above the base of the rail at its midpoint. DO NOT OVER TIGHTEN THE BELT. See image (8).
INSTALLATION SECTION
Wear protective goggles when working overhead to protect your eyes from injury. Disengage all existing garage door locks to avoid damage to the garage door.
To avoid serious personal injury from entanglement, remove all ropes connected to the garage door before installing the opener.
Note: It is recommended that the opener be installed no less than 2.1m above the floor where space permits.
12 Header Bracket Positioning
The header bracket must be rigidly fastened to a structural support of the garage. Reinforce the wall or ceiling with a 40 mm
You can attach the header bracket either to the header wall (1) or to the ceiling (3). Follow the instructions which will work best for your particular requirements.
With the door closed, mark the vertical centerline (2) of the garage door. Extend line onto header wall above the door.
Open door to highest point of travel. Draw an intersecting horizontal line (4) on header wall 5 cm (2") above high point to provide travel clearance for top edge of door.
1 |
4 |
2 |
33 |
7