
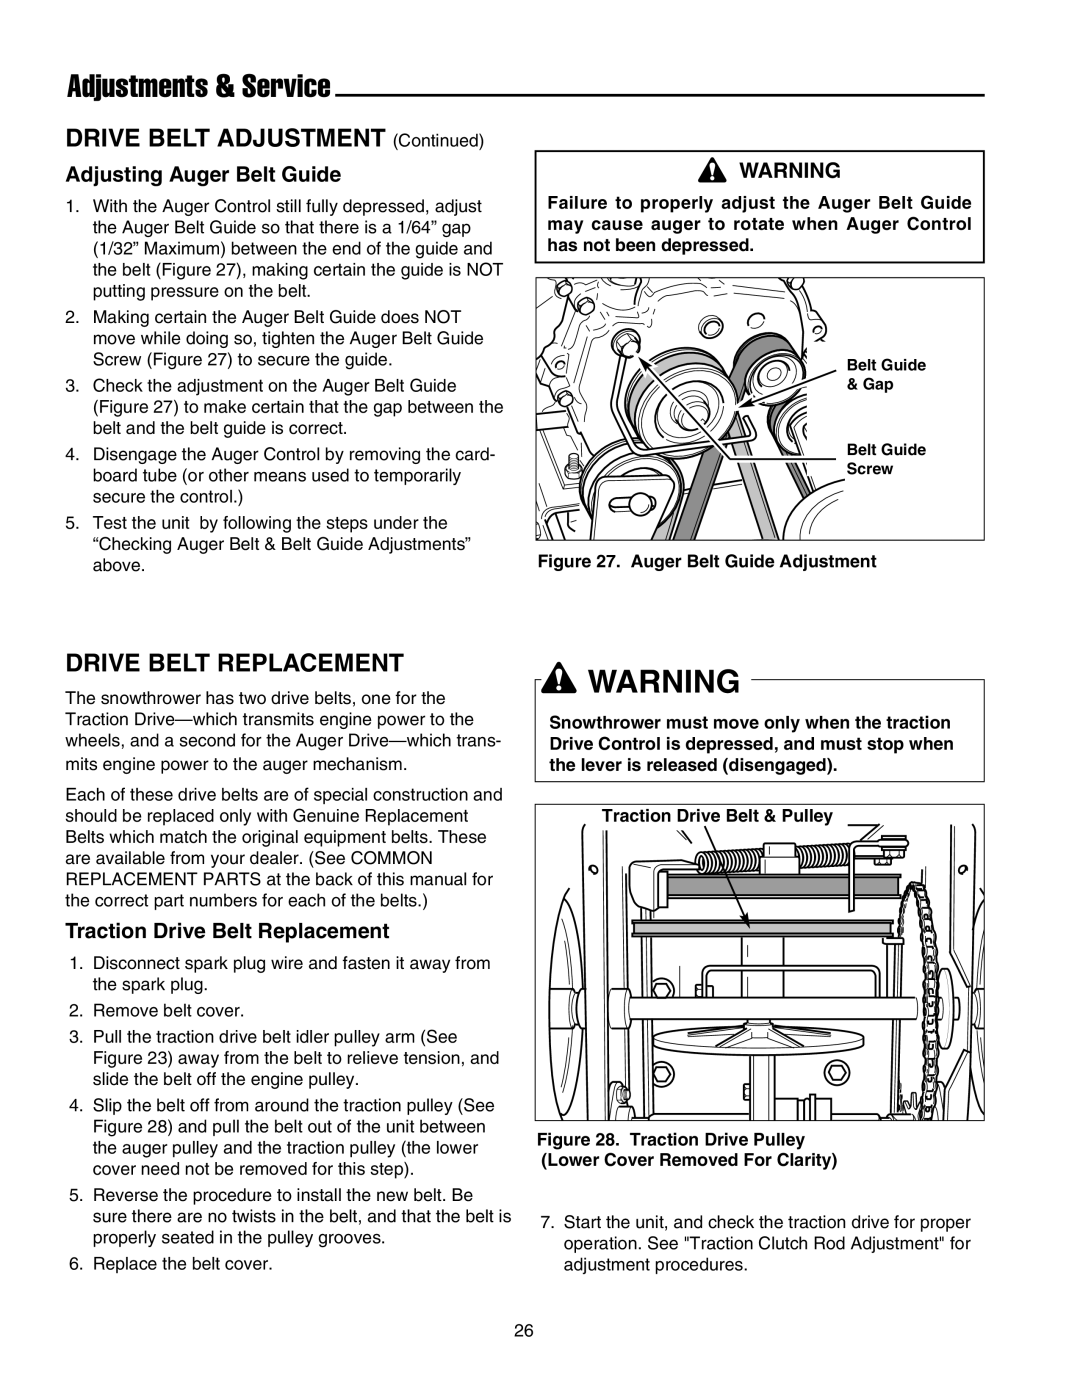
1694434, 1694433, 555, 755 specifications
Simplicity 1694433, 755, 1694434, 555 represents a remarkable step forward in the realm of technology, specifically designed to enhance user experience while simplifying complex processes. At its core, this product line caters to both professionals and everyday users, ensuring that high-end technological features are accessible and manageable.One of the main features of Simplicity 1694433 is its cutting-edge user interface. The intuitive design makes navigation a breeze, allowing users to swiftly access various functions without the steep learning curve often associated with advanced technology. This focus on user-friendliness is a hallmark of the Simplicity line, making it ideal for those who need efficiency without compromising on functionality.
In terms of technology, the Simplicity 1694433 series incorporates state-of-the-art processing power. Its robust processors enable seamless multitasking, ensuring that users can run multiple applications simultaneously without experiencing lag. This is particularly beneficial for professionals who rely on their devices for productivity, as it significantly enhances workflow efficiency.
Another significant feature is the integration of innovative connectivity options. Simplicity 1694433 supports a wide array of connectivity protocols, including Wi-Fi 6 and Bluetooth 5.0. This allows for faster data transfer rates, improved range, and stable connections with other devices, catering to the growing demand for interconnectivity in today’s digital landscape.
The aesthetic design also deserves mention. Simplicity 1694433 exhibits a sleek and modern exterior, which not only provides an appealing look but also ensures durability. The materials used in its construction are chosen for their resilience, facilitating longevity in both personal and professional environments.
Security is a top priority in this product line. Equipped with advanced encryption technologies and biometric authentication, users can trust that their data remains secure from unauthorized access. This is particularly pertinent in today's cyber landscape, where data breaches have become increasingly common.
Overall, Simplicity 1694433, 755, 1694434, 555 blends advanced technology with a user-centric approach, making it a standout choice for anyone seeking a reliable, efficient, and stylish solution to their technological needs. The robust features combined with state-of-the-art design principles make this product series a compelling option in a competitive market.