HITCH INSTALLATION
SunStar/1900 Series (Mfg. No. 1691526)
1.Install the
Note: The
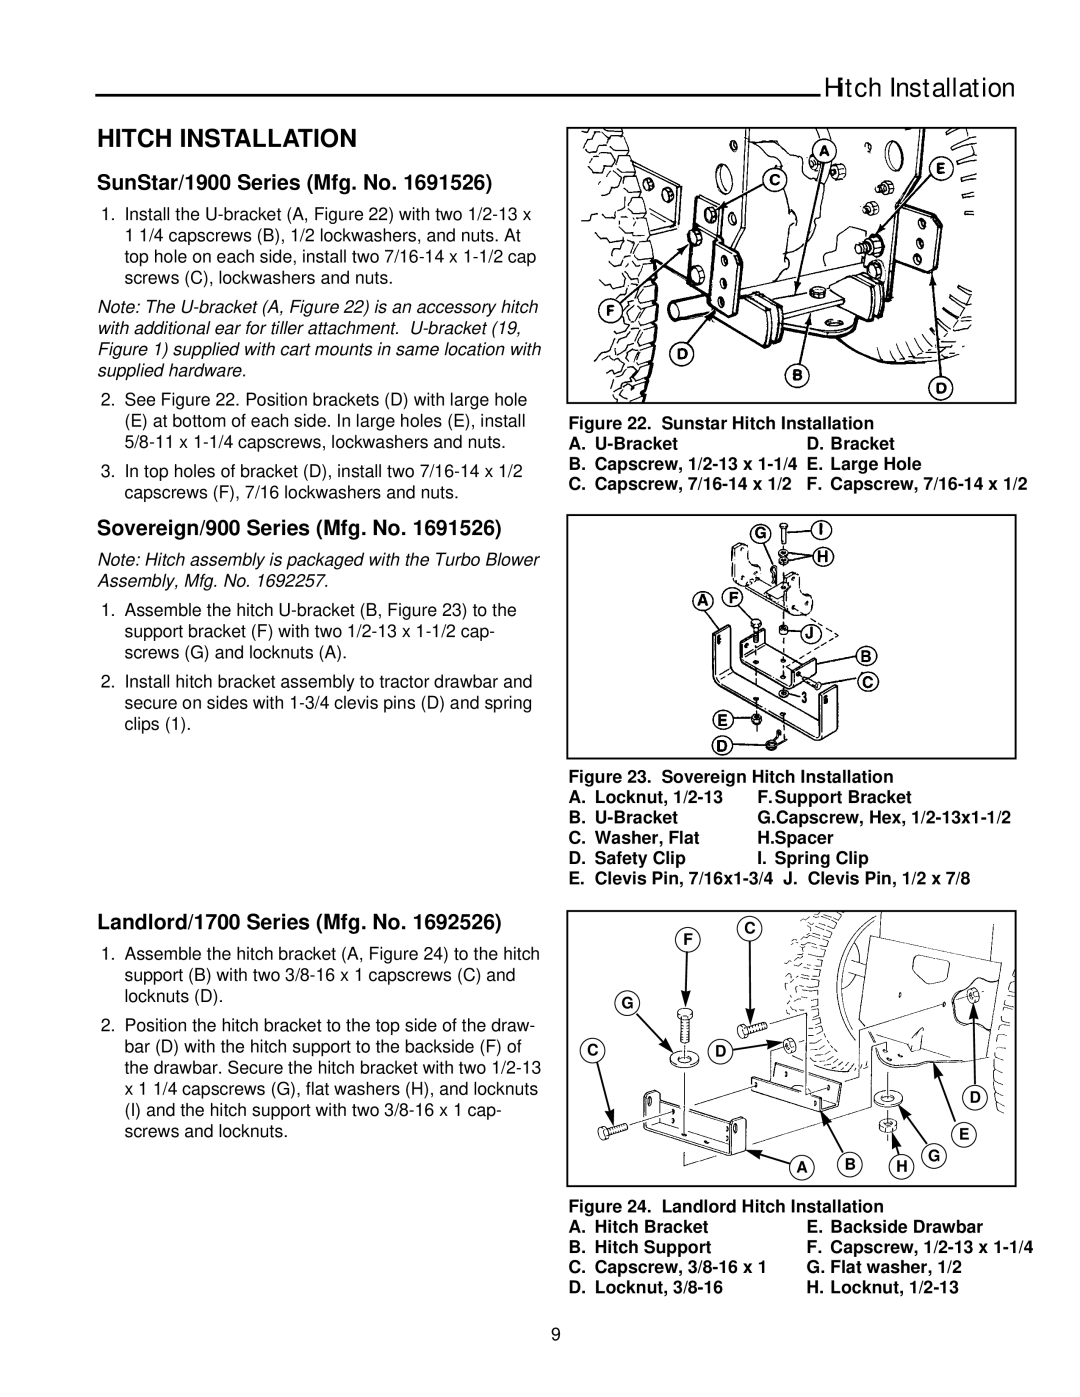
2.See Figure 22. Position brackets (D) with large hole
(E) at bottom of each side. In large holes (E), install
3.In top holes of bracket (D), install two
Hitch Installation
Figure 22. Sunstar Hitch Installation
A. | D. Bracket |
B.Capscrew, 1/2-13 x 1-1/4 E. Large Hole
C.Capscrew, 7/16-14 x 1/2 F. Capscrew, 7/16-14 x 1/2
Sovereign/900 Series (Mfg. No. 1691526)
Note: Hitch assembly is packaged with the Turbo Blower
Assembly, Mfg. No. 1692257.
1.Assemble the hitch
2.Install hitch bracket assembly to tractor drawbar and secure on sides with
Figure 23. Sovereign Hitch Installation
A. Locknut, | F. Support Bracket |
B. | G.Capscrew, Hex, |
C. Washer, Flat | H.Spacer |
D. Safety Clip | I. Spring Clip |
E. Clevis Pin, 7/16x1-3/4 J. Clevis Pin, 1/2 x 7/8
Landlord/1700 Series (Mfg. No. 1692526)
1.Assemble the hitch bracket (A, Figure 24) to the hitch support (B) with two
2.Position the hitch bracket to the top side of the draw- bar (D) with the hitch support to the backside (F) of the drawbar. Secure the hitch bracket with two
(I) and the hitch support with two
F | C |
|
|
|
|
|
|
| |
G |
|
|
|
|
C | D |
|
|
|
|
|
|
| D |
|
|
|
| E |
|
| A | B | G |
|
| H | ||
Figure 24. Landlord Hitch Installation |
| |||
A. Hitch Bracket |
| E. Backside Drawbar | ||
B. Hitch Support |
| F. Capscrew, | ||
C. Capscrew, | G. Flat washer, 1/2 | |||
D. Locknut, | H. Locknut, | |||
9