Troubleshooting, Adjustment & Service
CUTTING HEIGHT ADJUSTMENT
![]()
![]() WARNING
WARNING
Before checking mower, shut off PTO and engine. Allow all moving parts to stop. Remove ignition key, then disconnect the spark plug wire and fasten it away from the spark plug.
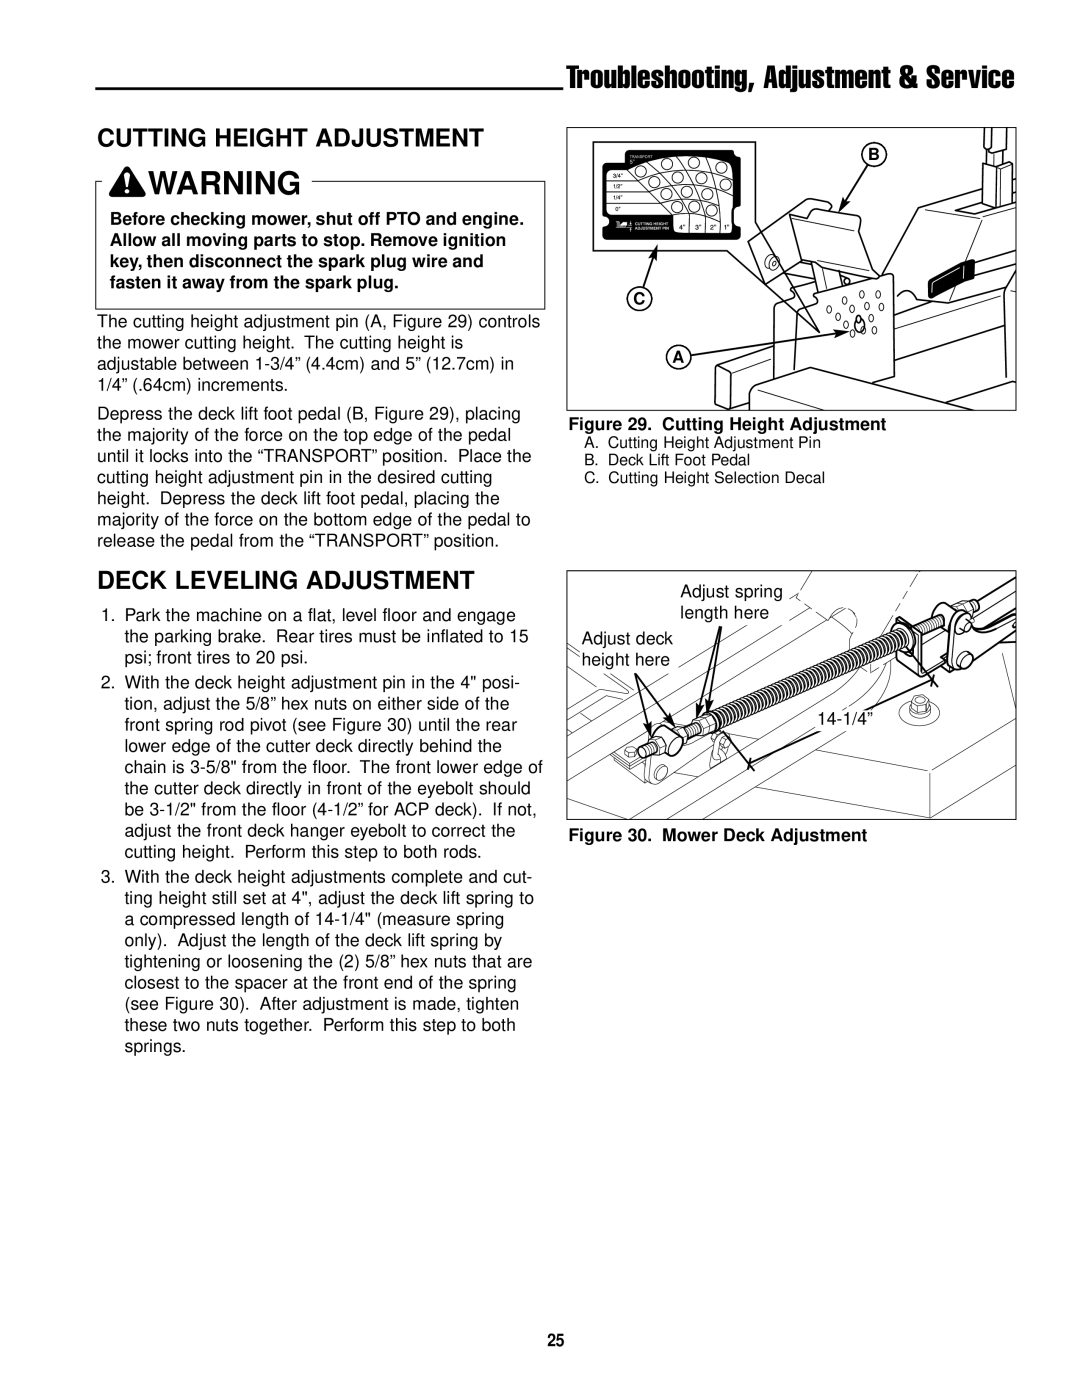
The cutting height adjustment pin (A, Figure 29) controls the mower cutting height. The cutting height is adjustable between
Depress the deck lift foot pedal (B, Figure 29), placing the majority of the force on the top edge of the pedal until it locks into the “TRANSPORT” position. Place the cutting height adjustment pin in the desired cutting height. Depress the deck lift foot pedal, placing the majority of the force on the bottom edge of the pedal to release the pedal from the “TRANSPORT” position.
B |
C |
A |
Figure 29. Cutting Height Adjustment
A.Cutting Height Adjustment Pin
B.Deck Lift Foot Pedal
C.Cutting Height Selection Decal
DECK LEVELING ADJUSTMENT | Adjust spring | |
| ||
1. Park the machine on a flat, level floor and engage | length here | |
the parking brake. Rear tires must be inflated to 15 | Adjust deck | |
psi; front tires to 20 psi. | height here | |
2. With the deck height adjustment pin in the 4" posi- |
| |
tion, adjust the 5/8” hex nuts on either side of the | ||
front spring rod pivot (see Figure 30) until the rear | ||
| ||
lower edge of the cutter deck directly behind the |
| |
chain is |
| |
the cutter deck directly in front of the eyebolt should |
| |
be |
| |
adjust the front deck hanger eyebolt to correct the | Figure 30. Mower Deck Adjustment | |
cutting height. Perform this step to both rods. |
|
3.With the deck height adjustments complete and cut- ting height still set at 4", adjust the deck lift spring to a compressed length of
25