 Class 99 & 99K
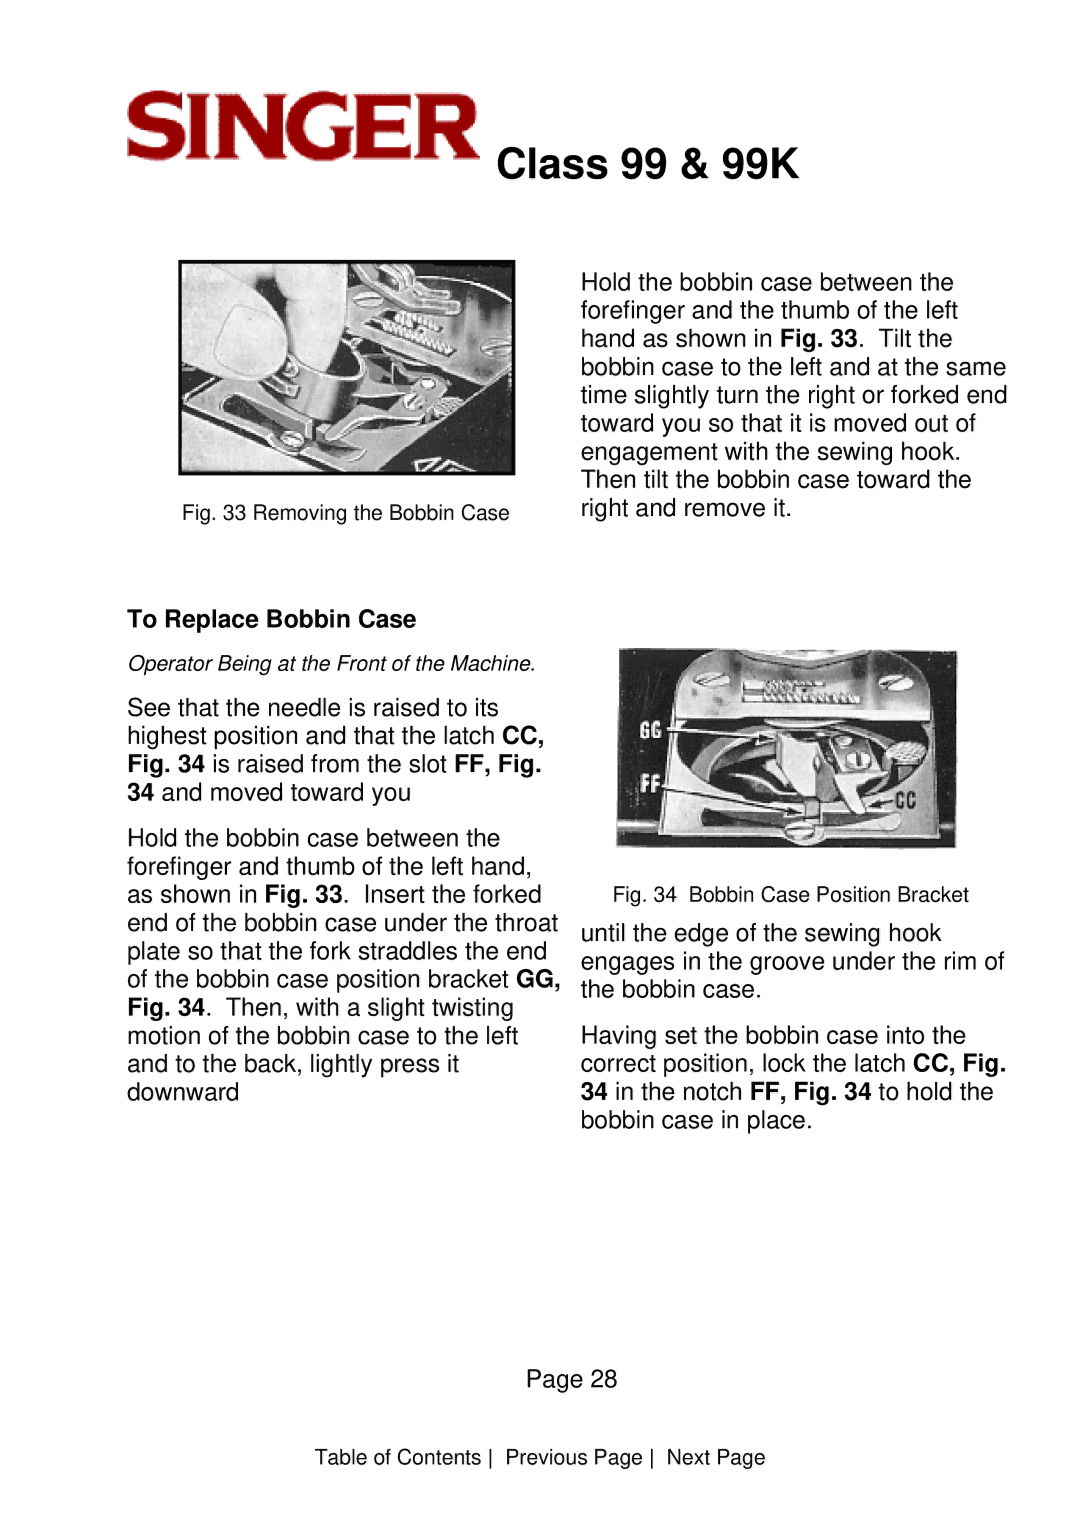
Fig. 33 Removing the Bobbin Case
To Replace Bobbin Case
Operator Being at the Front of the Machine.
See that the needle is raised to its highest position and that the latch CC, Fig. 34 is raised from the slot FF, Fig. 34 and moved toward you
Hold the bobbin case between the forefinger and thumb of the left hand, as shown in Fig. 33. Insert the forked end of the bobbin case under the throat plate so that the fork straddles the end of the bobbin case position bracket GG, Fig. 34. Then, with a slight twisting motion of the bobbin case to the left and to the back, lightly press it downward
Hold the bobbin case between the forefinger and the thumb of the left hand as shown in Fig. 33. Tilt the bobbin case to the left and at the same time slightly turn the right or forked end toward you so that it is moved out of engagement with the sewing hook. Then tilt the bobbin case toward the right and remove it.
Fig. 34 Bobbin Case Position Bracket
until the edge of the sewing hook engages in the groove under the rim of the bobbin case.
Having set the bobbin case into the correct position, lock the latch CC, Fig. 34 in the notch FF, Fig. 34 to hold the bobbin case in place.
Page 28
Table of Contents Previous Page Next Page
