 Class 99 & 99K
To Adjust the Needle Thread Tension
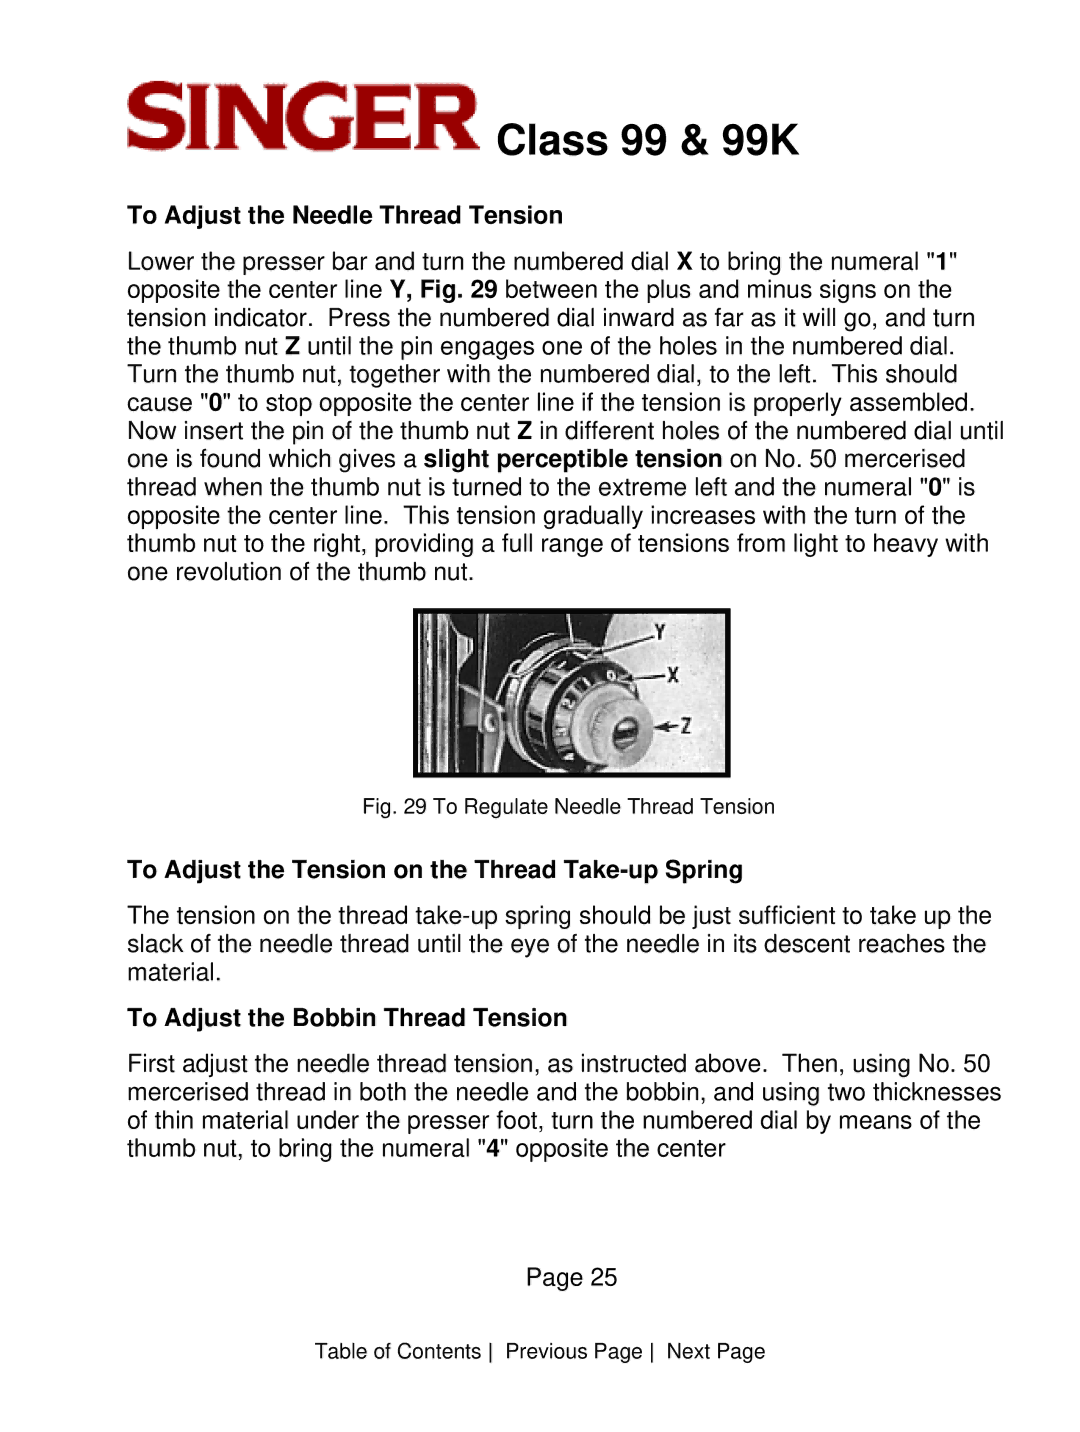
Lower the presser bar and turn the numbered dial X to bring the numeral "1" opposite the center line Y, Fig. 29 between the plus and minus signs on the tension indicator. Press the numbered dial inward as far as it will go, and turn the thumb nut Z until the pin engages one of the holes in the numbered dial. Turn the thumb nut, together with the numbered dial, to the left. This should cause "0" to stop opposite the center line if the tension is properly assembled. Now insert the pin of the thumb nut Z in different holes of the numbered dial until one is found which gives a slight perceptible tension on No. 50 mercerised thread when the thumb nut is turned to the extreme left and the numeral "0" is opposite the center line. This tension gradually increases with the turn of the thumb nut to the right, providing a full range of tensions from light to heavy with one revolution of the thumb nut.
Fig. 29 To Regulate Needle Thread Tension
To Adjust the Tension on the Thread Take-up Spring
The tension on the thread
To Adjust the Bobbin Thread Tension
First adjust the needle thread tension, as instructed above. Then, using No. 50 mercerised thread in both the needle and the bobbin, and using two thicknesses of thin material under the presser foot, turn the numbered dial by means of the thumb nut, to bring the numeral "4" opposite the center
Page 25
Table of Contents Previous Page Next Page
