POCKET/PLUNGE CUTS
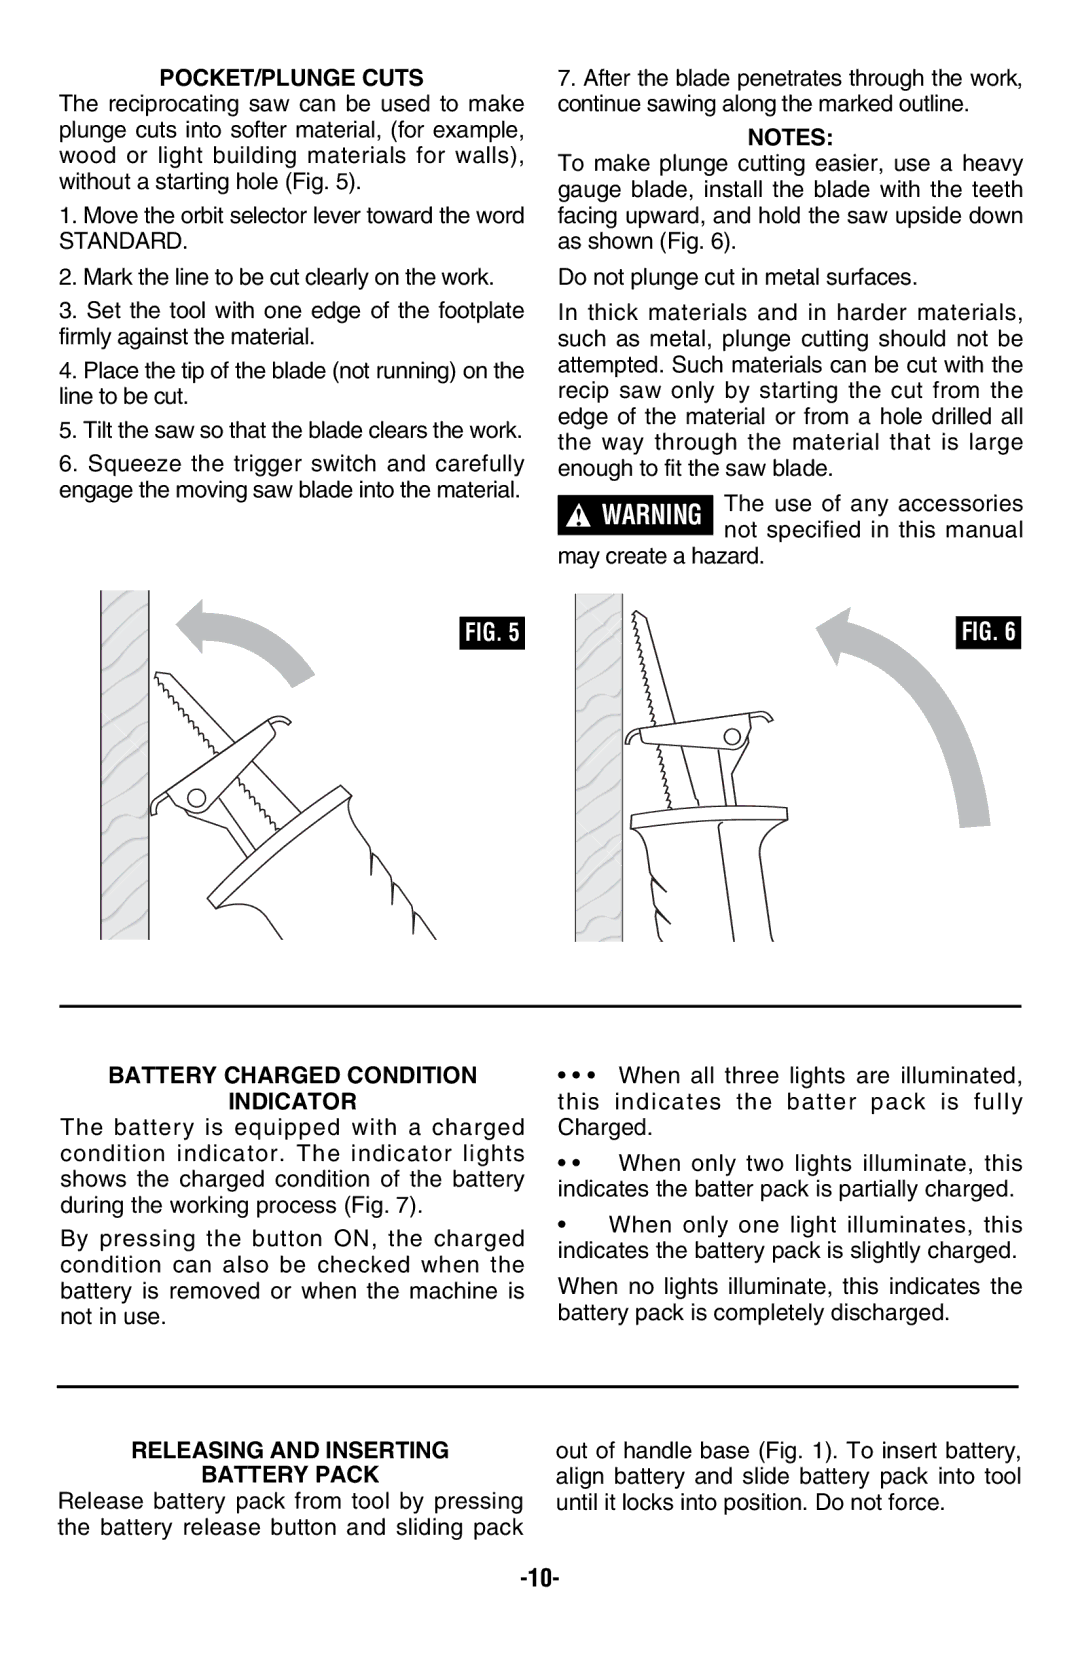
The reciprocating saw can be used to make plunge cuts into softer material, (for example, wood or light building materials for walls), without a starting hole (Fig. 5).
1.Move the orbit selector lever toward the word
STANDARD.
2.Mark the line to be cut clearly on the work.
3.Set the tool with one edge of the footplate firmly against the material.
4.Place the tip of the blade (not running) on the line to be cut.
5.Tilt the saw so that the blade clears the work.
6.Squeeze the trigger switch and carefully engage the moving saw blade into the material.
7.After the blade penetrates through the work, continue sawing along the marked outline.
NOTES:
To make plunge cutting easier, use a heavy gauge blade, install the blade with the teeth facing upward, and hold the saw upside down as shown (Fig. 6).
Do not plunge cut in metal surfaces.
In thick materials and in harder materials, such as metal, plunge cutting should not be attempted. Such materials can be cut with the recip saw only by starting the cut from the edge of the material or from a hole drilled all the way through the material that is large enough to fit the saw blade.
!WARNING The use of any accessories not specified in this manual
may create a hazard.
FIG. 5
FIG. 6
BATTERY CHARGED CONDITION
INDICATOR
The battery is equipped with a charged condition indicator. The indicator lights shows the charged condition of the battery during the working process (Fig. 7).
By pressing the button ON, the charged condition can also be checked when the battery is removed or when the machine is not in use.
•• • When all three lights are illuminated, this indicates the batter pack is fully Charged.
•• When only two lights illuminate, this indicates the batter pack is partially charged.
•When only one light illuminates, this indicates the battery pack is slightly charged.
When no lights illuminate, this indicates the battery pack is completely discharged.
RELEASING AND INSERTING
BATTERY PACK
Release battery pack from tool by pressing the battery release button and sliding pack
out of handle base (Fig. 1). To insert battery, align battery and slide battery pack into tool until it locks into position. Do not force.
