2007 NLMC Manual:Layout 1 1/17/07 11:43 AM Page 2
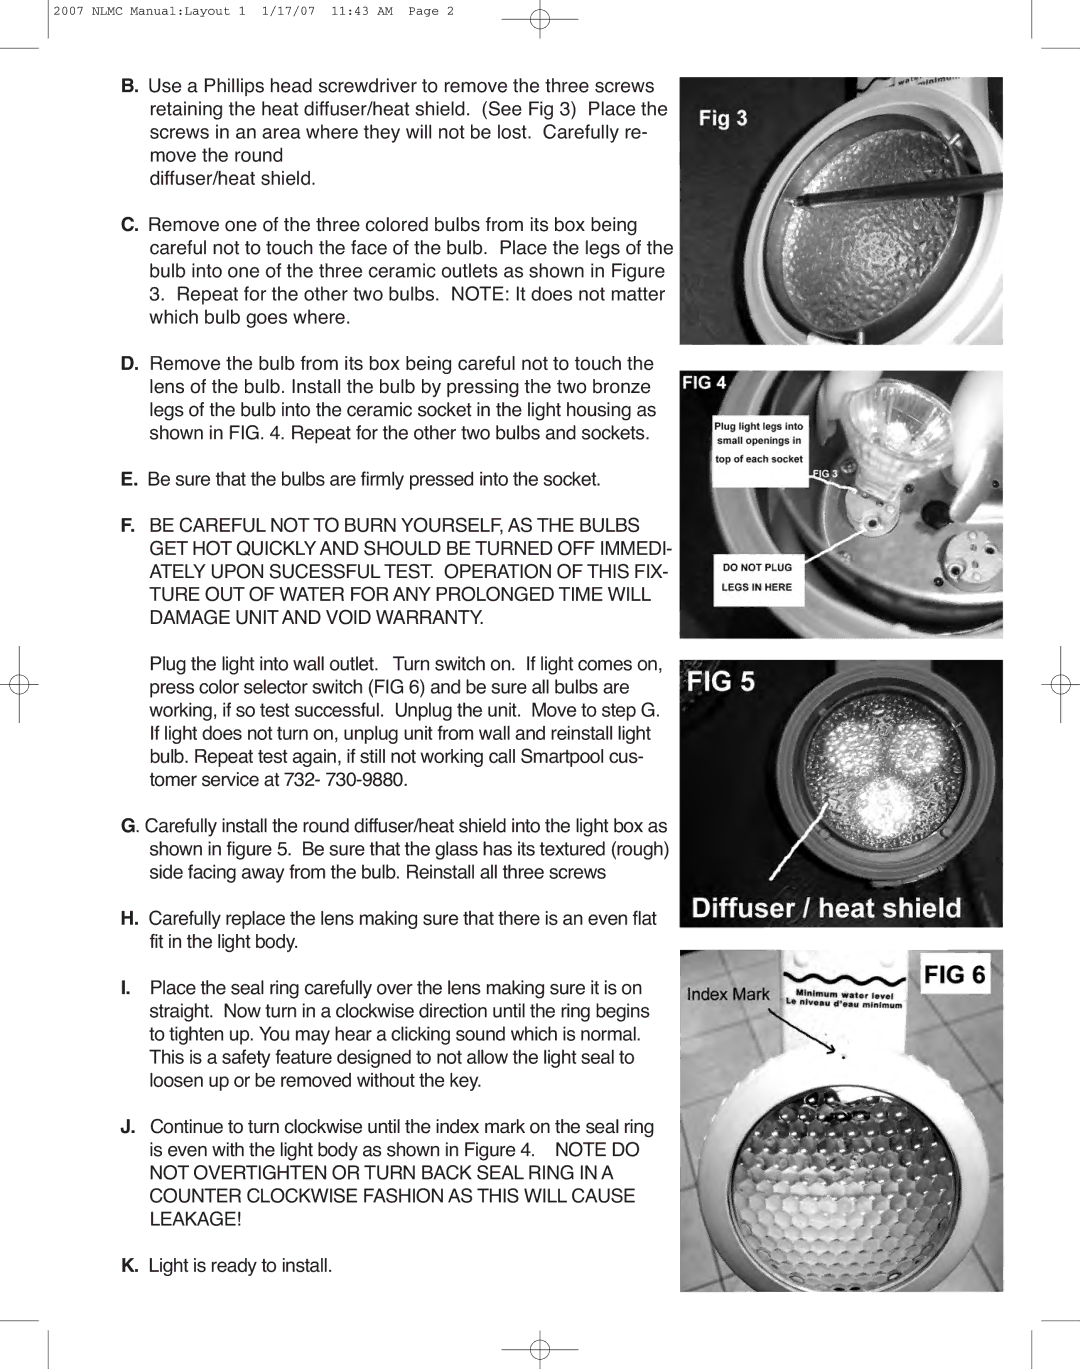
Use a Phillips head screwdriver to remove the three screws B. retaining the heat diffuser/heat shield. (See Fig 3) Place the screws in an area where they will not be lost. Carefully re-
move the round diffuser/heat shield.
Remove one of the three colored bulbs from its box being C. careful not to touch the face of the bulb. Place the legs of the
bulb into one of the three ceramic outlets as shown in Figure 3. Repeat for the other two bulbs. NOTE: It does not matter which bulb goes where.
Remove the bulb from its box being careful not to touch the D. lens of the bulb. Install the bulb by pressing the two bronze legs of the bulb into the ceramic socket in the light housing as shown in FIG. 4. Repeat for the other two bulbs and sockets.
E. Be sure that the bulbsare firmly pressedinto the socket.
BE CAREFUL NOT TO BURN YOURSELF,AS THE BULBS F. GET HOT QUICKLYAND SHOULD BE TURNEDOFF IMMEDI-
ATELYUPON SUCESSFUL TEST. OPERATIONOF THIS FIX- TURE OUT OF WATER FORANY PROLONGEDTIME WILL DAMAGE UNITAND VOID WARRANTY.
Plug the light into wall outlet. Turn switchon. If lightcomeson, press color selectorswitch (FIG 6) and be sure all bulbsare working, if so test successful. Unplugthe unit. Move to step G. If lightdoes not turn on, unplug unit from wall and reinstalllight bulb. Repeattest again,if still not workingcall Smartpoolcus- tomerservice at 732-
. Carefullyinstall the rounddiffuser/heatshieldinto the lightbox as G shown in figure 5. Be sure that the glasshas its textured(rough)
side facing away from the bulb. Reinstall all three screws Carefuly replace the lens making sure that thereis an even flat
H. fit in the light body.
Placethe seal ring carefuly over the lens makingsure it is on I. straight. Now turn in a clockwise directionuntilthe ring begins to tighten up. Youmay hear a clicking soundwhichis normal.
This is a safetyfeature designedto not allowthe lightseal to loosenup or be removed withoutthe key.
Continue to turn clockwise until the indexmark on the seal ring J. is even with the light body as shownin Figure4. NOTE DO
NOT OVERTIGHTEN OR TURN BACK SEALRING IN A COUNTER CLOCKWISE FASHION AS THIS WILLCAUSE LEAKAGE!