Windows NT
Step 1: NT is not a
Step 2: Go to the [Adapters] tab and click the [Add] button.
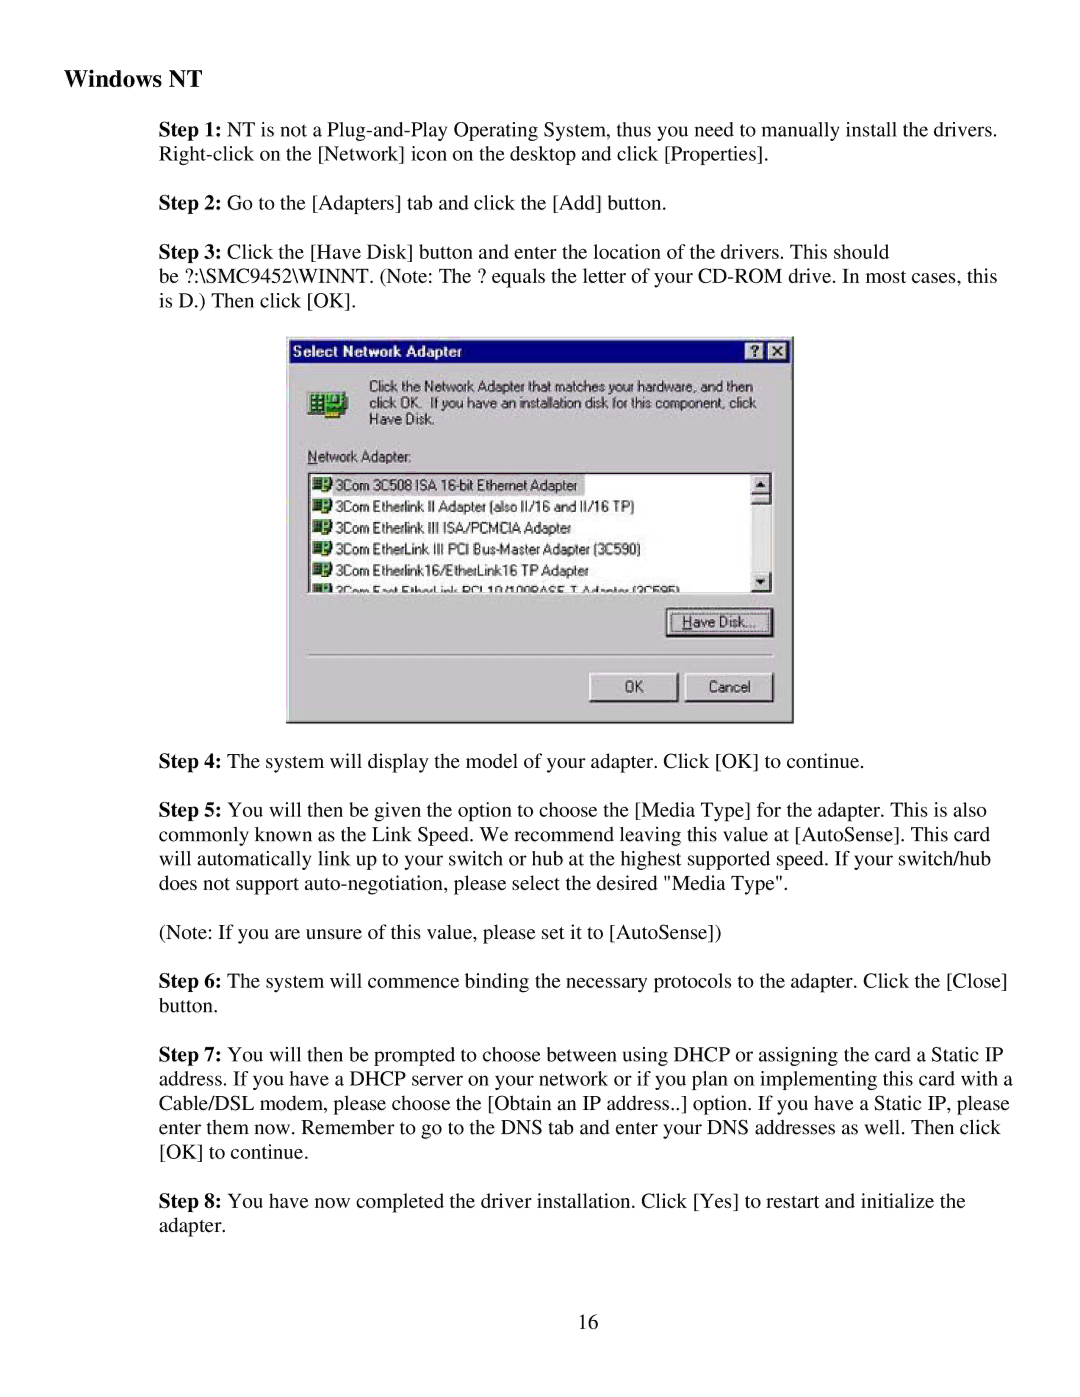
Step 3: Click the [Have Disk] button and enter the location of the drivers. This should
be ?:\SMC9452\WINNT. (Note: The ? equals the letter of your
Step 4: The system will display the model of your adapter. Click [OK] to continue.
Step 5: You will then be given the option to choose the [Media Type] for the adapter. This is also commonly known as the Link Speed. We recommend leaving this value at [AutoSense]. This card will automatically link up to your switch or hub at the highest supported speed. If your switch/hub does not support
(Note: If you are unsure of this value, please set it to [AutoSense])
Step 6: The system will commence binding the necessary protocols to the adapter. Click the [Close] button.
Step 7: You will then be prompted to choose between using DHCP or assigning the card a Static IP address. If you have a DHCP server on your network or if you plan on implementing this card with a Cable/DSL modem, please choose the [Obtain an IP address..] option. If you have a Static IP, please enter them now. Remember to go to the DNS tab and enter your DNS addresses as well. Then click [OK] to continue.
Step 8: You have now completed the driver installation. Click [Yes] to restart and initialize the adapter.
16