Contents
Contents
7. Using the hob
8. Cleaning and maintenance
1. Instructions for safe and proper use 2. Positioning of hob
Instructions for safe and proper use
1. Instructions for safe and proper use
THE MANUFACTURER DECLINES ALL RESPONSIBILITY FOR IMPROPER USE
NEVER UNPLUG BY PULLING ON THE CABLE
Instructions for the installer
2. Positioning of hob
2.1 Attachment to support structure
Instructions for the installer
Carefully position the insulation gasket supplied on the external perimeter of the hole made in the top surface see figures below and try to make it stick to the entire surface by applying light pressure with your hands. Refer to the distances shown in the figure for the model to be installed, keeping in mind that for both models the long front side has to skim the hole. Secure the hob to the counter with brackets A supplied. Carefully trim any excess from border B of the gasket. The distances in the following drawing refer to the hole on the inner side of the gasket
3. Electrical connection
Instructions for the installer
4. Gas connection
Instructions for the installer
4.1 Connection to LPG
4.2 Ventilation of rooms
4.3 Discharge of combustion products
Instructions for the installer
5. Adapting to different types of gas
5.1 Removing the hob
Instructions for the installer
5.2 Regulation for LPG
5.3 Regulation for natural gas
Instructions for the installer
5.4 Regulation of primary air
5.5 Reassembling the hob
5.6 Regulation of minimum for natural gas
Instructions for the installer
5.7 Regulation of minimum for LPG
5.8 Arrangement of burners on hob
5.9 Lubrication of gas taps
BURNERS
ARRANGEMENT OF BURNERS - Description of symbols
Instructions for the user
6. Description of controls
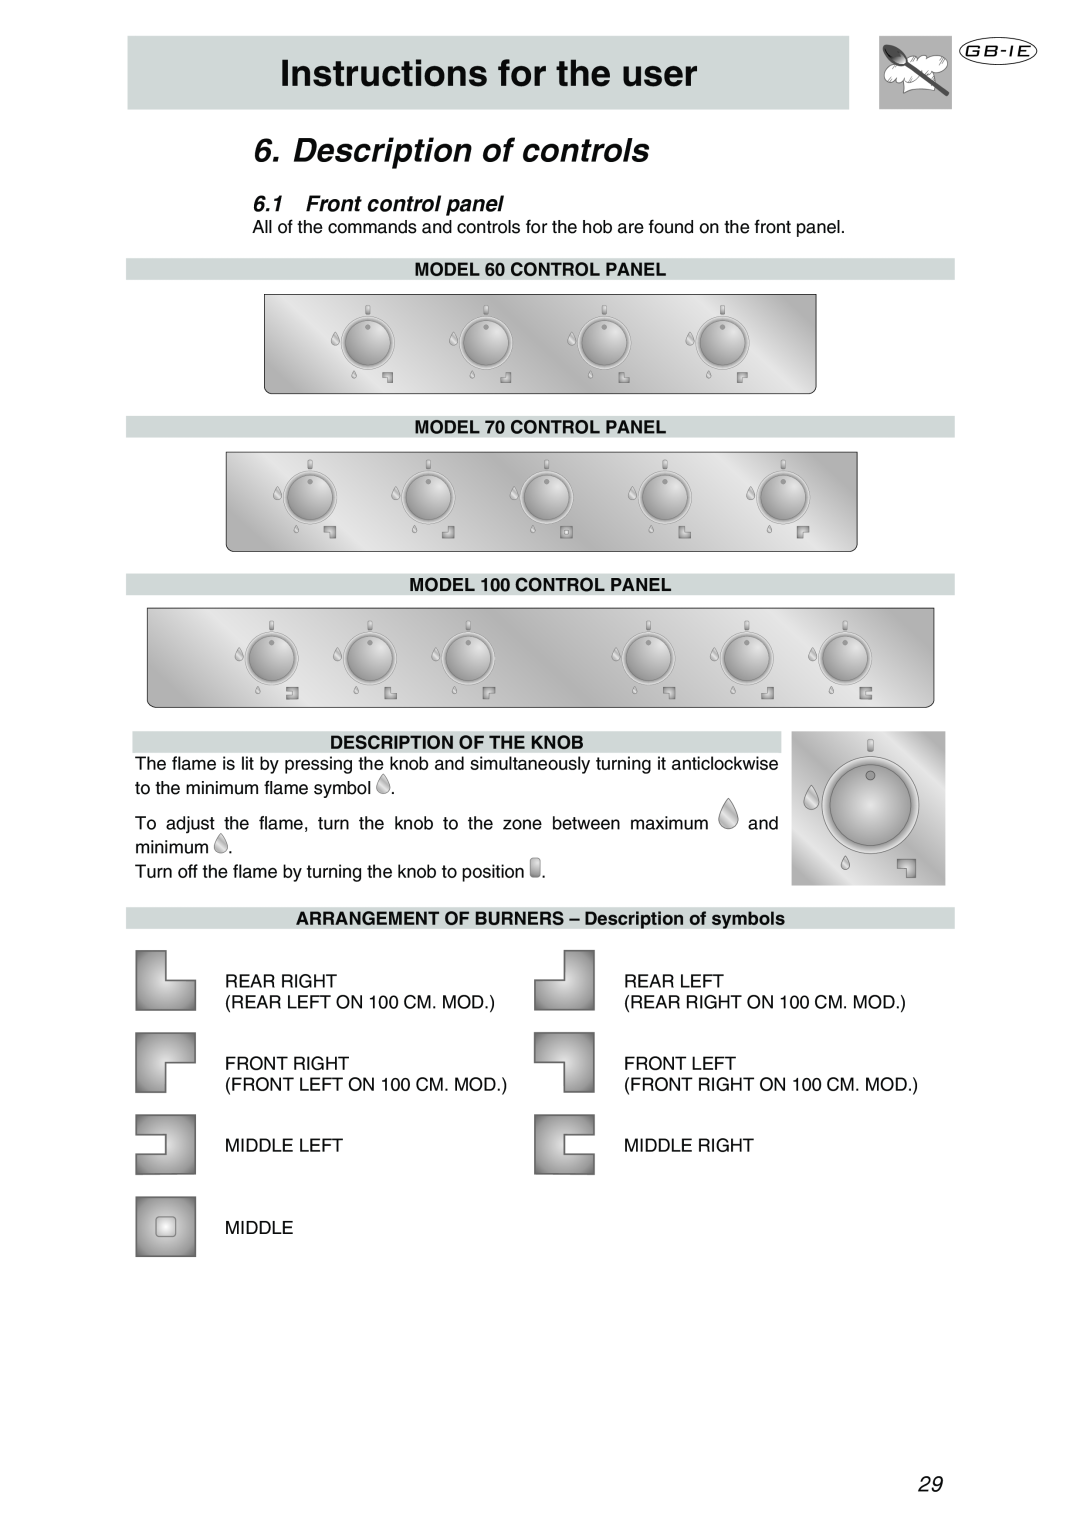
6.1 Front control panel
7. Using the hob
7.1 Burner lighting with safety device
7.2 Practical advice for using the burners
7.3 Diameter of containers
8. Cleaning and maintenance
8.1 Cleaning stainless steel
8.2 Cleaning of components
Never use a steam jet to clean the appliance