Instructions for the installer
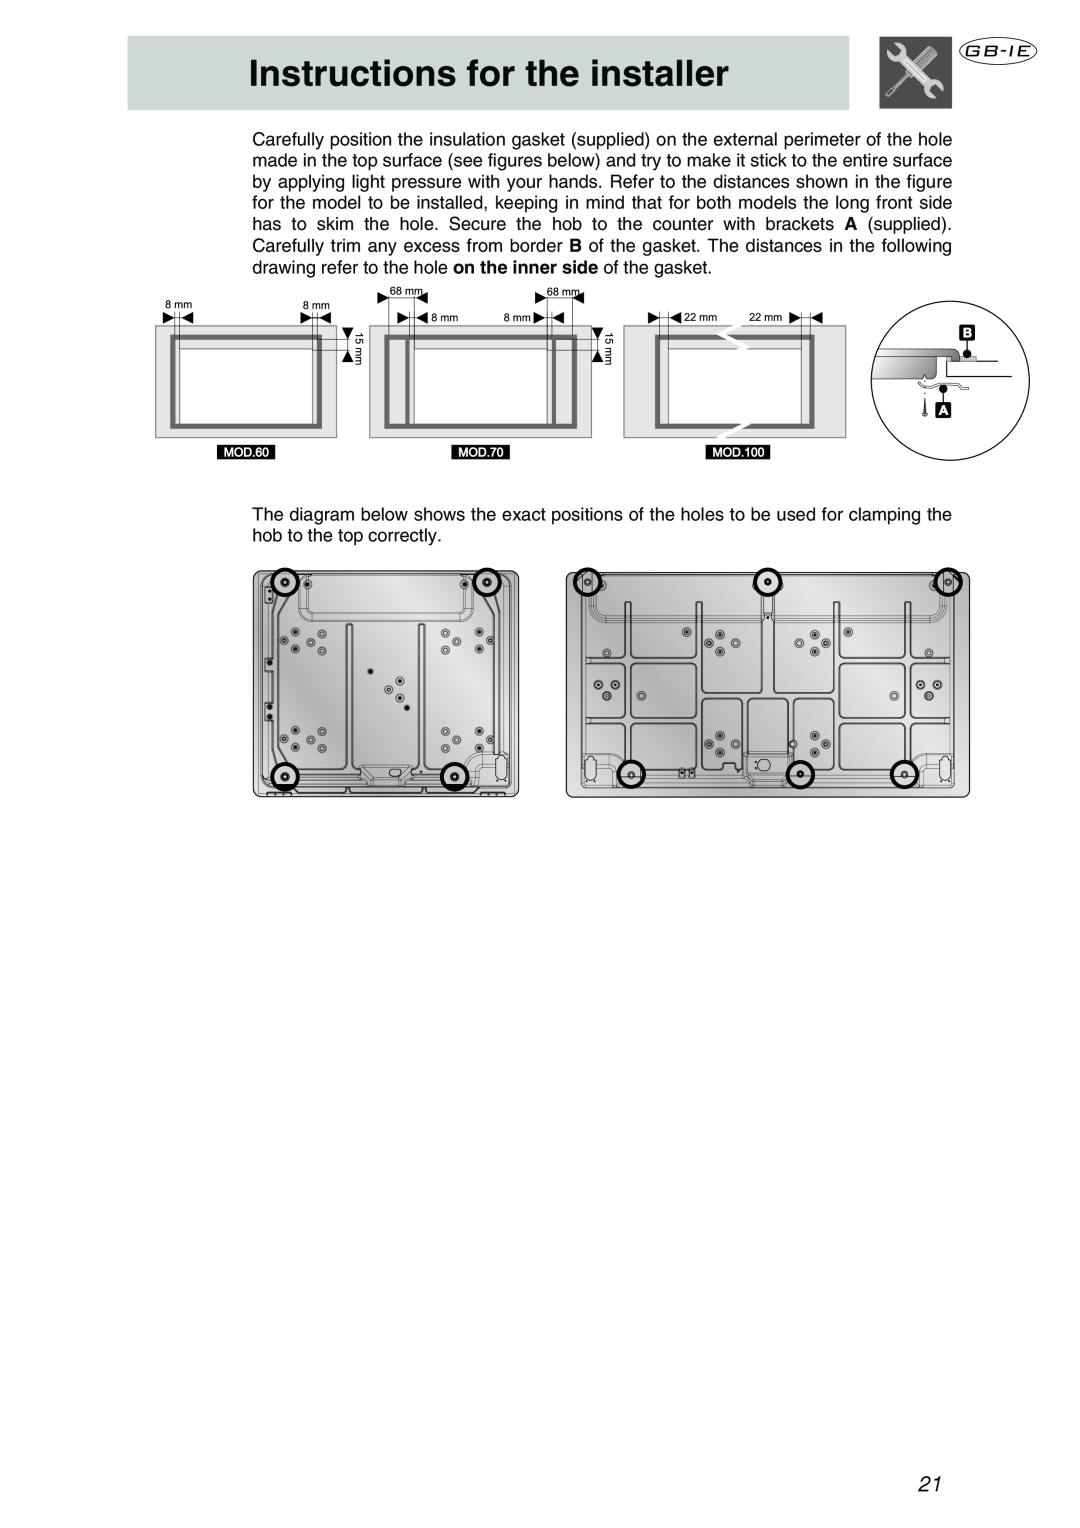
Carefully position the insulation gasket (supplied) on the external perimeter of the hole made in the top surface (see figures below) and try to make it stick to the entire surface by applying light pressure with your hands. Refer to the distances shown in the figure for the model to be installed, keeping in mind that for both models the long front side has to skim the hole. Secure the hob to the counter with brackets A (supplied). Carefully trim any excess from border B of the gasket. The distances in the following drawing refer to the hole on the inner side of the gasket.
The diagram below shows the exact positions of the holes to be used for clamping the hob to the top correctly.
21