
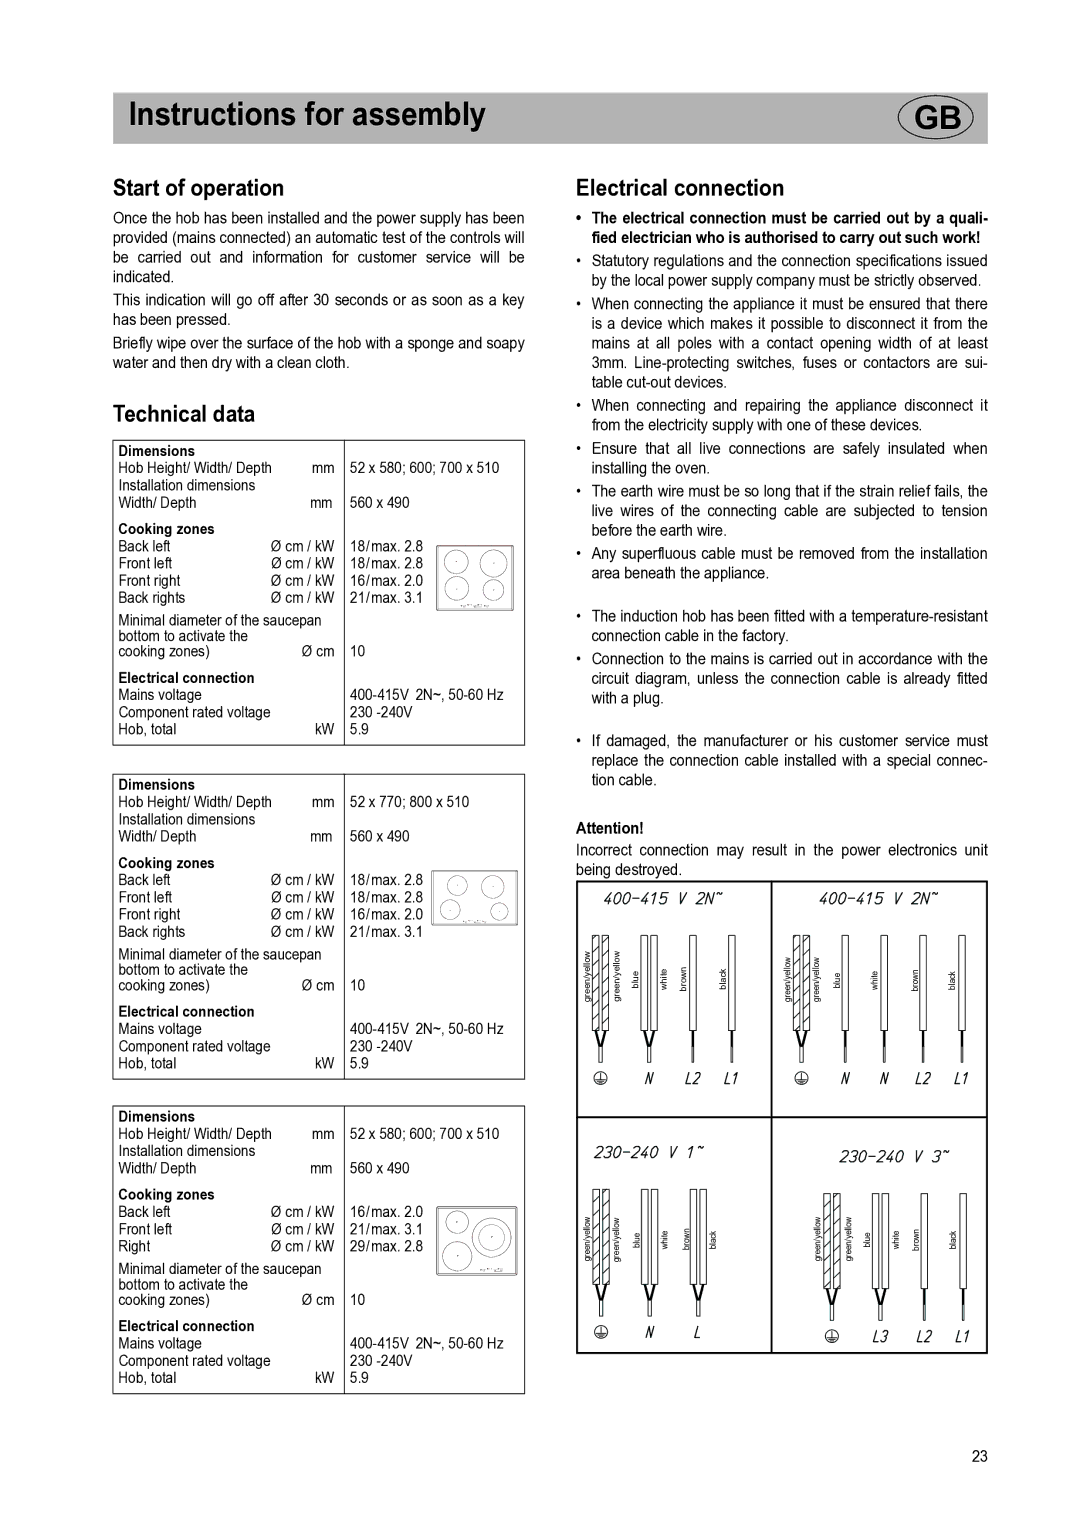
SE2732ID specifications
The Smeg SE2732ID is an innovative and stylish integrated dishwasher designed to meet the demands of modern households. Combining functionality with aesthetics, it offers a perfect blend of practicality and design that Smeg is renowned for.One of the standout features of the SE2732ID is its energy efficiency. It boasts an impressive energy rating, contributing to lower utility bills while being environmentally friendly. This model incorporates advanced technologies that optimize water and energy consumption, ensuring that you can run your dishwasher without excessive resource use.
The SE2732ID is equipped with multiple wash programs, allowing users to select the best option based on the type of load. This includes Eco, Intensive, and Quick cycles, catering to everything from heavily soiled pots and pans to delicate glassware. Its flexibility ensures that it can handle a variety of dish types efficiently.
In addition to customizable washing cycles, this dishwasher also features innovative technology such as Smeg's patented Multi-Flow System, which ensures an even distribution of water throughout the dishwasher. This results in consistent cleaning results across all dishes, regardless of their placement in the machine.
Another important characteristic of the SE2732ID is its spacious interior. With multiple racks and compartments, the dishwasher is designed to accommodate a wide array of kitchenware. It includes adjustable and removable cutlery baskets, making it easier to load larger items or unique shapes without sacrificing cleaning quality.
The Smeg SE2732ID also emphasizes quiet operation. With a low decibel rating, it delivers impressive cleaning power while remaining unobtrusive in your kitchen environment. This is particularly beneficial for open-plan living spaces, where noise can be a concern.
Smeg’s characteristic design touch is evident in the SE2732ID, featuring a sleek integrated facade that blends seamlessly with cabinetry. This makes it an ideal choice for those looking to maintain a streamlined kitchen aesthetic. The controls are user-friendly, allowing for intuitive operation even for those who may be less tech-savvy.
Safety features like child locks and anti-flood systems further enhance its appeal, providing peace of mind for busy families.
In summary, the Smeg SE2732ID is an exceptional integrated dishwasher that combines energy efficiency, versatility, spaciousness, quiet operation, and stylish design, making it a worthy addition to any kitchen.