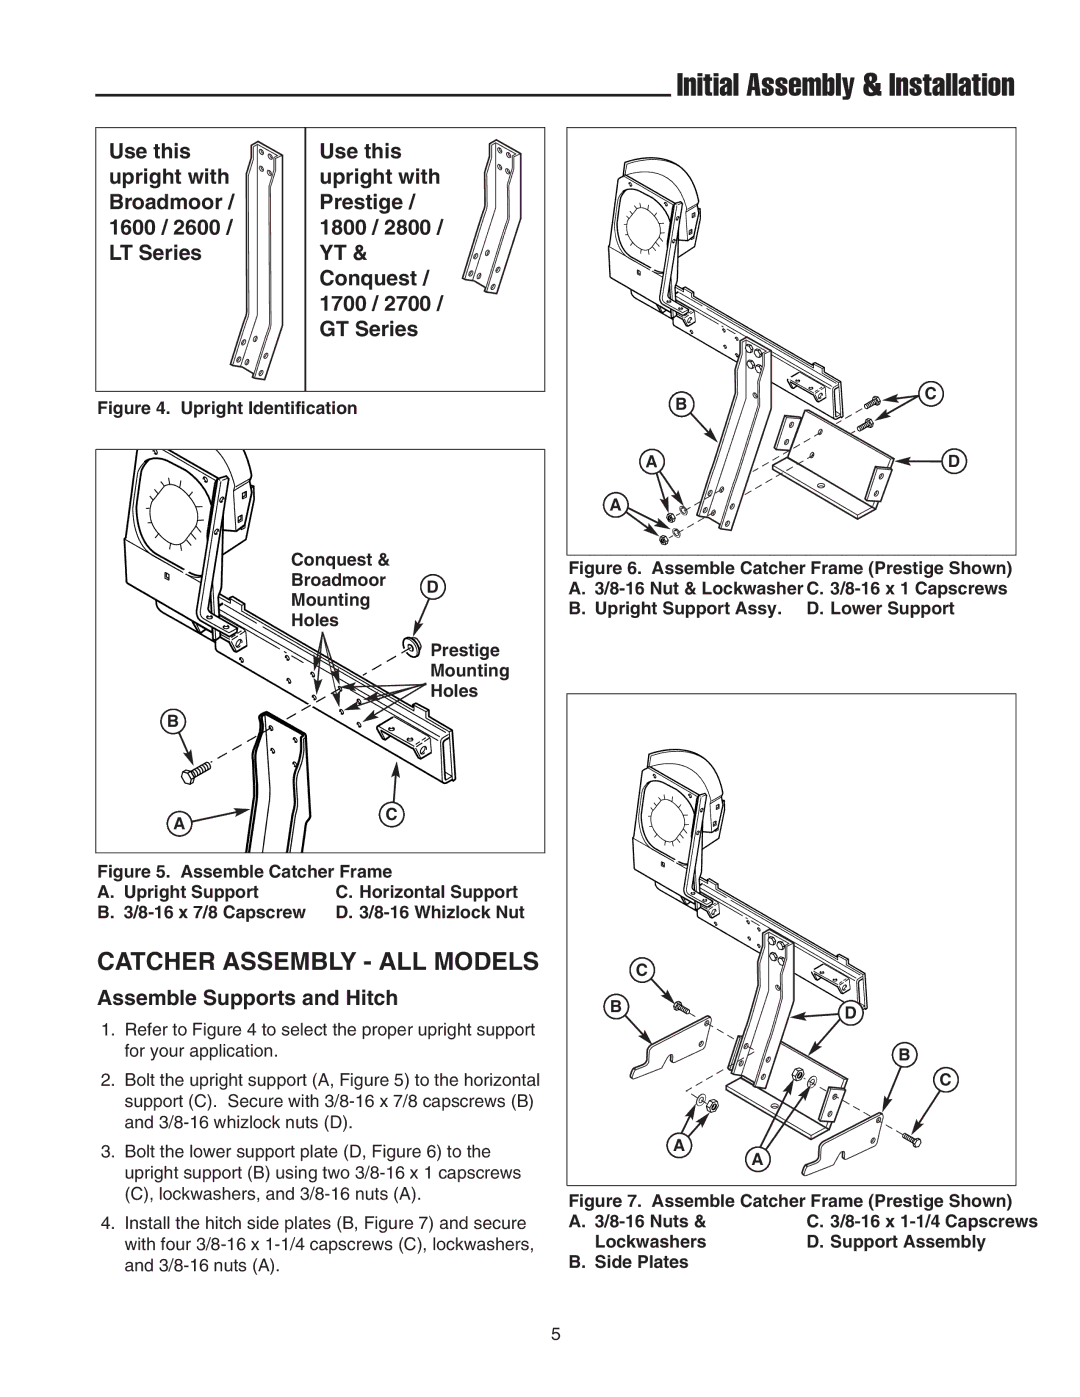
Use this upright with Broadmoor / 1600 / 2600 / LT Series
Use this upright with Prestige / 1800 / 2800 / YT & Conquest / 1700 / 2700 / GT Series
Initial Assembly & Installation
C |
Figure 4. Upright Identification
Conquest &
Broadmoor D
Mounting
Holes
 Prestige
Mounting
![]()
![]() Holes
Holes
B
A | C |
| |
Figure 5. Assemble Catcher Frame | |
A. Upright Support | C. Horizontal Support |
B. | D. |
CATCHER ASSEMBLY - ALL MODELS
Assemble Supports and Hitch
1.Refer to Figure 4 to select the proper upright support for your application.
2.Bolt the upright support (A, Figure 5) to the horizontal support (C). Secure with
3.Bolt the lower support plate (D, Figure 6) to the upright support (B) using two
4.Install the hitch side plates (B, Figure 7) and secure with four
| B |
A | D |
A |
|
Figure 6. Assemble Catcher Frame (Prestige Shown)
A.3/8-16 Nut & Lockwasher C. 3/8-16 x 1 Capscrews
B.Upright Support Assy. D. Lower Support
C
B ![]()
![]()
![]() D
D![]()
B
C
A
A
Figure 7. Assemble Catcher Frame (Prestige Shown)
A. | C. |
Lockwashers | D. Support Assembly |
B. Side Plates |
|
5