Initial Assembly & Installation
A |
B |
C |
D |
E |
G |
F |
H |
I |
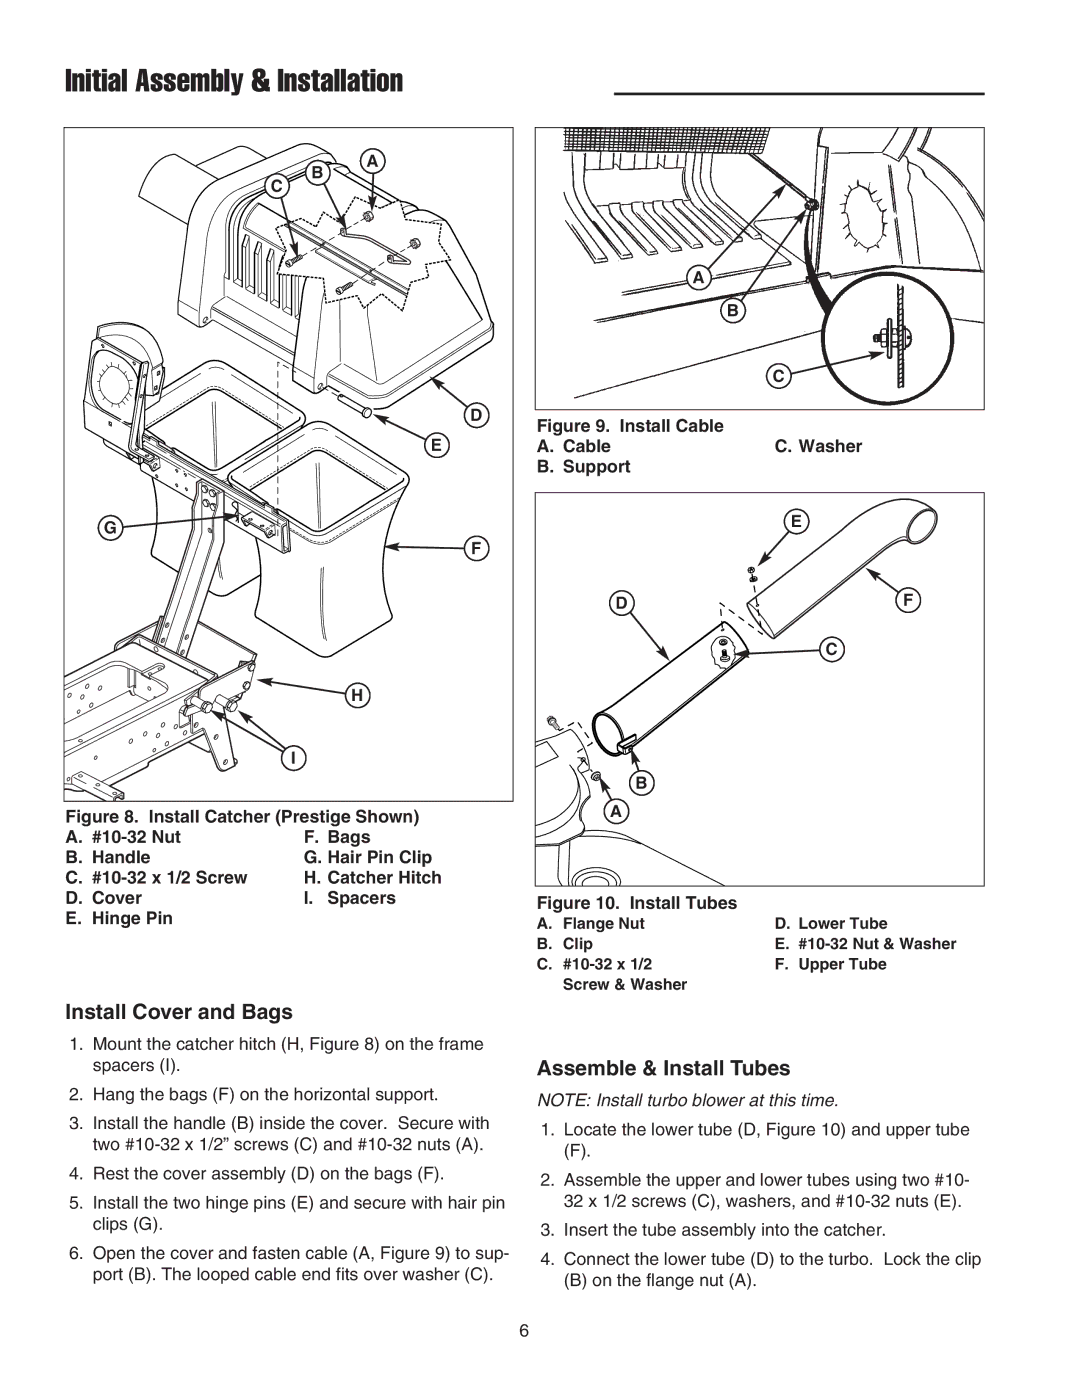
Figure 8. Install Catcher (Prestige Shown)
A. | F. Bags |
B. Handle | G. Hair Pin Clip |
C. | H. Catcher Hitch |
D. Cover | I. Spacers |
E. Hinge Pin |
|
Install Cover and Bags
1.Mount the catcher hitch (H, Figure 8) on the frame spacers (I).
2.Hang the bags (F) on the horizontal support.
3.Install the handle (B) inside the cover. Secure with two
4.Rest the cover assembly (D) on the bags (F).
5.Install the two hinge pins (E) and secure with hair pin clips (G).
6.Open the cover and fasten cable (A, Figure 9) to sup- port (B). The looped cable end fits over washer (C).
A
B
C
Figure 9. Install Cable
A. CableC. Washer
B. Support
| E |
D | F |
| C |
| B |
A |
|
Figure 10. Install Tubes
A. Flange Nut | D. Lower Tube |
B. Clip | E. |
C. | F. Upper Tube |
Screw & Washer |
|
Assemble & Install Tubes
NOTE: Install turbo blower at this time.
1.Locate the lower tube (D, Figure 10) and upper tube
2.Assemble the upper and lower tubes using two #10- 32 x 1/2 screws (C), washers, and
3.Insert the tube assembly into the catcher.
4.Connect the lower tube (D) to the turbo. Lock the clip
(B)on the flange nut (A).
6