Troubleshooting, Adjustment, & Service
Battery Charging
![]() WARNING
WARNING
Keep open flames and sparks away from the battery; the gasses coming from it are highly explosive. Ventilate the battery well during charging.
A dead battery or one too weak to start the engine may be the result of a defect in the charging system or other electrical component. If there is any doubt about the cause of the problem, see your dealer. If you need to replace the battery, follow the steps under Cleaning the Battery & Cables in the Regular Maintenance Section.
To charge the battery, follow the instructions provided by the battery charger manufacturer as well as all warnings included in the safety rules sections of this book. Charge the battery until fully charged (until the specific gravity of the electrolyte is 1.250 or higher and the electrolyte tem- perature is at least 60° F). Do not charge at a rate high- er than 10 amps.
Seat Adjustment
Pitch Adjustment
C |
A |
B |
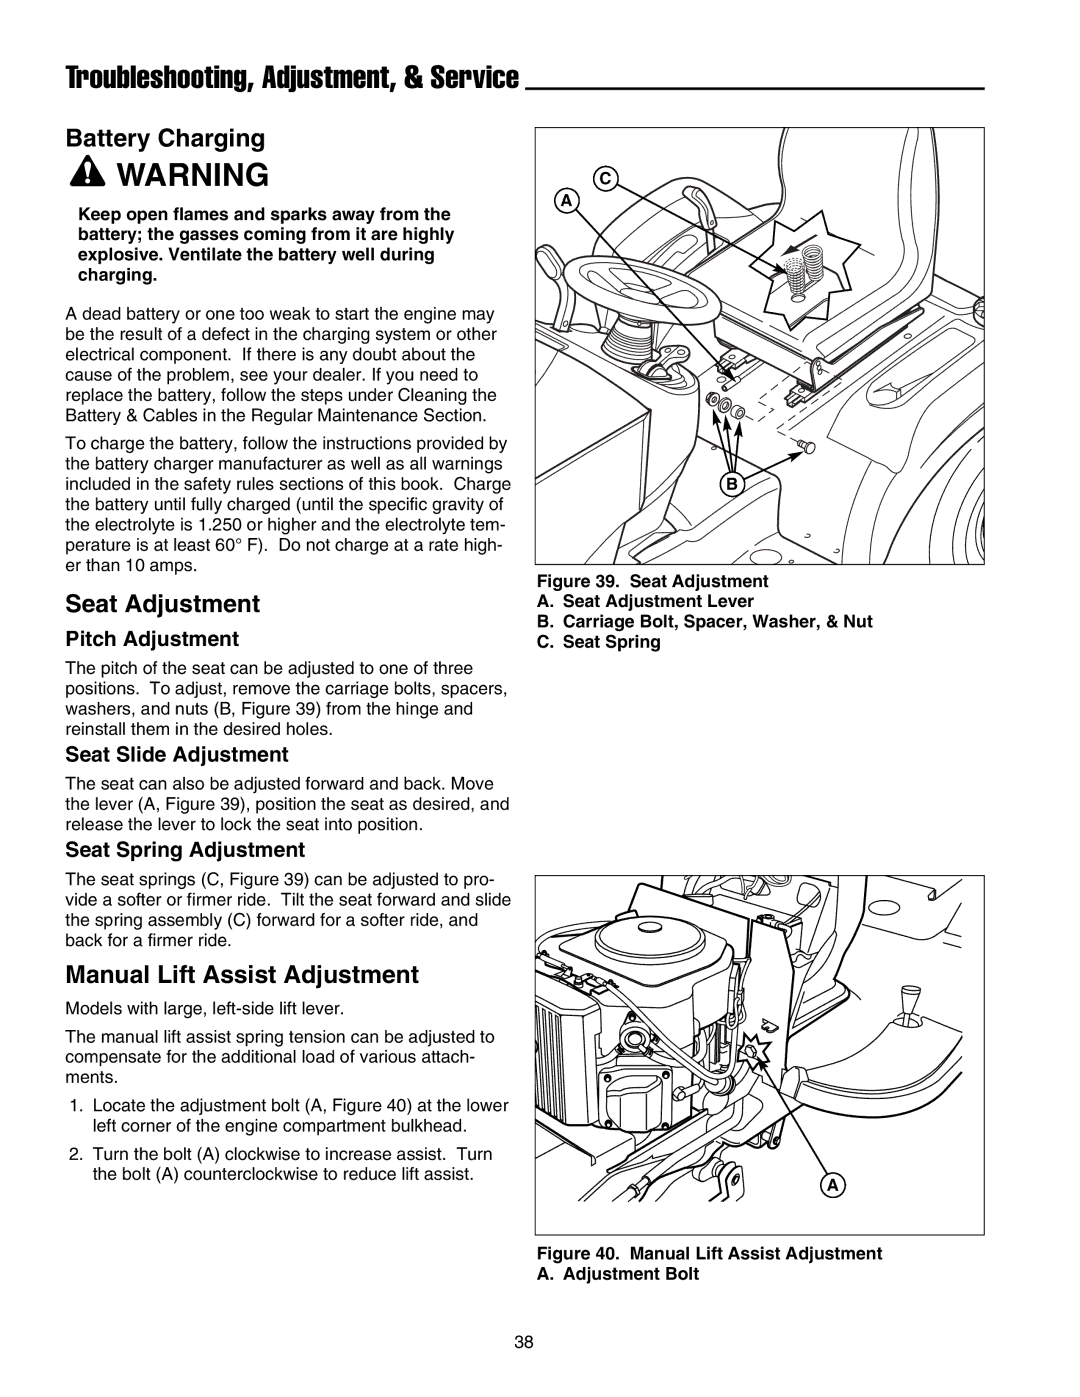
Figure 39. Seat Adjustment
A.Seat Adjustment Lever
B.Carriage Bolt, Spacer, Washer, & Nut
C.Seat Spring
The pitch of the seat can be adjusted to one of three positions. To adjust, remove the carriage bolts, spacers, washers, and nuts (B, Figure 39) from the hinge and reinstall them in the desired holes.
Seat Slide Adjustment
The seat can also be adjusted forward and back. Move the lever (A, Figure 39), position the seat as desired, and release the lever to lock the seat into position.
Seat Spring Adjustment
The seat springs (C, Figure 39) can be adjusted to pro- vide a softer or firmer ride. Tilt the seat forward and slide the spring assembly (C) forward for a softer ride, and back for a firmer ride.
Manual Lift Assist Adjustment
Models with large,
The manual lift assist spring tension can be adjusted to compensate for the additional load of various attach- ments.
1.Locate the adjustment bolt (A, Figure 40) at the lower left corner of the engine compartment bulkhead.
2.Turn the bolt (A) clockwise to increase assist. Turn the bolt (A) counterclockwise to reduce lift assist.
A |
Figure 40. Manual Lift Assist Adjustment A. Adjustment Bolt
38