Section 2 - OPERATING INSTRUCTIONS
2.1PRE-START CHECK LIST
Make the following checks and perform the service required before each
2.1.1.Check tires and add or release air as needed to bring pressure to 12 PSI in front and 12 PSI in rear tires.
2.1.2.Check guards, deflectors and covers to make sure all are in place and securely tightened.
2.1.3.Check engine oil and add oil as needed to bring level up to the FULL mark. Refer to engine owner’s manual for oil specifications. See Figure 2.1.
SAFE LEVEL
AREA
FIGURE 2.1
2.1.4.Adjust seat as needed to most comfortable position. Refer to Section “OPERATOR’S SEAT ADJUSTMENT”.
2.1.5.Check blade control to insure it works freely. If blade pedals are depressed, blade lever can be moved manually from “ON” to “OFF” to stop blade.
2.1.6.Check Reverse Lockout Mechanism. With blade pedals depressed, shift lever must not go into reverse.
2.1.7.Clean exterior surfaces of cutting deck and engine of any accumulation of dirt, grass, oil, etc. Keep engine air intake screen and cooling fins clear at all times.
2.1.8.Add fuel to tank after pushing the Rear Engine Rider outside where fumes can dissipate. Make sure fuel filler cap is tight and vent is open after refueling. Refer to engine owner’s manual for fuel specifications. See Figure 2.2.
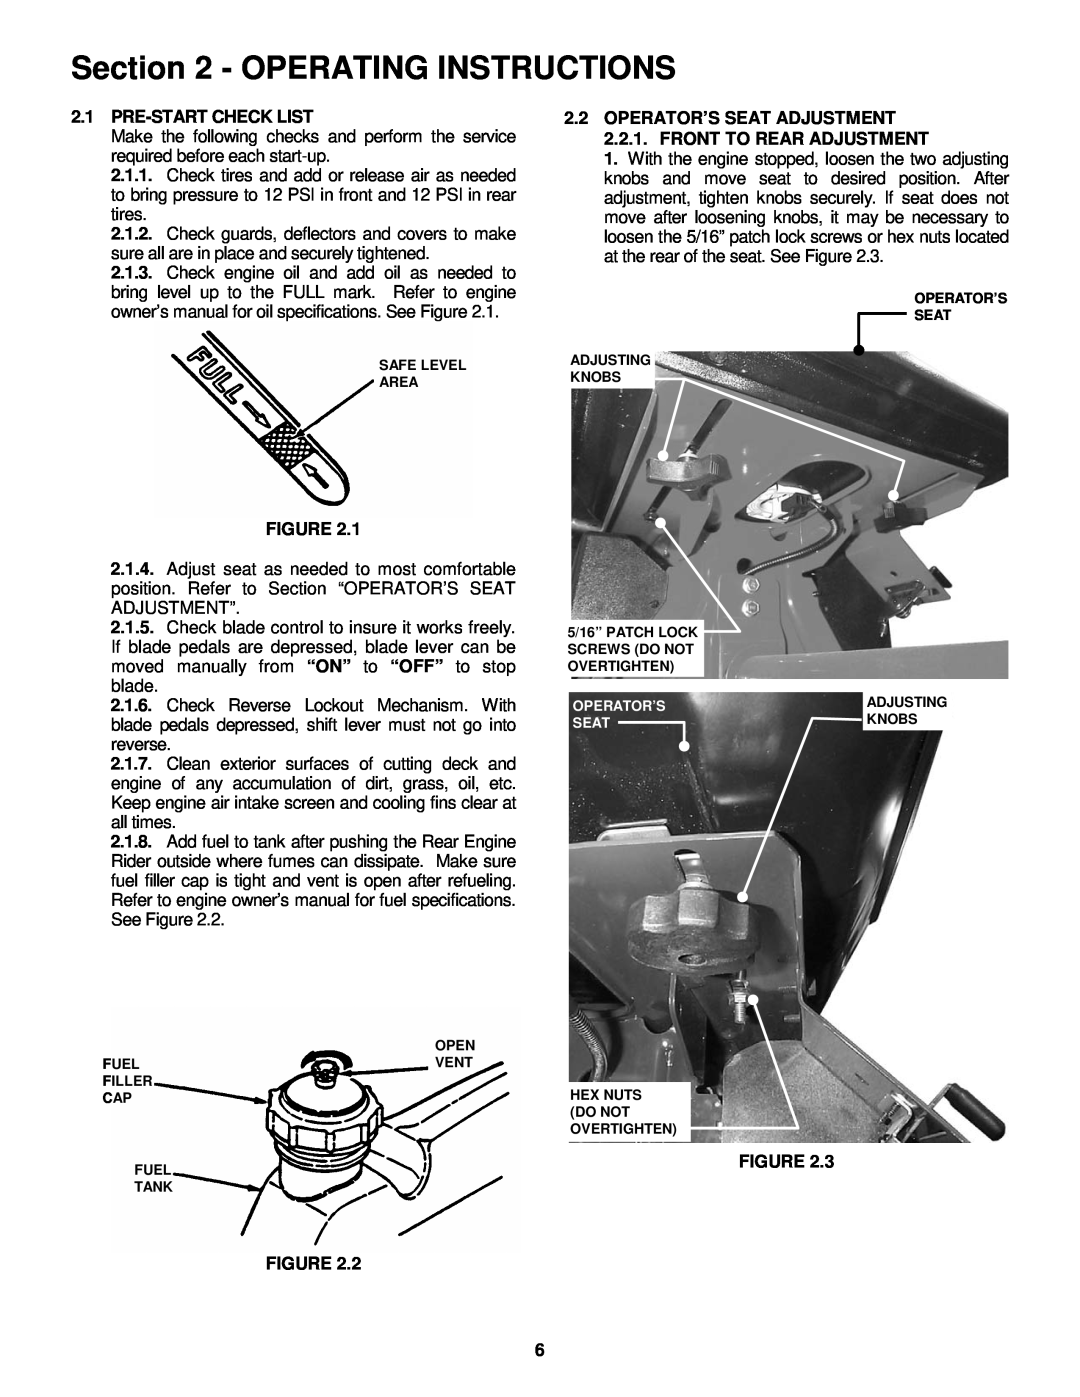
2.2 OPERATOR’S SEAT ADJUSTMENT 2.2.1. FRONT TO REAR ADJUSTMENT
1.With the engine stopped, loosen the two adjusting knobs and move seat to desired position. After adjustment, tighten knobs securely. If seat does not move after loosening knobs, it may be necessary to loosen the 5/16” patch lock screws or hex nuts located at the rear of the seat. See Figure 2.3.
OPERATOR’S
SEAT
ADJUSTING
KNOBS
5/16” PATCH LOCK SCREWS (DO NOT OVERTIGHTEN)
OPERATOR’S | ADJUSTING |
SEAT | KNOBS |
| OPEN | |
FUEL | VENT | |
FILLER |
|
|
| HEX NUTS | |
CAP |
| |
|
| (DO NOT |
|
| OVERTIGHTEN) |
|
|
|
FUEL | FIGURE 2.3 |
| |
TANK |
|
| FIGURE 2.2 |
6