| 250 Z & Javelin Series | |
Battery Activation & |
| |
Installation |
| |
WARNING |
| |
BATTERY SAFETY RULES | B | |
• Battery acid causes severe burns. Avoid contact | ||
| ||
with skin. |
| |
• Wear eye protection while handling the battery. |
| |
• To avoid an explosion, keep flames and sparks |
| |
away from battery, especially while charging. |
| |
• When installing battery cables, CONNECT THE |
| |
POSITIVE (+) CABLE FIRST and negative | C | |
last. If not done in this order, the positive |
| |
terminal can be shorted to the frame by a tool. |
| |
Charge Battery | A | |
| ||
1. Tip the seat forward to access the battery. |
| |
2. Remove the battery from the battery compartment, |
| |
and place the battery on a level, |
|
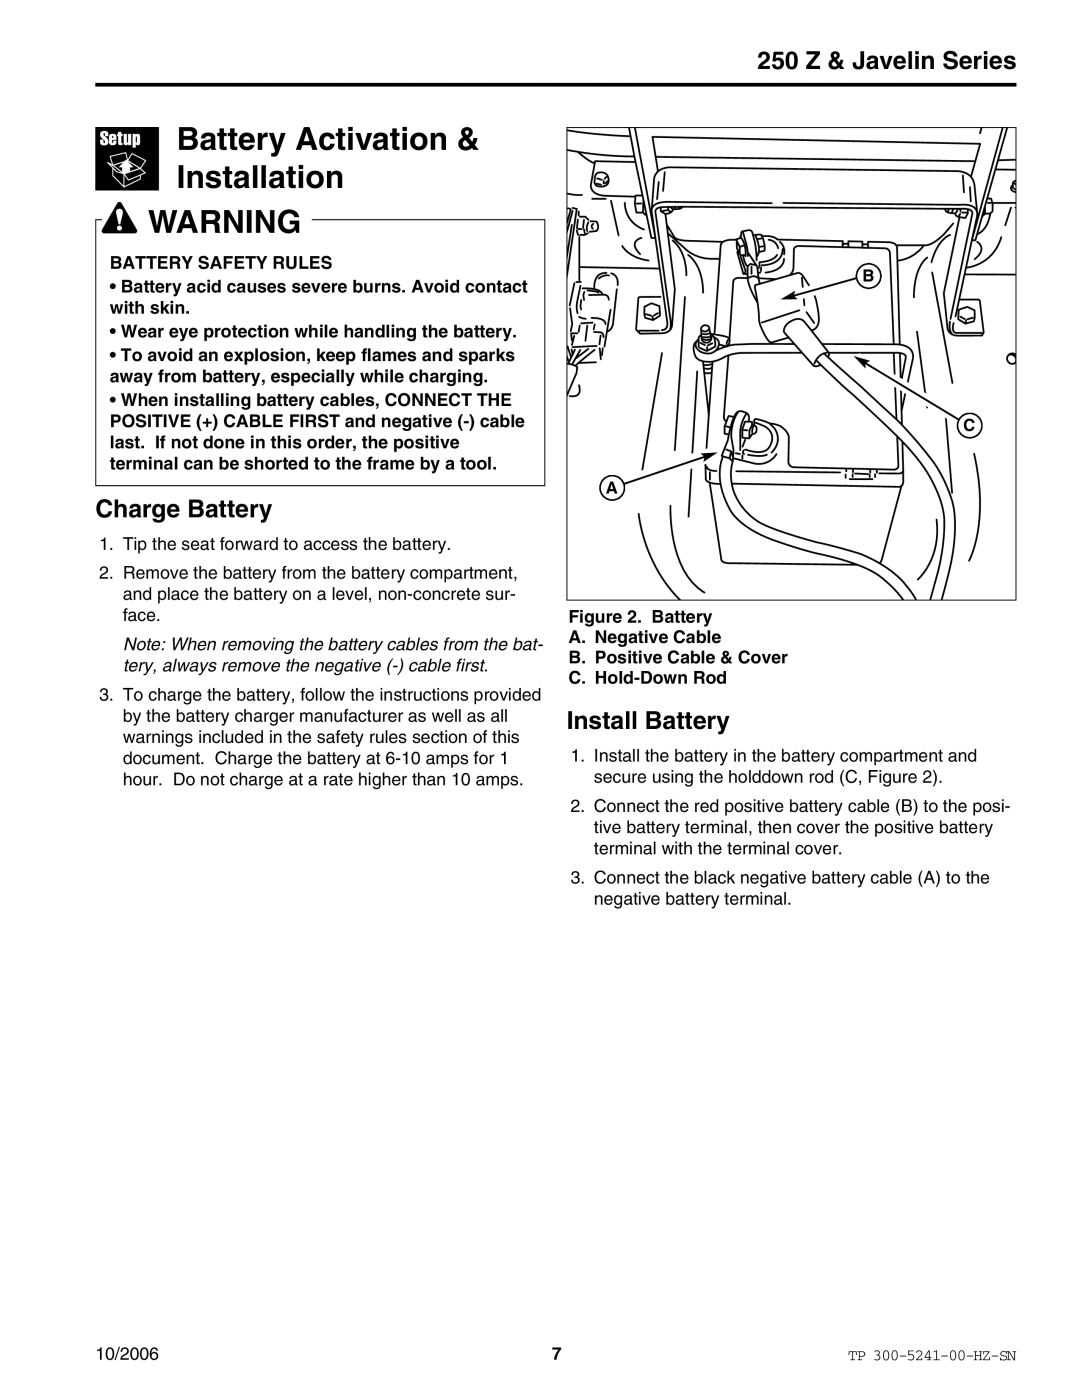
face. | Figure 2. Battery | |
Note: When removing the battery cables from the bat- | A. Negative Cable | |
B. Positive Cable & Cover | ||
tery, always remove the negative | ||
C. | ||
3. To charge the battery, follow the instructions provided | ||
| ||
by the battery charger manufacturer as well as all | Install Battery | |
warnings included in the safety rules section of this | 1. Install the battery in the battery compartment and | |
document. Charge the battery at | ||
hour. Do not charge at a rate higher than 10 amps. | secure using the holddown rod (C, Figure 2). | |
| 2. Connect the red positive battery cable (B) to the posi- | |
| tive battery terminal, then cover the positive battery | |
| terminal with the terminal cover. | |
| 3. Connect the black negative battery cable (A) to the | |
| negative battery terminal. |
10/2006 | 7 | TP |