Section 4 – ADJUSTMENT & REPAIR
WARNING
DO NOT attempt any adjustments, maintenance or service with the engine or blades running. STOP blades. STOP engine. Set brake. Remove key. Remove spark plug wire from spark plug and secure wire away from spark plug. Engine and components can be extremely hot. Avoid burns by allowing engine and components sufficient time to cool.
4.2.4.MOWER DECK ADJUSTMENT (LEVELNESS)
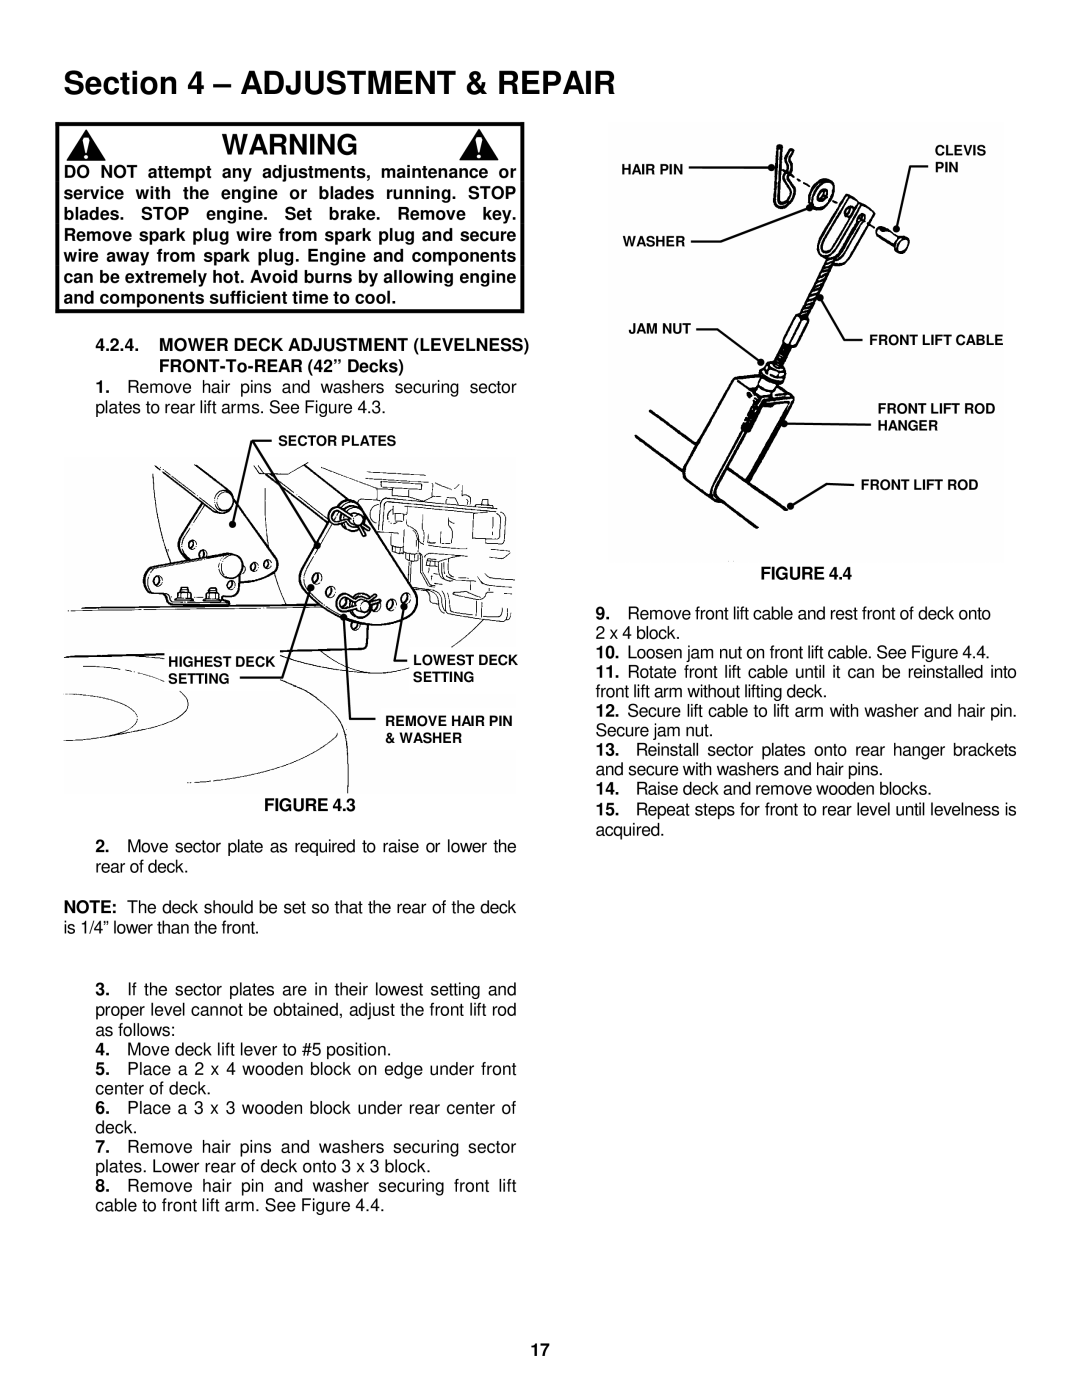
1.Remove hair pins and washers securing sector plates to rear lift arms. See Figure 4.3.
SECTOR PLATES
HIGHEST DECK |
| LOWEST DECK |
SETTING |
| SETTING |
|
|
|
|
|
|
REMOVE HAIR PIN & WASHER
FIGURE 4.3
2.Move sector plate as required to raise or lower the rear of deck.
NOTE: The deck should be set so that the rear of the deck is 1/4” lower than the front.
3.If the sector plates are in their lowest setting and proper level cannot be obtained, adjust the front lift rod as follows:
4.Move deck lift lever to #5 position.
5.Place a 2 x 4 wooden block on edge under front center of deck.
6.Place a 3 x 3 wooden block under rear center of deck.
7.Remove hair pins and washers securing sector plates. Lower rear of deck onto 3 x 3 block.
8.Remove hair pin and washer securing front lift cable to front lift arm. See Figure 4.4.
| CLEVIS |
HAIR PIN | PIN |
WASHER |
|
JAM NUT
FRONT LIFT CABLE
FRONT LIFT ROD
HANGER
FRONT LIFT ROD
FIGURE 4.4
9.Remove front lift cable and rest front of deck onto
2x 4 block.
10.Loosen jam nut on front lift cable. See Figure 4.4.
11.Rotate front lift cable until it can be reinstalled into front lift arm without lifting deck.
12.Secure lift cable to lift arm with washer and hair pin. Secure jam nut.
13.Reinstall sector plates onto rear hanger brackets and secure with washers and hair pins.
14.Raise deck and remove wooden blocks.
15.Repeat steps for front to rear level until levelness is acquired.
17
