Maintenance (Continued)
Removing the Drive Belt
(Self-Propelled Units Only)
WARNING: Before you remove the belt, disconnect the wire from the spark plug.
1.Remove the screws that secure the belt cover (A, Figure 17). Remove the belt cover.
Note: The screws that secure the belt cover are located beneath the deck.
2.To remove the drive belt, tip the mower up. See “Engine Tipping” in the Maintenance section.
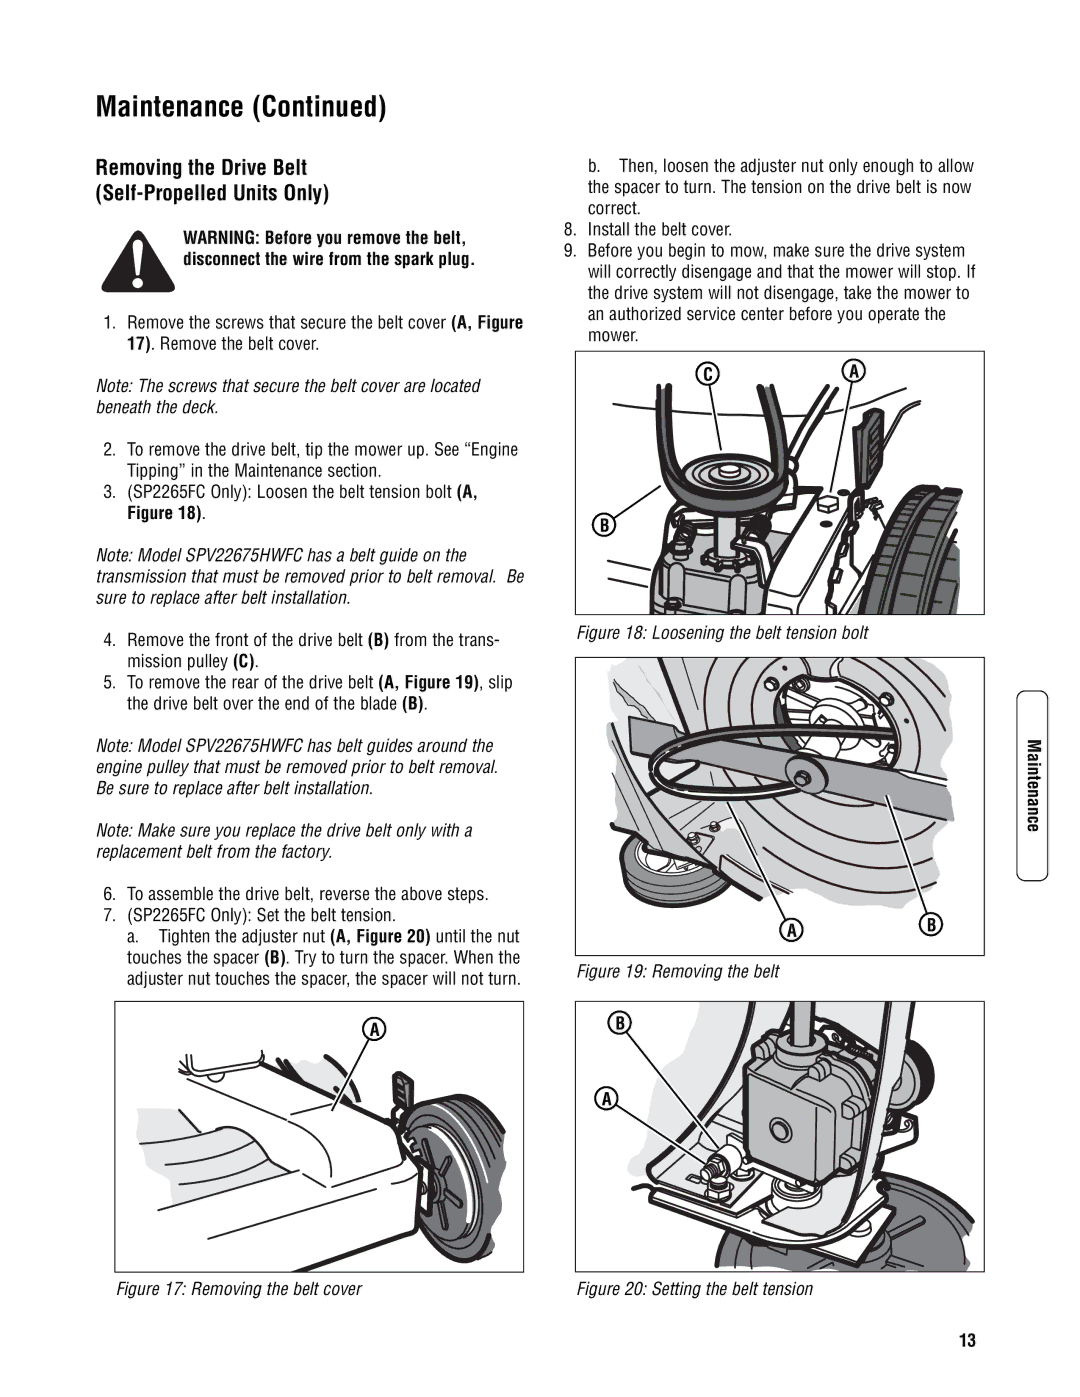
3.(SP2265FC Only): Loosen the belt tension bolt (A, Figure 18).
Note: Model SPV22675HWFC has a belt guide on the transmission that must be removed prior to belt removal. Be sure to replace after belt installation.
4.Remove the front of the drive belt (B) from the trans- mission pulley (C).
5.To remove the rear of the drive belt (A, Figure 19), slip the drive belt over the end of the blade (B).
Note: Model SPV22675HWFC has belt guides around the engine pulley that must be removed prior to belt removal. Be sure to replace after belt installation.
Note: Make sure you replace the drive belt only with a replacement belt from the factory.
6.To assemble the drive belt, reverse the above steps.
7.(SP2265FC Only): Set the belt tension.
a. Tighten the adjuster nut (A, Figure 20) until the nut touches the spacer (B). Try to turn the spacer. When the adjuster nut touches the spacer, the spacer will not turn.
A |
Figure 17: Removing the belt cover
b. Then, loosen the adjuster nut only enough to allow the spacer to turn. The tension on the drive belt is now correct.
8.Install the belt cover.
9.Before you begin to mow, make sure the drive system will correctly disengage and that the mower will stop. If the drive system will not disengage, take the mower to an authorized service center before you operate the mower.
C | A |
B |
|
Figure 18: Loosening the belt tension bolt
| Maintenance |
A | B |
|
Figure 19: Removing the belt
B |
A |
Figure 20: Setting the belt tension
13