SETUP INSTRUCTIONS
The majority of the assembly has been completed at the factory. After removing the machine from the shipping container you will be required to unfold the handles, attach the debris bag, and insert the accessory plug into the vacuum nozzle. Initial adjustments and operational tests were performed prior to shipping the machine. Due to the effects of shipping, handling and storage, the machine must be carefully inspected for loose, damaged parts and any necessary final adjustments completed at the time of setup. It is very important that you register your purchase to insure warranty coverage. Please fill out your product registration form and mail it to the address listed on the form.
1.Carefully remove the contents from the shipping container. You can avoid having to lift the machine by cutting the rear out of the box. The machine can then be rolled out.
2.Unfold the handles being careful not to kink the control cables and place in the operating position. Tighten the hardware securely.
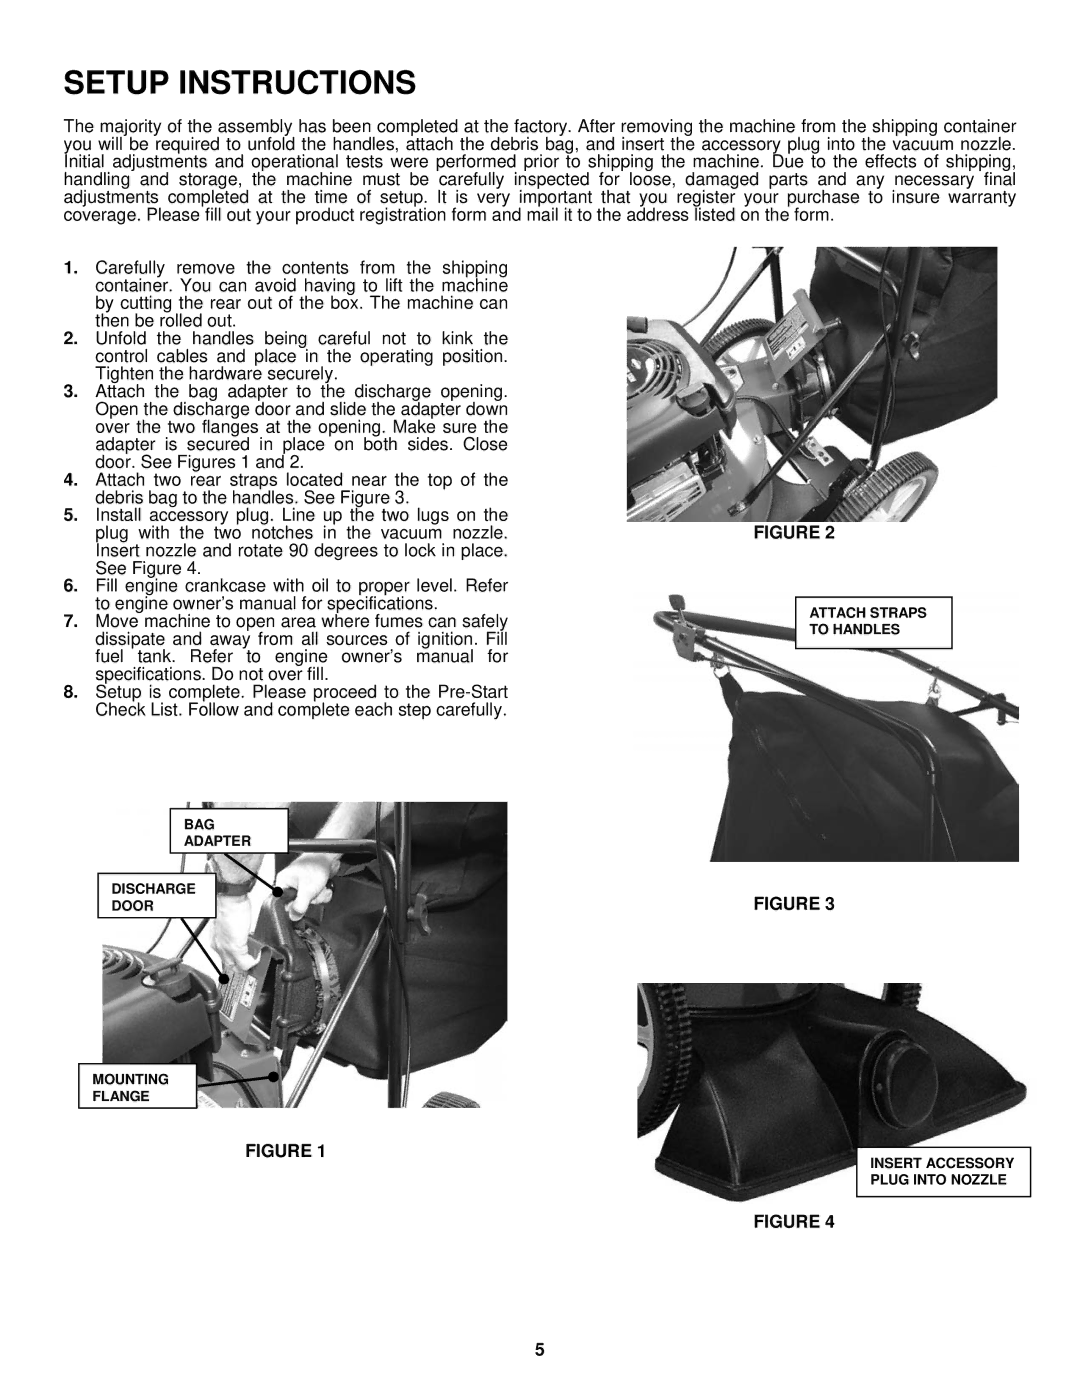
3.Attach the bag adapter to the discharge opening. Open the discharge door and slide the adapter down over the two flanges at the opening. Make sure the adapter is secured in place on both sides. Close door. See Figures 1 and 2.
4.Attach two rear straps located near the top of the debris bag to the handles. See Figure 3.
5.Install accessory plug. Line up the two lugs on the plug with the two notches in the vacuum nozzle. Insert nozzle and rotate 90 degrees to lock in place. See Figure 4.
6.Fill engine crankcase with oil to proper level. Refer to engine owner’s manual for specifications.
7.Move machine to open area where fumes can safely dissipate and away from all sources of ignition. Fill fuel tank. Refer to engine owner’s manual for specifications. Do not over fill.
8.Setup is complete. Please proceed to the
BAG
ADAPTER
DISCHARGE
DOOR
MOUNTING
FLANGE
FIGURE 1
FIGURE 2
ATTACH STRAPS
TO HANDLES
FIGURE 3
INSERT ACCESSORY
PLUG INTO NOZZLE
FIGURE 4
5