Manuals
/
Snapper
/
Lawn and Garden
/
Snow Blower
Snapper
SX5200R, SX5200E Repair & Adjustments, Flite Shoe, Angled Ends Of Auger
Models:
SX5200R, SX5200E
1
12
16
16
Download
16 pages
27.3 Kb
9
10
11
12
13
14
15
16
Troubleshooting
Warranty
Maintenance
Storage Procedure
Auger Belt Replacement
Operational Precautions
Page 12
Image 12
Page 11
Page 13
Page 12
Image 12
Page 11
Page 13
Contents
Safety Instructions & Operator’s Manual for
SINGLE STAGE EXTENDED FRAME SNOW THROWER SERIES
MODEL NUMBER EXPLANATION
MODELS
IMPORTANT SAFETY INSTRUCTIONS
OPERATIONAL PRECAUTIONS
PROTECTION FOR CHILDREN
PREPARATION
MAINTENANCE AND STORAGE
thrower such as wheels weights, counterweights, cabs and the like
TABLE OF CONTENTS
SECTION 4 - ADJUSTMENTS AND REPAIR
TROUBLESHOOTING
SERVICE SCHEDULE
Section 2 - OPERATING INSTRUCTIONS
0.25
0.50
0.75
A.W.G
MINIMUM GAUGE FOR CORD SETS
2.2 STARTING, STOPPING & OPERATION RECOIL START MODELS
2.2.4. STOPPING
2.2.6. ENGAGING AUGER
Section 3 - MAINTENANCE
3.2 SERVICE - AFTER FIRST 5 HOURS 3.2.1 CHECK AUGER DRIVE BELT
3.4 STORAGE PROCEDURE
3.1 INTRODUCTION
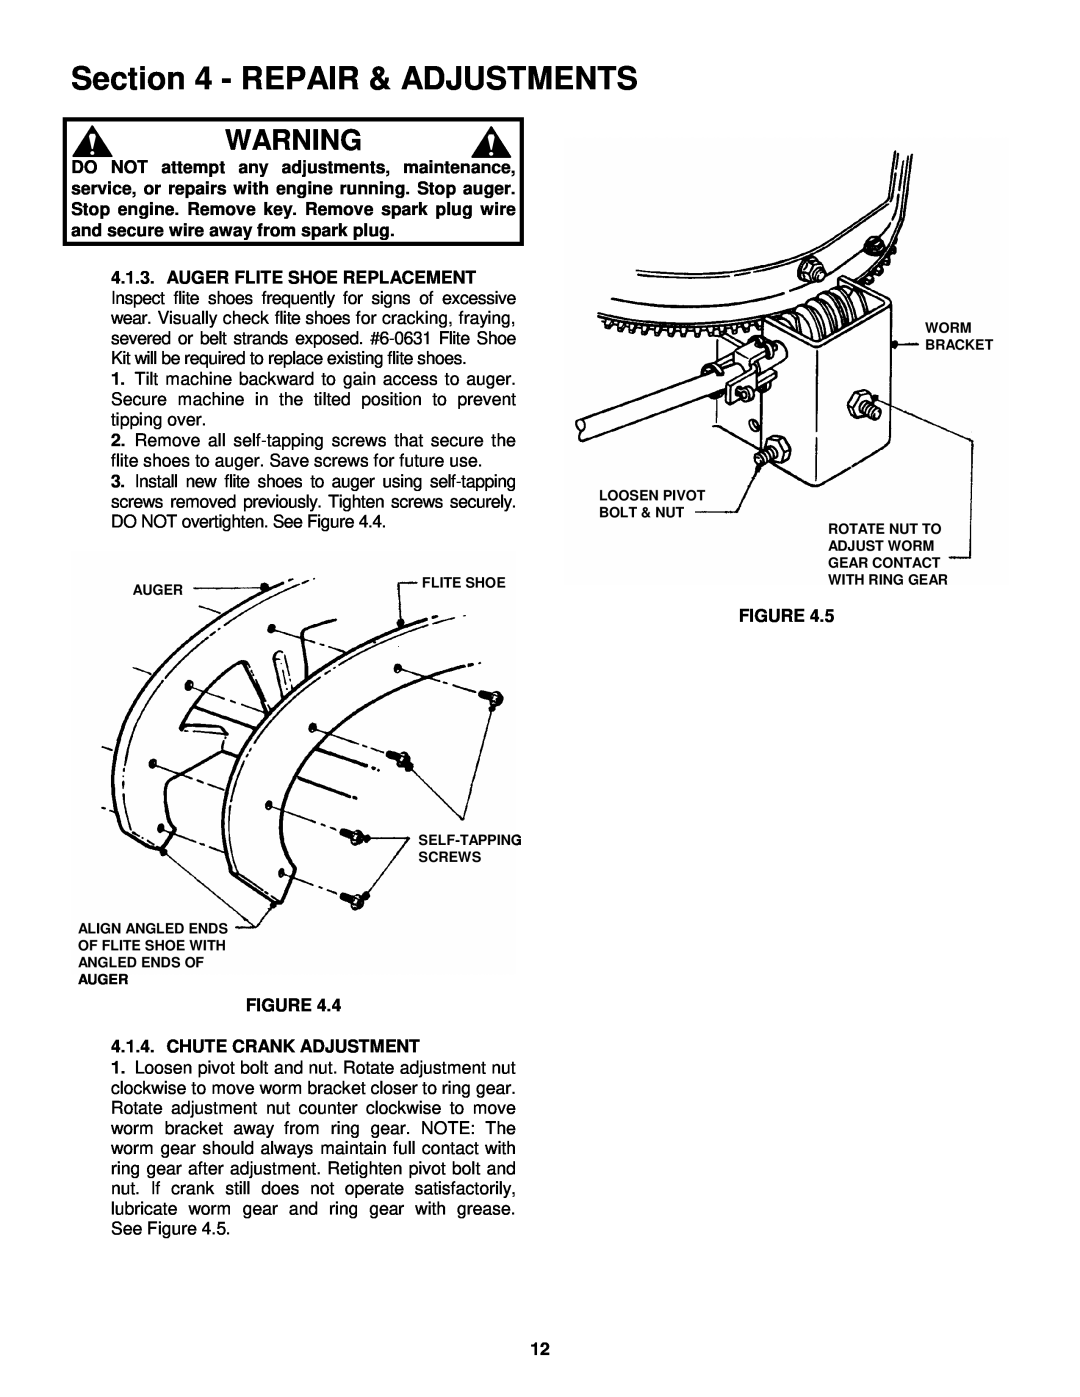
Section 4 - REPAIR & ADJUSTMENTS
4.1.1. AUGER BELT CABLE ADJUSTMENT
4.1.2. AUGER BELT REPLACEMENT
WORM BRACKET LOOSEN PIVOT BOLT & NUT ROTATE NUT TO ADJUST WORM
AUGER
FLITE SHOE
SELF-TAPPING SCREWS ALIGN ANGLED ENDS OF FLITE SHOE WITH
TROUBLESHOOTING
SERVICE SCHEDULE
MAINTENANCE PARTS
3 YEAR LIMITED WARRANTY
Page
Safety Instructions & Operator’s Manual for
SINGLE STAGE EXTENDED FRAME SNOW THROWER SERIES
Top
Page
Image
Contents