ASSEMBLY & INSTALLATION (CONT.)
Install Support Brackets
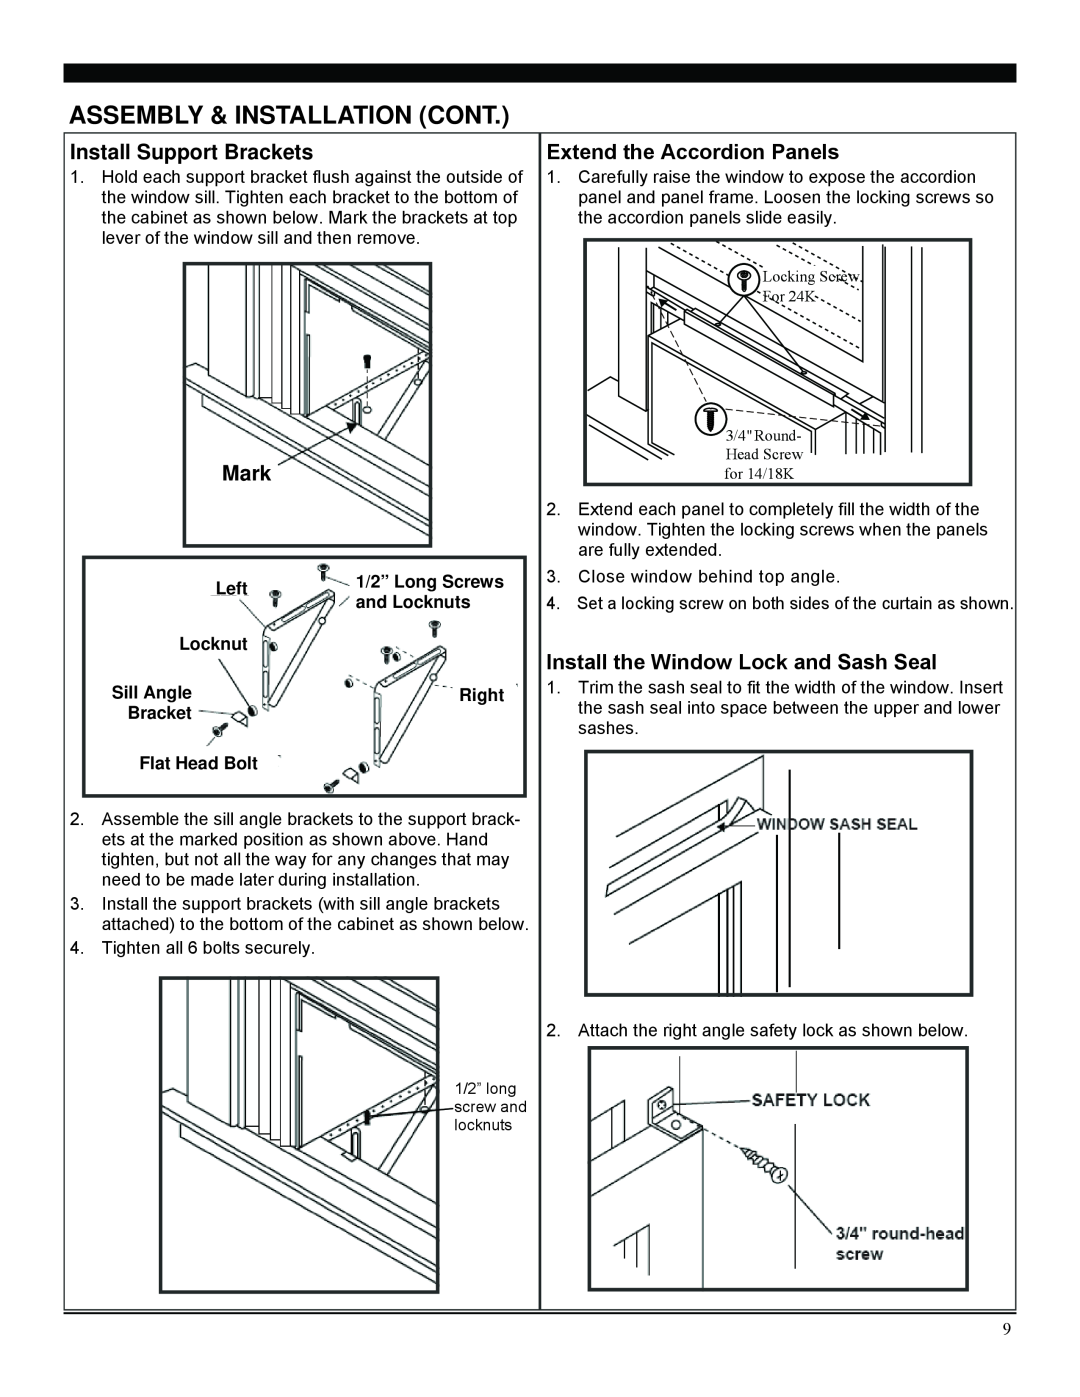
1.Hold each support bracket flush against the outside of the window sill. Tighten each bracket to the bottom of the cabinet as shown below. Mark the brackets at top lever of the window sill and then remove.
Mark
|
|
|
|
|
|
| 1/2” Long Screws | |
|
|
|
| Left |
|
| ||
|
|
|
|
|
| and Locknuts | ||
|
|
|
|
|
|
| ||
|
|
|
|
|
|
| ||
|
|
|
|
| ||||
|
| Locknut |
|
|
| |||
|
|
|
|
|
|
|
| |
|
|
|
|
|
|
|
|
|
Sill Angle |
|
|
| Right | ||||
| Bracket |
|
|
|
| |||
|
| |||||||
|
|
|
|
| ||||
| Flat Head Bolt |
|
|
| ||||
|
|
|
|
|
|
|
|
|
2.Assemble the sill angle brackets to the support brack- ets at the marked position as shown above. Hand tighten, but not all the way for any changes that may need to be made later during installation.
3.Install the support brackets (with sill angle brackets attached) to the bottom of the cabinet as shown below.
4.Tighten all 6 bolts securely.
1/2” long screw and locknuts
Extend the Accordion Panels
1.Carefully raise the window to expose the accordion panel and panel frame. Loosen the locking screws so the accordion panels slide easily.
2.Extend each panel to completely fill the width of the window. Tighten the locking screws when the panels are fully extended.
3.Close window behind top angle.
4.Set a locking screw on both sides of the curtain as shown.
Install the Window Lock and Sash Seal
1.Trim the sash seal to fit the width of the window. Insert the sash seal into space between the upper and lower sashes.
2. Attach the right angle safety lock as shown below.
9