ASSEMBLY & INSTALLATION (CONT.)
Top Angle Rail and Side Bracket Installation
1.Place the air conditioner on a hard flat surface.
2.Locate the foam gasket and top angle rail
3.Attach the foam gasket to the top angle rail.
4.Install top angle side to cabinet as shown in FIG. 7.
5.Slide "I" section of window filler panel into side retainer. Do both sides.
FIG. 8a | SIDE RETAINER |
WINDOW FILLER PANEL
SIDE RETAINER
WINDOW FILLER
PANEL
6.Insert top and bottom legs of window filler panel frame into channel in the top angle and bottom rail. Do both
sides(see FIG
7. Install side retainer to cabinet as shown in
PLASTIC | FIG.8b |
FRAME |
SIDE RETAINER
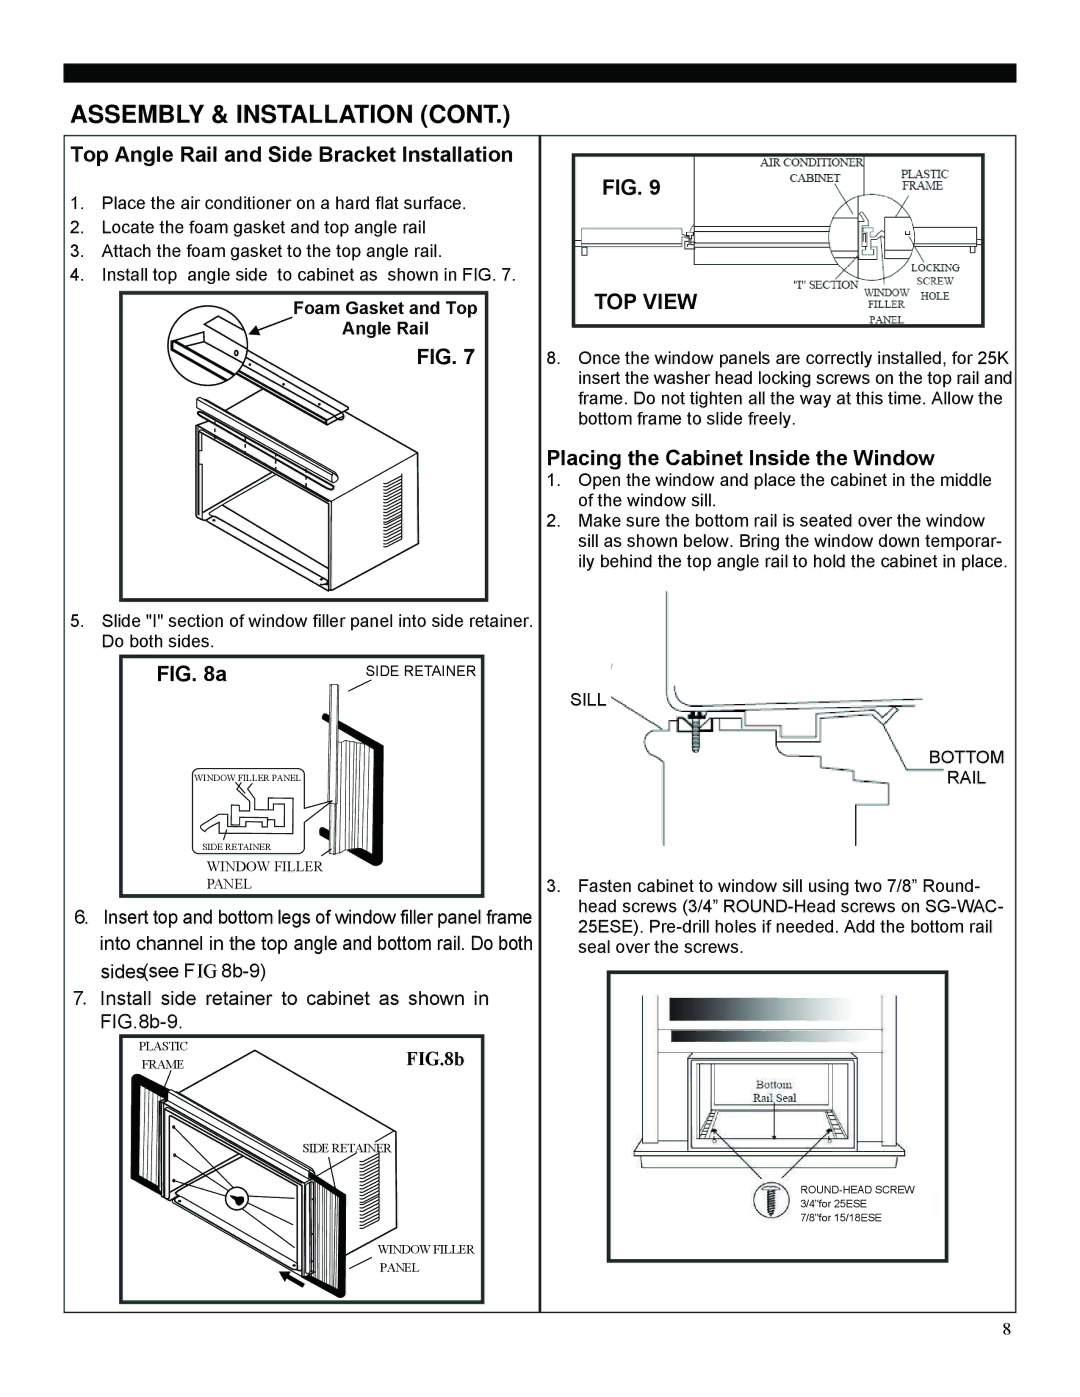
FIG. 9
TOP VIEW
8.Once the window panels are correctly installed, for 25K insert the washer head locking screws on the top rail and frame. Do not tighten all the way at this time. Allow the bottom frame to slide freely.
Placing the Cabinet Inside the Window
1.Open the window and place the cabinet in the middle of the window sill.
2.Make sure the bottom rail is seated over the window sill as shown below. Bring the window down temporar- ily behind the top angle rail to hold the cabinet in place.
SILL
BOTTOM
RAIL
3.Fasten cabinet to window sill using two 7/8” Round- head screws (3/4”
7/8"for 15/18ESE
WINDOW FILLER
![]() PANEL
PANEL
8