Adjustments
When one of the
You can, however, adjust the picture to your preferences by following the procedure described below.
You can adjust the all items on the OSD (On Screen Display).
pBefore adjusting the items, turn on the unit and feed the video signal from the connected computer/work station.
pWhen the limit value is reached, the POWER SAVING indicator will begin to flash.
pAdjustments will be stored automatically.
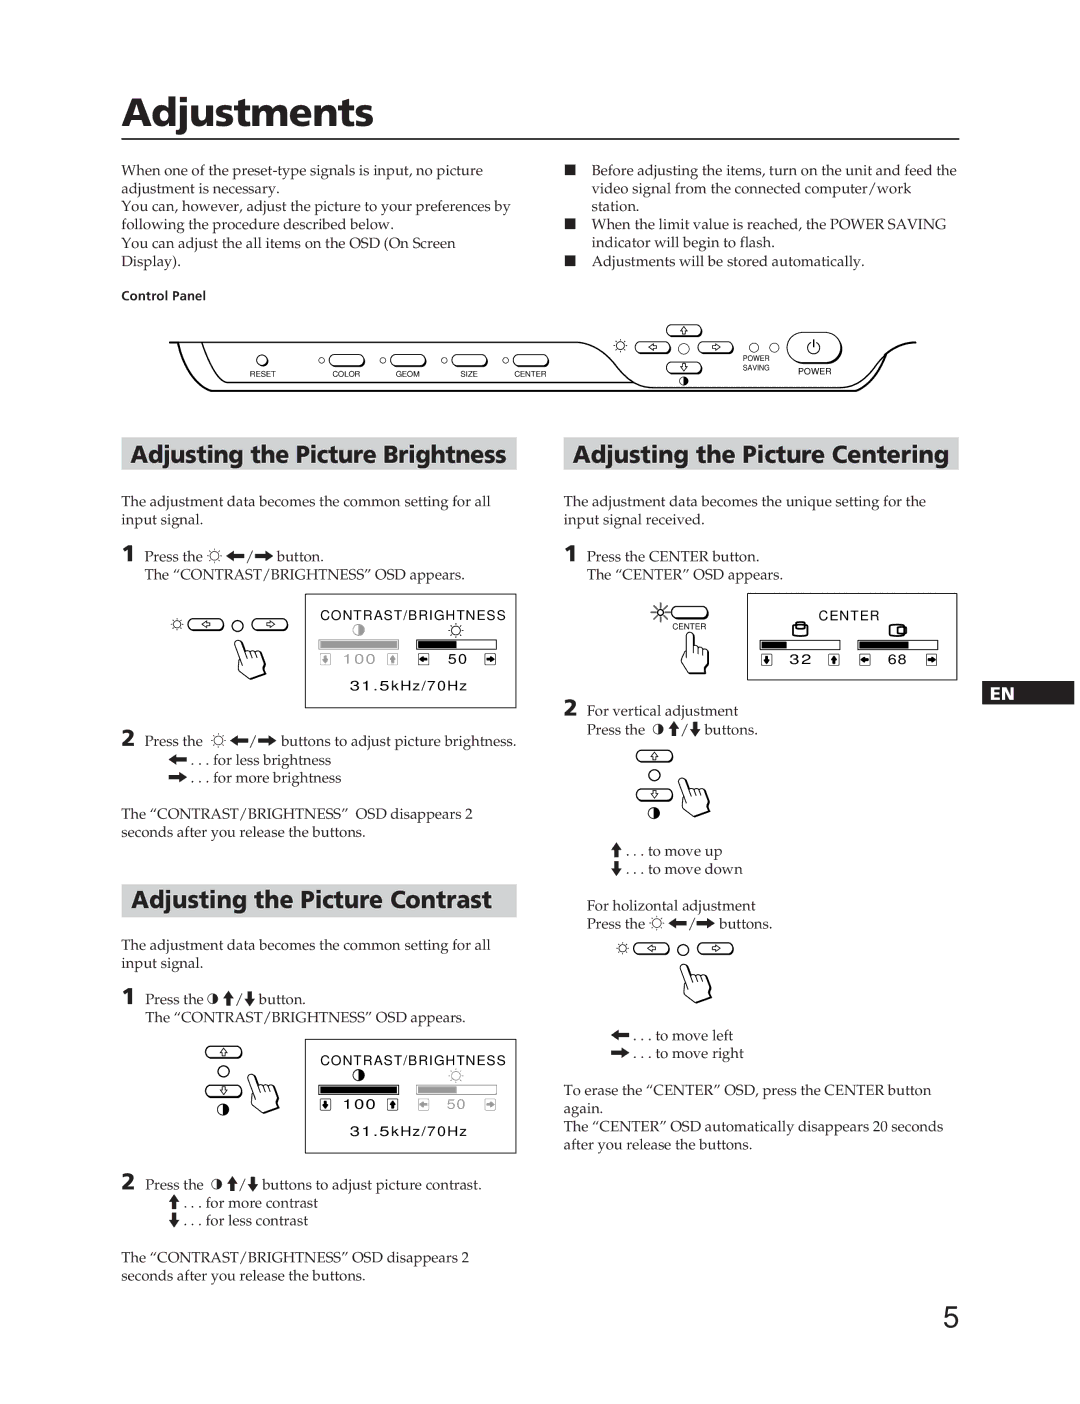
Control Panel
|
|
|
|
| POWER |
|
RESET | COLOR | GEOM | SIZE | CENTER | SAVING | POWER |
|
Adjusting the Picture Brightness |
| Adjusting the Picture Centering |
The adjustment data becomes the common setting for all |
| The adjustment data becomes the unique setting for the |
input signal. |
| input signal received. |
1 Press the ¬ ?//button. |
| 1 Press the CENTER button. |
The “CONTRAST/BRIGHTNESS” OSD appears. |
| The “CENTER” OSD appears. |
CONTRAST/BRIGHTNESS | |
100 | 50 |
31 . 5kHz/70Hz | |
| 2 |
2 Press the ¬ ?//buttons to adjust picture brightness.
?. . . for less brightness /. . . for more brightness
The “CONTRAST/BRIGHTNESS” OSD disappears 2 seconds after you release the buttons.
CENTER | CENTER |
| |
32 | 68 |
For vertical adjustment
Press the > >/.buttons.
>. . . to move up
.. . . to move down
EN
Adjusting the Picture Contrast
The adjustment data becomes the common setting for all input signal.
1 Press the > >/.button.
The “CONTRAST/BRIGHTNESS” OSD appears.
CONTRAST/BRIGHTNESS | |
100 | 50 |
31 . 5kHz/70Hz | |
For holizontal adjustment
Press the ¬ ?//buttons.
?. . . to move left /. . . to move right
To erase the “CENTER” OSD, press the CENTER button again.
The “CENTER” OSD automatically disappears 20 seconds after you release the buttons.
2 Press the > >/.buttons to adjust picture contrast.
>. . . for more contrast
.. . . for less contrast
The “CONTRAST/BRIGHTNESS” OSD disappears 2 seconds after you release the buttons.
5