010COV.book Page 11 Wednesday, August 25, 2010 12:06 PM
To display the photo frame on the wall
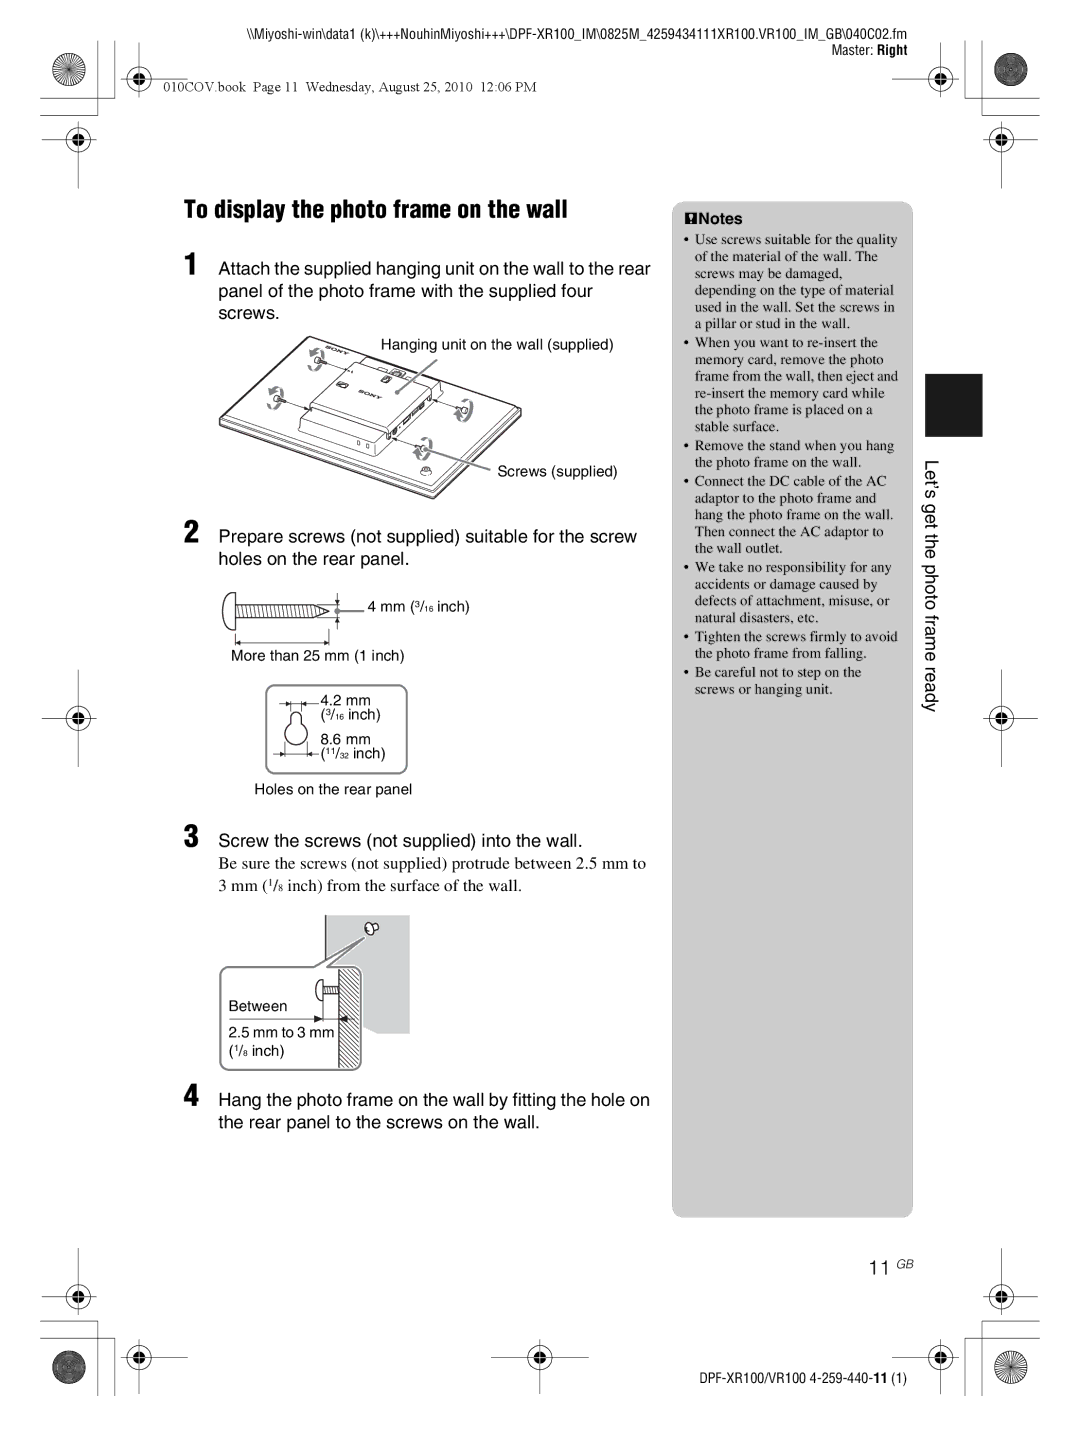
1 Attach the supplied hanging unit on the wall to the rear panel of the photo frame with the supplied four screws.
Hanging unit on the wall (supplied)
![]() Screws (supplied)
Screws (supplied)
2 Prepare screws (not supplied) suitable for the screw holes on the rear panel.
![]() 4 mm (3/16 inch)
4 mm (3/16 inch)
More than 25 mm (1 inch)
![]() 4.2 mm (3/16 inch)
4.2 mm (3/16 inch)
8.6 mm
![]() (11/32 inch)
(11/32 inch)
Holes on the rear panel
3 Screw the screws (not supplied) into the wall.
Be sure the screws (not supplied) protrude between 2.5 mm to 3 mm (1/8 inch) from the surface of the wall.
Between
2.5mm to 3 mm (1/8 inch)
4 Hang the photo frame on the wall by fitting the hole on the rear panel to the screws on the wall.
PNotes
• Use screws suitable for the quality |
| |
of the material of the wall. The |
| |
screws may be damaged, |
| |
depending on the type of material |
| |
used in the wall. Set the screws in |
| |
a pillar or stud in the wall. |
| |
• When you want to |
| |
memory card, remove the photo |
| |
frame from the wall, then eject and |
| |
| ||
| ||
the photo frame is placed on a |
| |
stable surface. |
| |
• Remove the stand when you hang |
| |
the photo frame on the wall. | Let’s | |
• Connect the DC cable of the AC | ||
| ||
adaptor to the photo frame and | get | |
hang the photo frame on the wall. | ||
| ||
Then connect the AC adaptor to | the | |
the wall outlet. | ||
| ||
• We take no responsibility for any | photo | |
accidents or damage caused by | ||
defects of attachment, misuse, or | ||
natural disasters, etc. | frame | |
• Tighten the screws firmly to avoid | ||
the photo frame from falling. | ||
• Be careful not to step on the | ready | |
screws or hanging unit. | ||
|