
MDS-JE500 specifications
The Sony MDS-JE510 and MDS-JE500 are notable entries in the MiniDisc player/recorder category, reflecting Sony's commitment to high-quality audio at the turn of the millennium. These models showcase innovative features and technologies that cater to both casual listeners and audiophiles alike.The MDS-JE510, released in the early 2000s, boasts advanced recording capabilities, including a high-speed digital transfer mechanism that allows users to record from various sources, such as CD players and radio tuners, with remarkable clarity. One of the standout features of the MDS-JE510 is its ability to support both standard and long-play recording modes. This flexibility enables users to choose between the traditional 74- or 80-minute discs or utilize extended recording for up to 320 minutes on a single disc, making it ideal for lengthy recordings, such as live concerts or lengthy mixes.
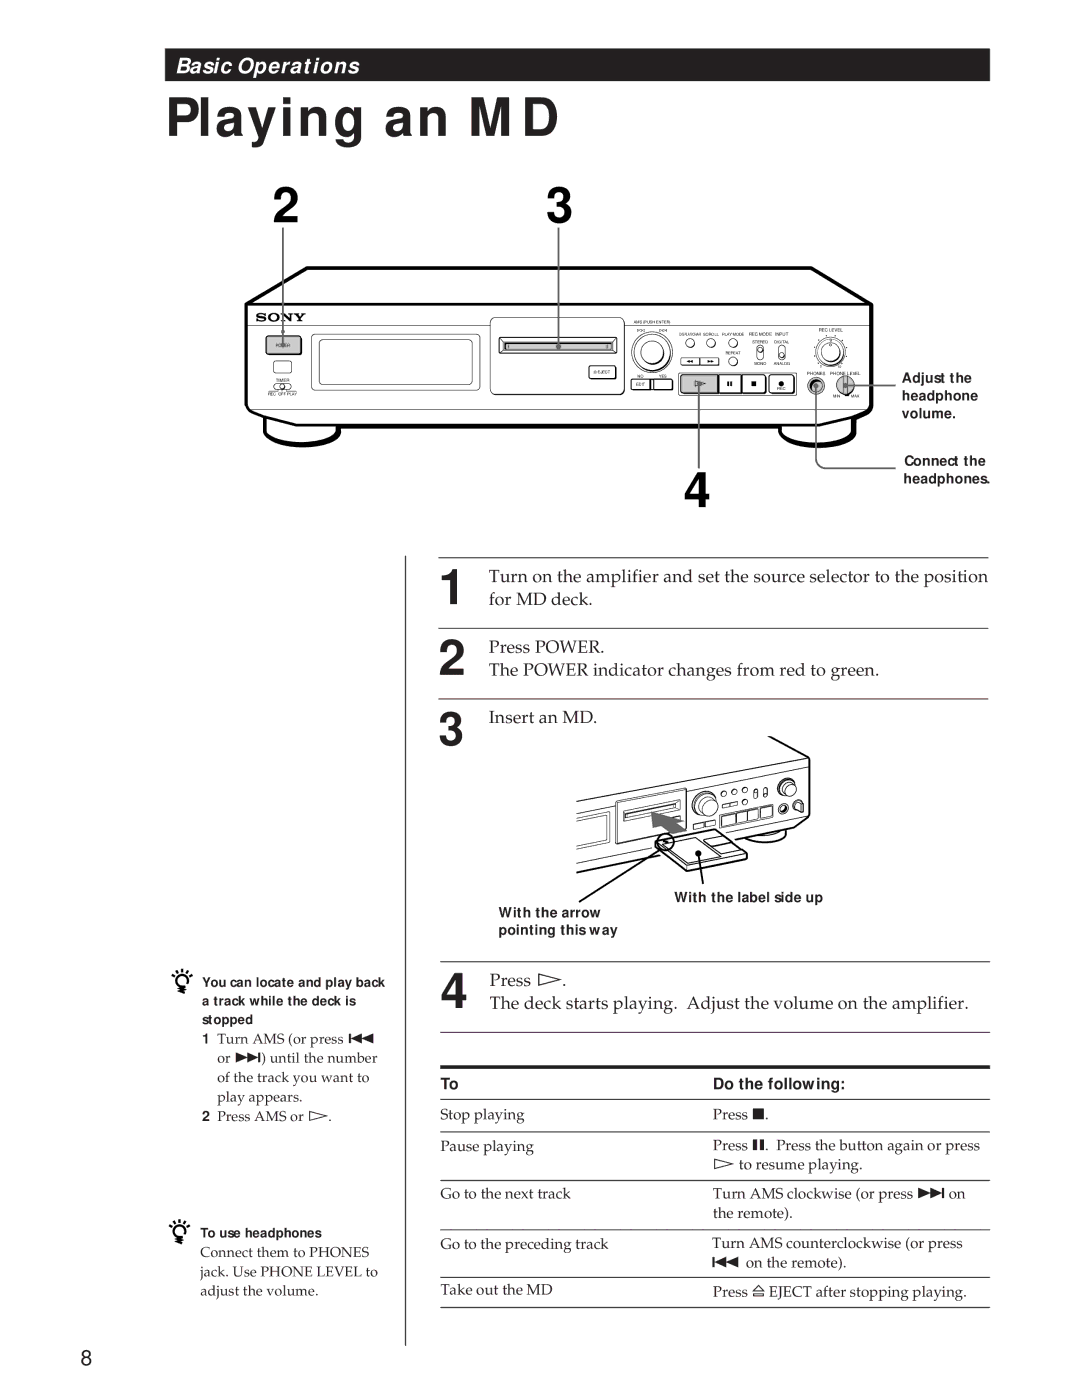
The MDS-JE500, an earlier model, also shares many features with the JE510. It includes an integrated digital signal processor that ensures optimal audio performance and minimal distortion. Both models are equipped with Optical Digital Input/Output connections, allowing for high-quality transfers and a seamless connection to other digital audio equipment.
In terms of playback capabilities, both models support various audio formats, delivering clear and powerful sound that enhances the listening experience. The users have the advantage of being able to create custom playlists and utilize a program feature that allows for easy playback of selected tracks, making them versatile tools for personalizing music collections.
Build quality is another aspect where both models shine. They feature robust construction, ensuring durability while maintaining an appealing aesthetic design. The intuitive interface, with clear controls and an easy-to-navigate display, enhances usability for both novice and seasoned users.
In conclusion, the Sony MDS-JE510 and MDS-JE500 stand out for their high-fidelity audio performance, user-friendly features, and sturdy construction. As part of the MiniDisc format's legacy, they hold a special place in the hearts of audio enthusiasts, reflecting a unique era in personal music consumption and recording. Their ability to deliver quality sound and recording flexibility makes them timeless models even many years after their release.