Sony
5. Setup of NSP-1
At least, you need to do followings using web browser.
•Confirm firmware version
•Set IP address of NSP1 if necessary
•Set Date and Time
•Set Screen resolution
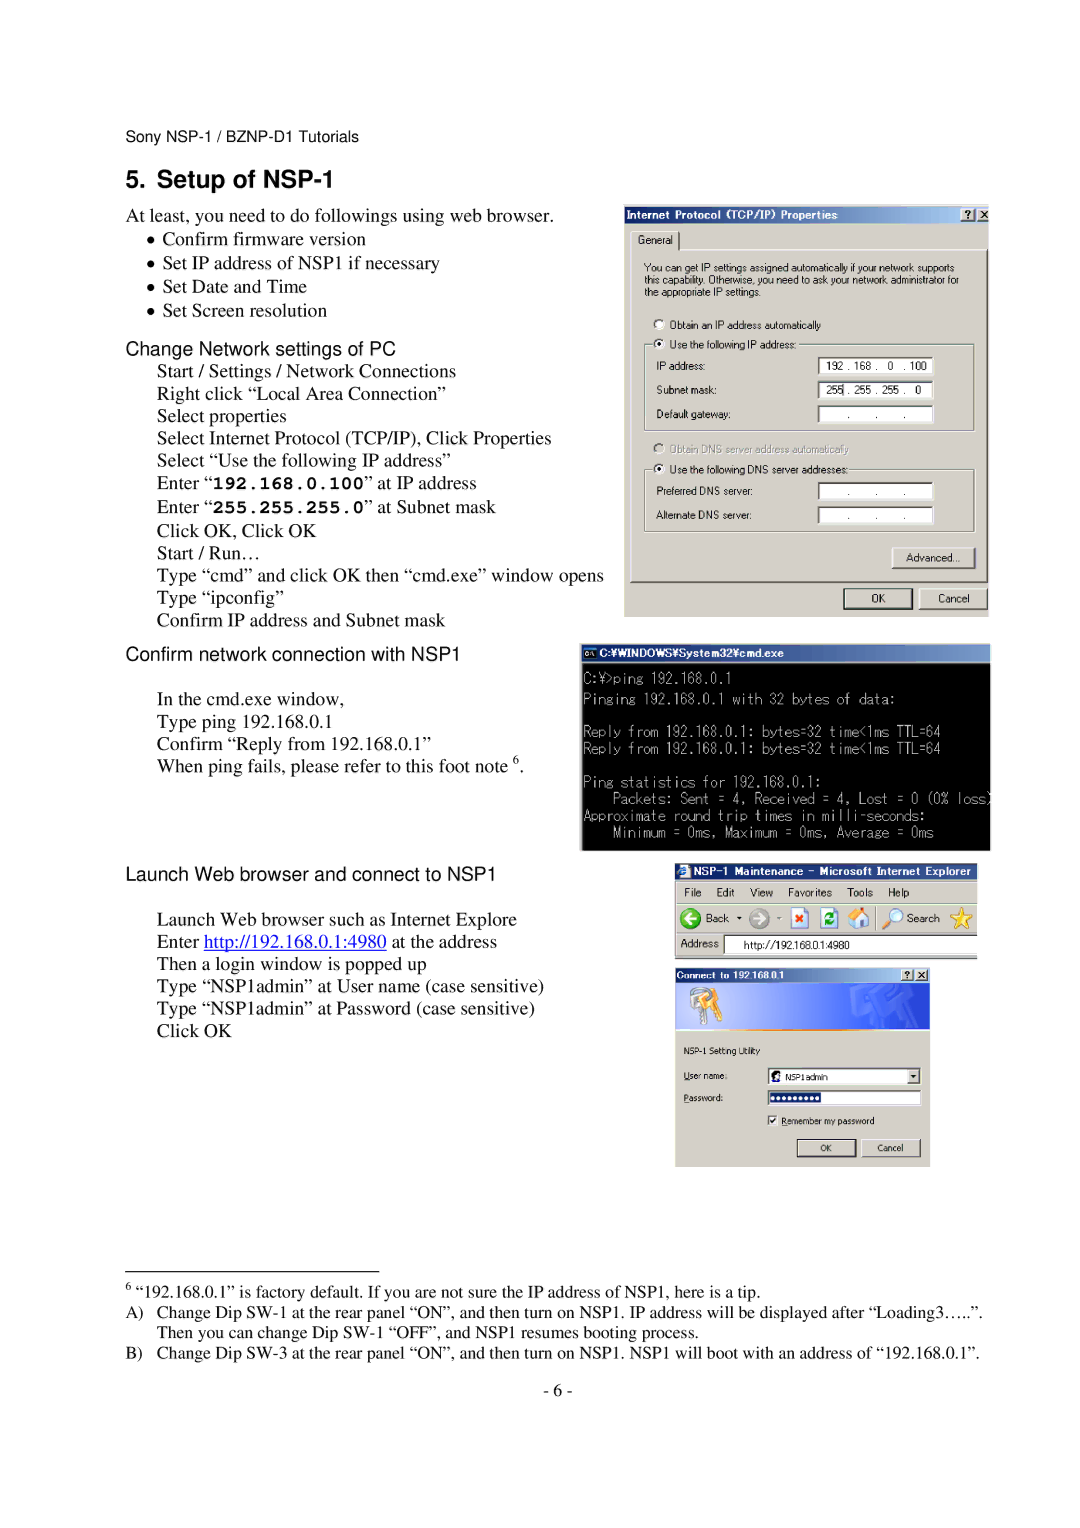
Change Network settings of PC
Start / Settings / Network Connections
Right click “Local Area Connection”
Select properties
Select Internet Protocol (TCP/IP), Click Properties
Select “Use the following IP address”
Enter “192.168.0.100” at IP address
Enter “255.255.255.0” at Subnet mask
Click OK, Click OK
Start / Run…
Type “cmd” and click OK then “cmd.exe” window opens
Type “ipconfig”
Confirm IP address and Subnet mask
Confirm network connection with NSP1
In the cmd.exe window,
Type ping 192.168.0.1
Confirm “Reply from 192.168.0.1”
When ping fails, please refer to this foot note 6.
Launch Web browser and connect to NSP1
Launch Web browser such as Internet Explore
Enter http://192.168.0.1:4980 at the address
Then a login window is popped up
Type “NSP1admin” at User name (case sensitive)
Type “NSP1admin” at Password (case sensitive)
Click OK
6“192.168.0.1” is factory default. If you are not sure the IP address of NSP1, here is a tip.
A)Change Dip
B)Change Dip
-6 -