Features
Congratulations on the purchase of your new Sony Electronics
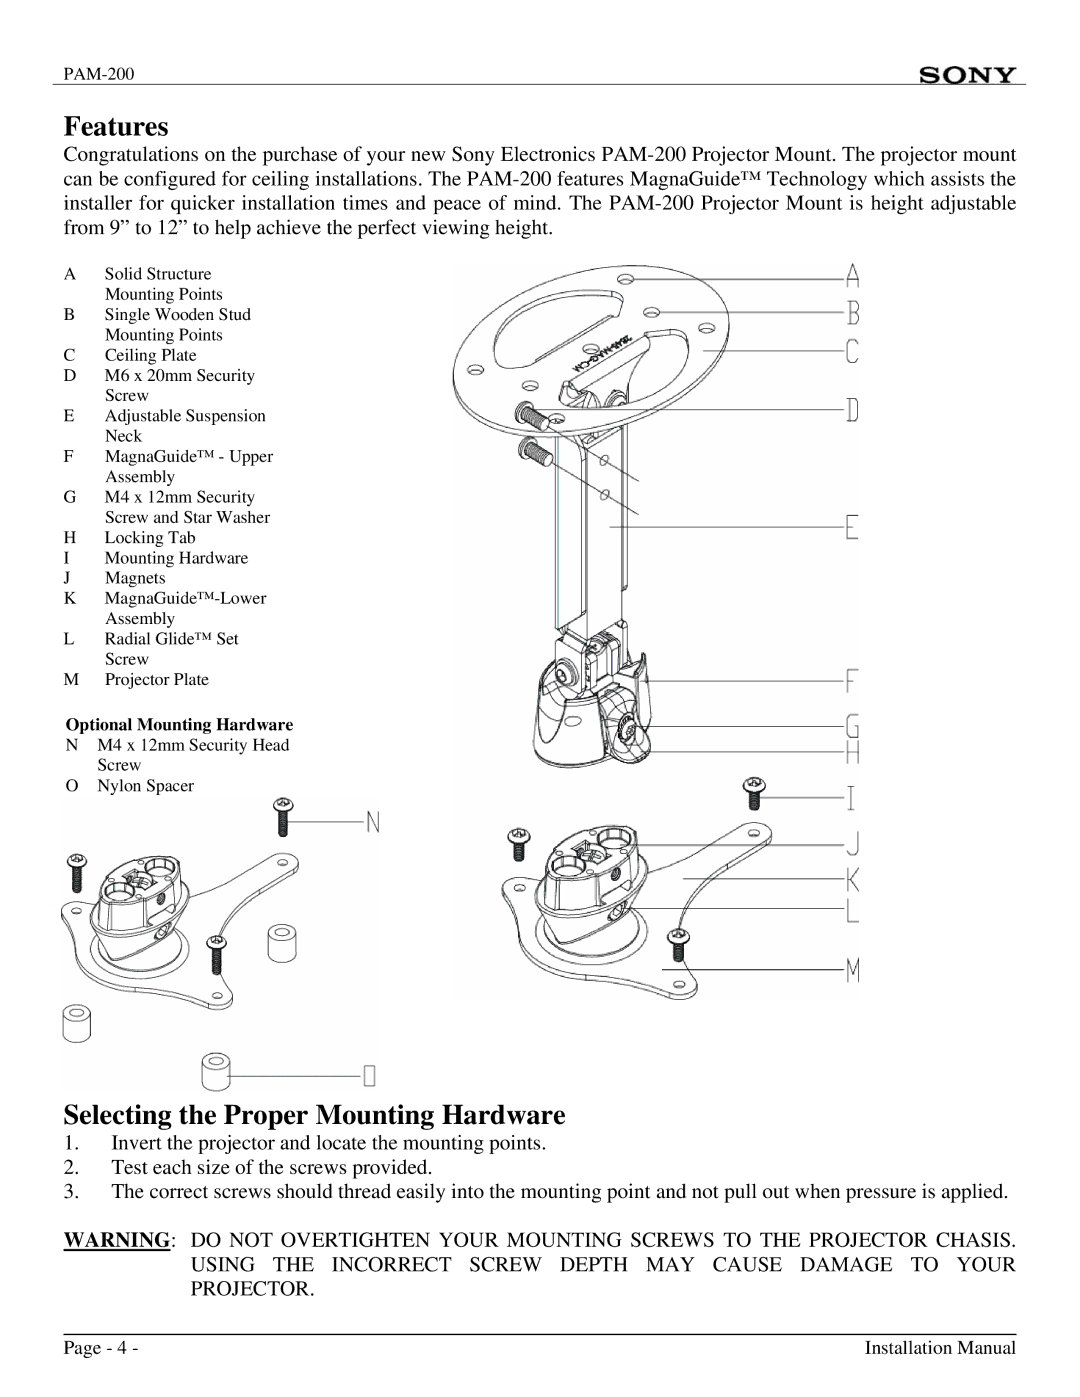
ASolid Structure Mounting Points
BSingle Wooden Stud Mounting Points
CCeiling Plate
DM6 x 20mm Security Screw
EAdjustable Suspension Neck
FMagnaGuide™ - Upper Assembly
GM4 x 12mm Security Screw and Star Washer
HLocking Tab
IMounting Hardware
JMagnets
K
LRadial Glide™ Set Screw
MProjector Plate
Optional Mounting Hardware
NM4 x 12mm Security Head Screw
ONylon Spacer
Selecting the Proper Mounting Hardware
1.Invert the projector and locate the mounting points.
2.Test each size of the screws provided.
3.The correct screws should thread easily into the mounting point and not pull out when pressure is applied.
WARNING: DO NOT OVERTIGHTEN YOUR MOUNTING SCREWS TO THE PROJECTOR CHASIS. USING THE INCORRECT SCREW DEPTH MAY CAUSE DAMAGE TO YOUR PROJECTOR.
Page - 4 - | Installation Manual |