Processor Operations

When you programme the recording signal

While holding down the r button on the processor’s remote and press the record button on the other remote.

If you cannot successfully programme signals, check the following:

• If the LEARN indicator does not light up at all, the

batteries are weak. Replace both batteries.

• If the LEARN indicator does not flash or light up in

Step 3 or 4, there is interference. Clear the signal as

described in “Clearing the programmed signal”

below and programme again from the beginning.

• The two remotes are placed too far apart. Make sure

they are only 2 inches apart.

• If you don’t proceed to the following steps within

about 1 minute during Steps 2 and 3, the remote

automatically exits learning mode. Start again from

Step 2.

• If the memory in the remote has become full, (If you

Recording

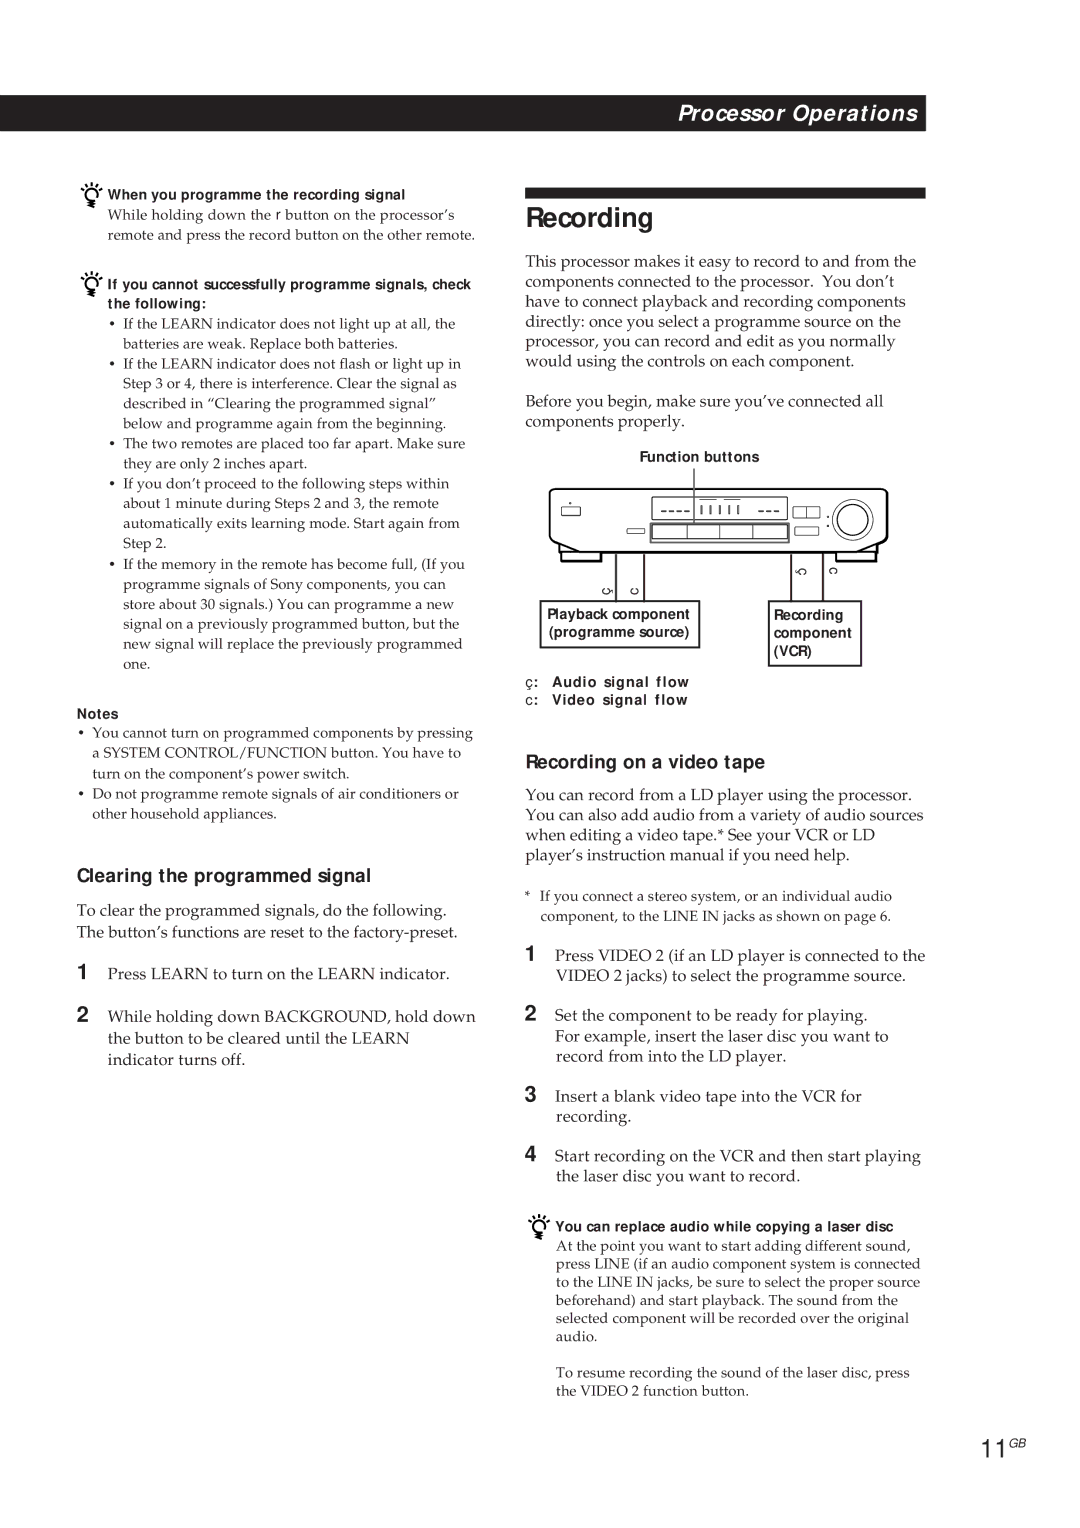
This processor makes it easy to record to and from the components connected to the processor. You don’t have to connect playback and recording components directly: once you select a programme source on the processor, you can record and edit as you normally would using the controls on each component.

Before you begin, make sure you’ve connected all components properly.

Function buttons

programme signals of Sony components, you can

store about 30 signals.) You can programme a new

signal on a previously programmed button, but the

new signal will replace the previously programmed

one.

Notes

ç

c

Playback component (programme source)

ç: Audio signal flow

c: Video signal flow

ç

c

Recording component (VCR)

You cannot turn on programmed components by pressing a SYSTEM CONTROL/FUNCTION button. You have to turn on the component’s power switch.

Do not programme remote signals of air conditioners or other household appliances.

Clearing the programmed signal

To clear the programmed signals, do the following. The button’s functions are reset to the factory-preset.

1Press LEARN to turn on the LEARN indicator.

2While holding down BACKGROUND, hold down the button to be cleared until the LEARN indicator turns off.

Recording on a video tape

You can record from a LD player using the processor. You can also add audio from a variety of audio sources when editing a video tape.* See your VCR or LD player’s instruction manual if you need help.

*If you connect a stereo system, or an individual audio component, to the LINE IN jacks as shown on page 6.

1Press VIDEO 2 (if an LD player is connected to the VIDEO 2 jacks) to select the programme source.

2Set the component to be ready for playing. For example, insert the laser disc you want to record from into the LD player.

3Insert a blank video tape into the VCR for recording.

4Start recording on the VCR and then start playing the laser disc you want to record.

You can replace audio while copying a laser disc

At the point you want to start adding different sound, press LINE (if an audio component system is connected to the LINE IN jacks, be sure to select the proper source beforehand) and start playback. The sound from the selected component will be recorded over the original audio.

To resume recording the sound of the laser disc, press the VIDEO 2 function button.

11GB

Page 11
Image 11
Sony SDP-E300 operating instructions 11GB, Clearing the programmed signal, Recording on a video tape

SDP-E300 specifications

The Sony SDP-E300 is a cutting-edge digital signal processor designed to enhance the audio experience in various applications, such as home theater systems, professional audio setups, and broadcast environments. With its compact and robust design, it offers a multitude of features that cater to both casual listeners and audio professionals.

One of the standout features of the SDP-E300 is its advanced digital signal processing technology. The device is equipped with sophisticated algorithms that enable it to analyze and optimize sound quality. This capability allows users to achieve a more immersive auditory experience by fine-tuning audio signals to match their preferences or the acoustics of their environment.

The SDP-E300 supports various audio formats, making it versatile for different use cases. It can handle multi-channel audio, providing an engaging surround sound experience that is essential for movie watching and gaming. This multi-channel capability is complemented by its high-resolution audio support, which enables playback of lossless formats and ensures that even the most subtle nuances in sound are faithfully reproduced.

Another significant characteristic of the SDP-E300 is its intuitive user interface. Featuring a user-friendly LCD display and accessible controls, navigating through its extensive features is simple and straightforward. Users can easily adjust settings, access presets, and switch between different audio modes with ease.

Additionally, the SDP-E300 offers connectivity options that cater to modern audio setups. It includes multiple inputs and outputs, such as HDMI, optical, and coaxial connections, allowing seamless integration with a variety of devices, including televisions, gaming consoles, and streaming services. This flexibility in connectivity ensures that the processor can be an integral part of a comprehensive audio system.

Furthermore, the SDP-E300 incorporates advanced room correction technology. This feature analyzes the acoustics of the listening environment and adjusts the output to compensate for any deficiencies. As a result, users can enjoy a balanced and clear soundstage, regardless of their room's characteristics.

In summary, the Sony SDP-E300 stands out as a powerful and versatile digital signal processor that enhances audio experiences through advanced signal processing, multi-channel support, an intuitive user interface, flexible connectivity, and room correction technology. Whether for a home theater or a professional audio environment, the SDP-E300 is an excellent choice for those seeking to elevate their sound quality.