English

TROUBLESHOOTING

Troubleshooting

Before calling an authorized service center please check that the items below are properly connected or set.

In case of using a non-standard signal, please check the pin assignments and the signal timing of your adapter with the specifications outlined in sections "Pin Assignment Table" and "Preset Timing Chart".

Problem

Items to check


No picture

• Power Switch should be in the ON position and the power cord should be properly connected.


• Check the color of the power LED indicator; if it is orange, then the monitor is in a power


saving mode.


• Check if the horizontal/vertical frequency are out of range.


• Maximize the Brightness and Contrast controls.


"No Signal Input" is displayed on

• The video card should be completely seated in its slot.

the screen

• The computer power switch should be in the ON position.


• The signal cable should be completely connected to the video card/computer.


Display image is not centered,

• Change the Position and Size controls to adjust the image.

too small, or too large


Image is scrolling or unstable

• The signal cable should be completely attached to the computer.


• Check the pin assignments and signal timings of the monitor and your video card.


Picture is fuzzy

• Adjust the Contrast and Brightness Controls.


• Push the degauss button once.


CAUTION: A minimum interval of 20 minutes should exist before the degauss button is pressed


a second time when not switching between modes.


Do not hold the button down continuously.


Picture bounces or a wave

• Relocate electrical devices that may be causing electrical interference.

pattern is present in the picture

• See the inside front cover of this manual for FCC information.


Edges of the display image are

• Adjust the Pincushion control.

curved either inward or outward


Color looks blotchy

• Press the Degauss button once.


No Plug & Play functionality

•Check if the host system is Plug & Play compatible.


•Check if the VGA card is DDC 1/DDC 2B compatible.


•Check if Window '95 is installed and the software key for DDC function is enabled).

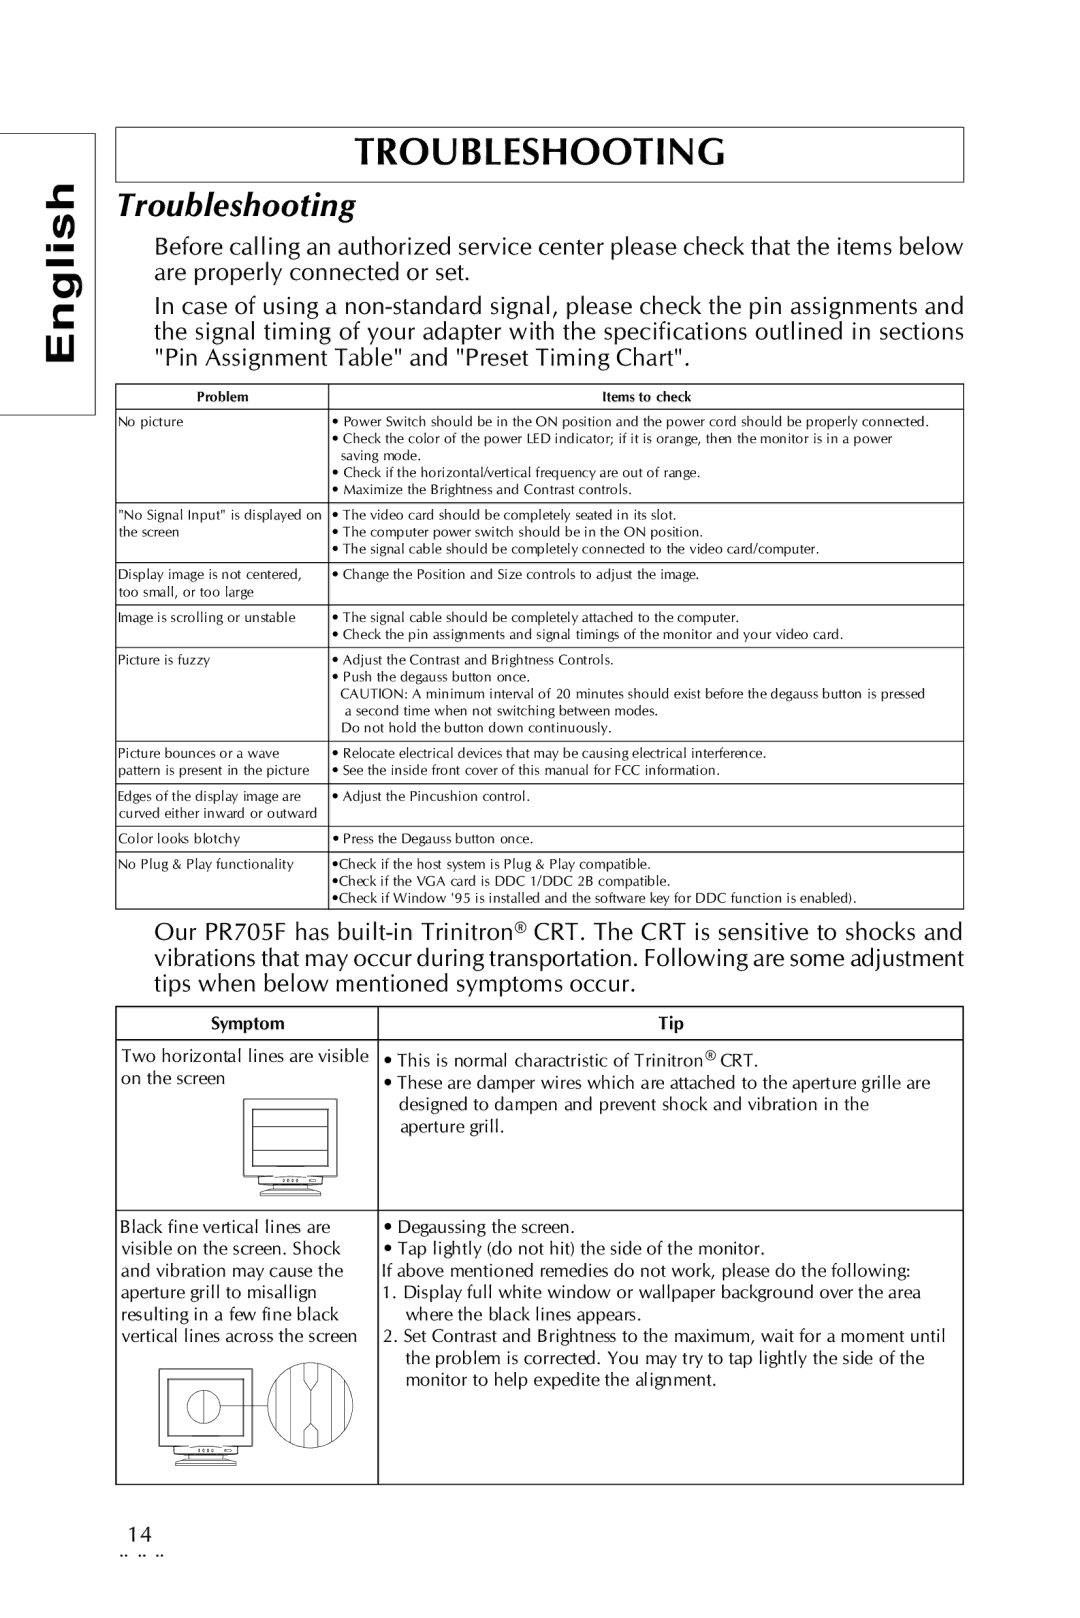
Our PR705F has built-in Trinitron® CRT. The CRT is sensitive to shocks and vibrations that may occur during transportation. Following are some adjustment tips when below mentioned symptoms occur.

Symptom

Tip

Two horizontal lines are visible

• This is normal charactristic of Trinitron® CRT.

on the screen

• These are damper wires which are attached to the aperture grille are


designed to dampen and prevent shock and vibration in the


aperture grill.

Black fine vertical lines are

• Degaussing the screen.

visible on the screen. Shock

• Tap lightly (do not hit) the side of the monitor.

and vibration may cause the

If above mentioned remedies do not work, please do the following:

aperture grill to misallign

1. Display full white window or wallpaper background over the area

resulting in a few fine black

where the black lines appears.

vertical lines across the screen

2. Set Contrast and Brightness to the maximum, wait for a moment until


the problem is corrected. You may try to tap lightly the side of the


monitor to help expedite the alignment.

14

¨ ¨ ¨

Page 14
Image 14
Sony Trinitron CRT Monitor specifications Troubleshooting

Trinitron CRT Monitor specifications

The Sony Trinitron CRT monitor is one of the most iconic displays in the history of consumer electronics. Introduced in the late 1960s, the Trinitron technology rapidly became synonymous with high-quality imaging, vibrant colors, and excellent reliability. The innovation behind the Trinitron monitors was rooted in its unique aperture grille design, which replaced the traditional shadow mask used in most CRTs. This design allowed for better light transmission, resulting in brighter images and more vivid colors.

One of the standout features of the Trinitron monitors is their ability to produce a wider color gamut compared to other CRTs. This was particularly beneficial for graphic design and video editing professionals, as the monitors could accurately display a broader spectrum of colors. The Trinitron technology employed three electron guns—one for each primary color (red, green, and blue)—enhancing color accuracy and minimizing color bleeding.

Another notable characteristic of the Trinitron CRT monitor is its flat screen design. Unlike many CRTs of the time, which had curved screens, the Trinitron offered a flatter display surface. This not only reduced glare and distortion but also provided a more immersive viewing experience. The combination of the flat screen and advanced electron gun technology contributed to sharp images and clear text, making the monitors popular among computer users and gamers alike.

In terms of resolution, Trinitron monitors were capable of delivering exceptional clarity and detail, with some models supporting resolutions up to 2048 x 1536 pixels. This level of detail was particularly appreciated in applications requiring high precision, such as CAD and design work.

In addition to performance, build quality was paramount. Sony Trinitron monitors were known for their robust construction, longevity, and reliability. Many users reported years of consistent performance, making these monitors a solid investment.

Overall, the Sony Trinitron CRT monitor set the standard for display technology during its time. With its advanced features, superior color reproduction, and durability, it left a lasting legacy in the realm of visual displays, influencing future technologies even beyond the CRT era. While flat-panel displays have since taken over, the Trinitron remains a beloved piece of history for many enthusiasts and professionals, serving as a benchmark for color fidelity and image quality.