VPCS1 Series Optical Disk Drive Replacement Instructions
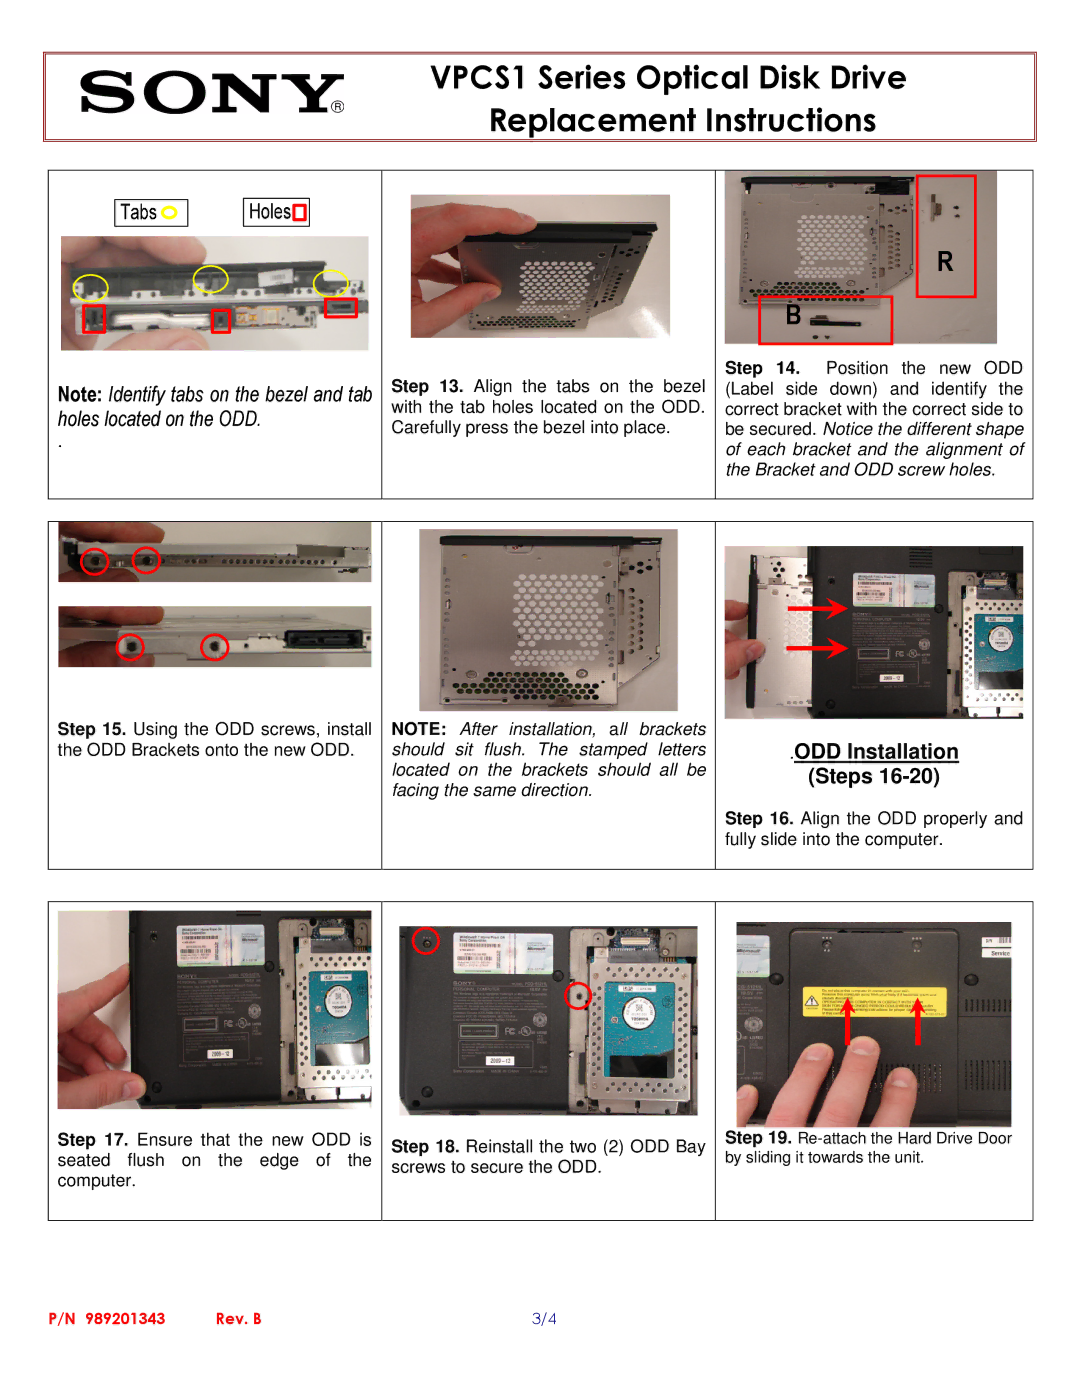
Note: Identify tabs on the bezel and tab holes located on the ODD.
.
Step 13. Align the tabs on the bezel with the tab holes located on the ODD. Carefully press the bezel into place.
R
B
Step 14. Position the new ODD (Label side down) and identify the correct bracket with the correct side to be secured. Notice the different shape of each bracket and the alignment of the Bracket and ODD screw holes.
Step 15. Using the ODD screws, install the ODD Brackets onto the new ODD.
NOTE: After installation, all brackets should sit flush. The stamped letters located on the brackets should all be facing the same direction.
.ODD Installation
(Steps 16-20)
Step 16. Align the ODD properly and fully slide into the computer.
Step 17. Ensure that the new ODD is seated flush on the edge of the computer.
Step 18. Reinstall the two (2) ODD Bay screws to secure the ODD.
Step 19.
P/N 989201343 | Rev. B | 3/4 |