③Move the arrow indicator to WIDTH to make desired width of cells to increase or decrease by using the Left / Right button between the level 0 ~ 100.
④Move the arrow indicator to HEIGHT to make desired height of cells to increase or decrease by using the Left / Right button between the level 0 ~ 100.
⑤Move the arrow indicator to the LEFT / RIGHT and TOP / BOTTOM to select the desired area positon by using the LEFT or RIGHT button.
⑥Move the arrow indicator to COLOR to select the desired color of each area cells by using the Left / Right button to select between the 15 different color.
RETURN : Move the arrow indicator to RETURN after completing the setup to return to SPECIAL menu.
Move the arrow indicator to RETURN after complete the setup to return to SETUP menu.
5. DEFECT
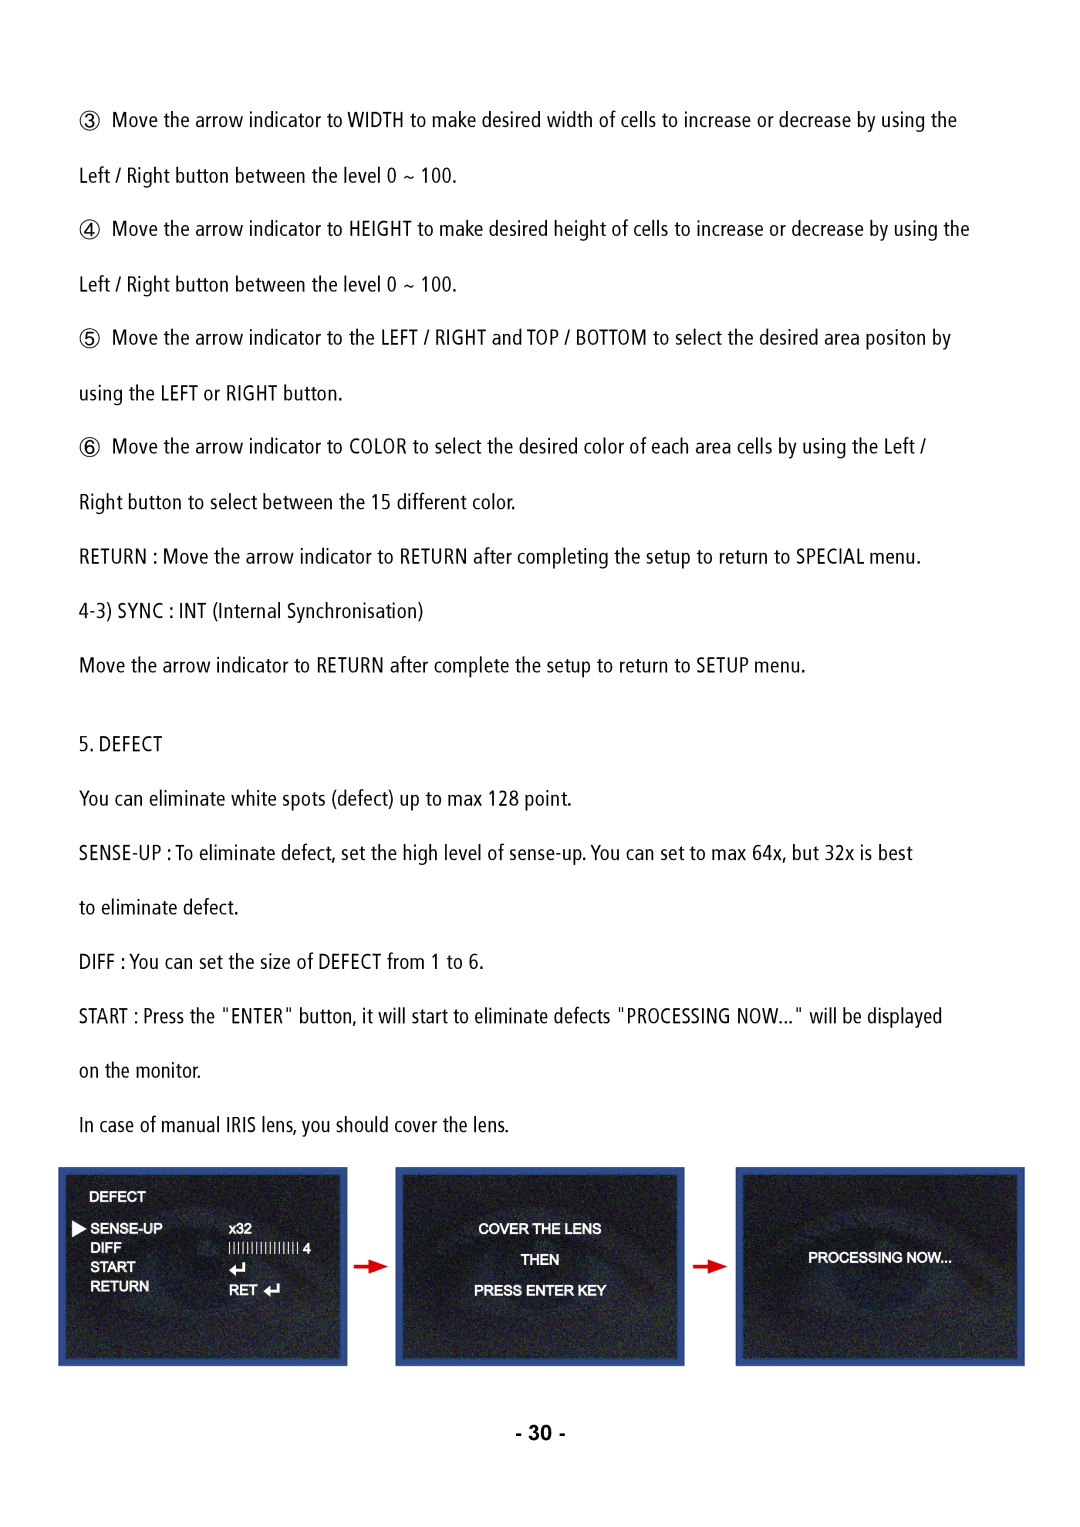
You can eliminate white spots (defect) up to max 128 point.
DIFF : You can set the size of DEFECT from 1 to 6.
START : Press the "ENTER" button, it will start to eliminate defects "PROCESSING NOW..." will be displayed on the monitor.
In case of manual IRIS lens, you should cover the lens.
DEFECT
![]()
![]() -UP
-UP![]()
![]() START RETURN
START RETURN
x32
![]()
![]()
![]()
![]()
![]()
![]()
![]()
![]()
![]()
![]()
![]()
![]()
![]()
![]()
![]() 4
4
RET![]()
![]()
![]()
COVER THE![]() LENS
LENS
THEN
PRESS ENTER KEY
PROCESSING NOW...
- 30 -
