ASSEMBLY & OPERATIONAL INSTRUCTIONS
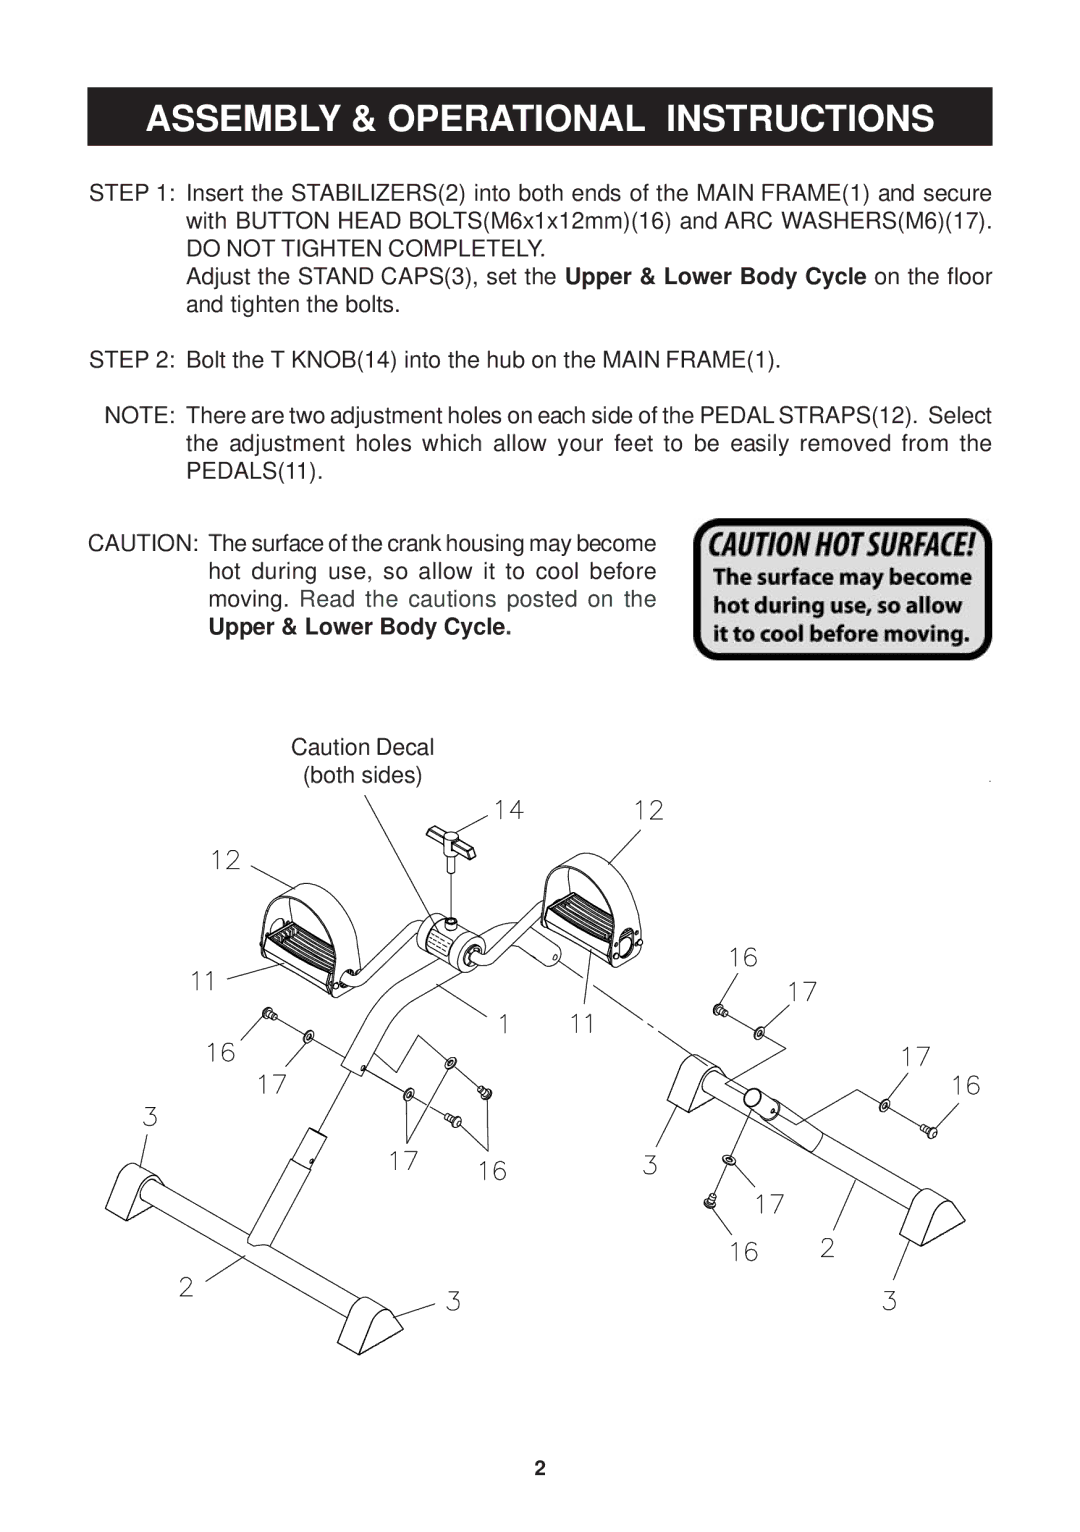
STEP 1: Insert the STABILIZERS(2) into both ends of the MAIN FRAME(1) and secure with BUTTON HEAD BOLTS(M6x1x12mm)(16) and ARC WASHERS(M6)(17).
DO NOT TIGHTEN COMPLETELY.
Adjust the STAND CAPS(3), set the Upper & Lower Body Cycle on the floor and tighten the bolts.
STEP 2: Bolt the T KNOB(14) into the hub on the MAIN FRAME(1).
NOTE: There are two adjustment holes on each side of the PEDAL STRAPS(12). Select the adjustment holes which allow your feet to be easily removed from the PEDALS(11).
CAUTION: The surface of the crank housing may become hot during use, so allow it to cool before moving. Read the cautions posted on the
Upper & Lower Body Cycle.
Caution Decal
(both sides)
2