OPERATIONAL INSTRUCTIONS
SEAT ADJUSTMENT
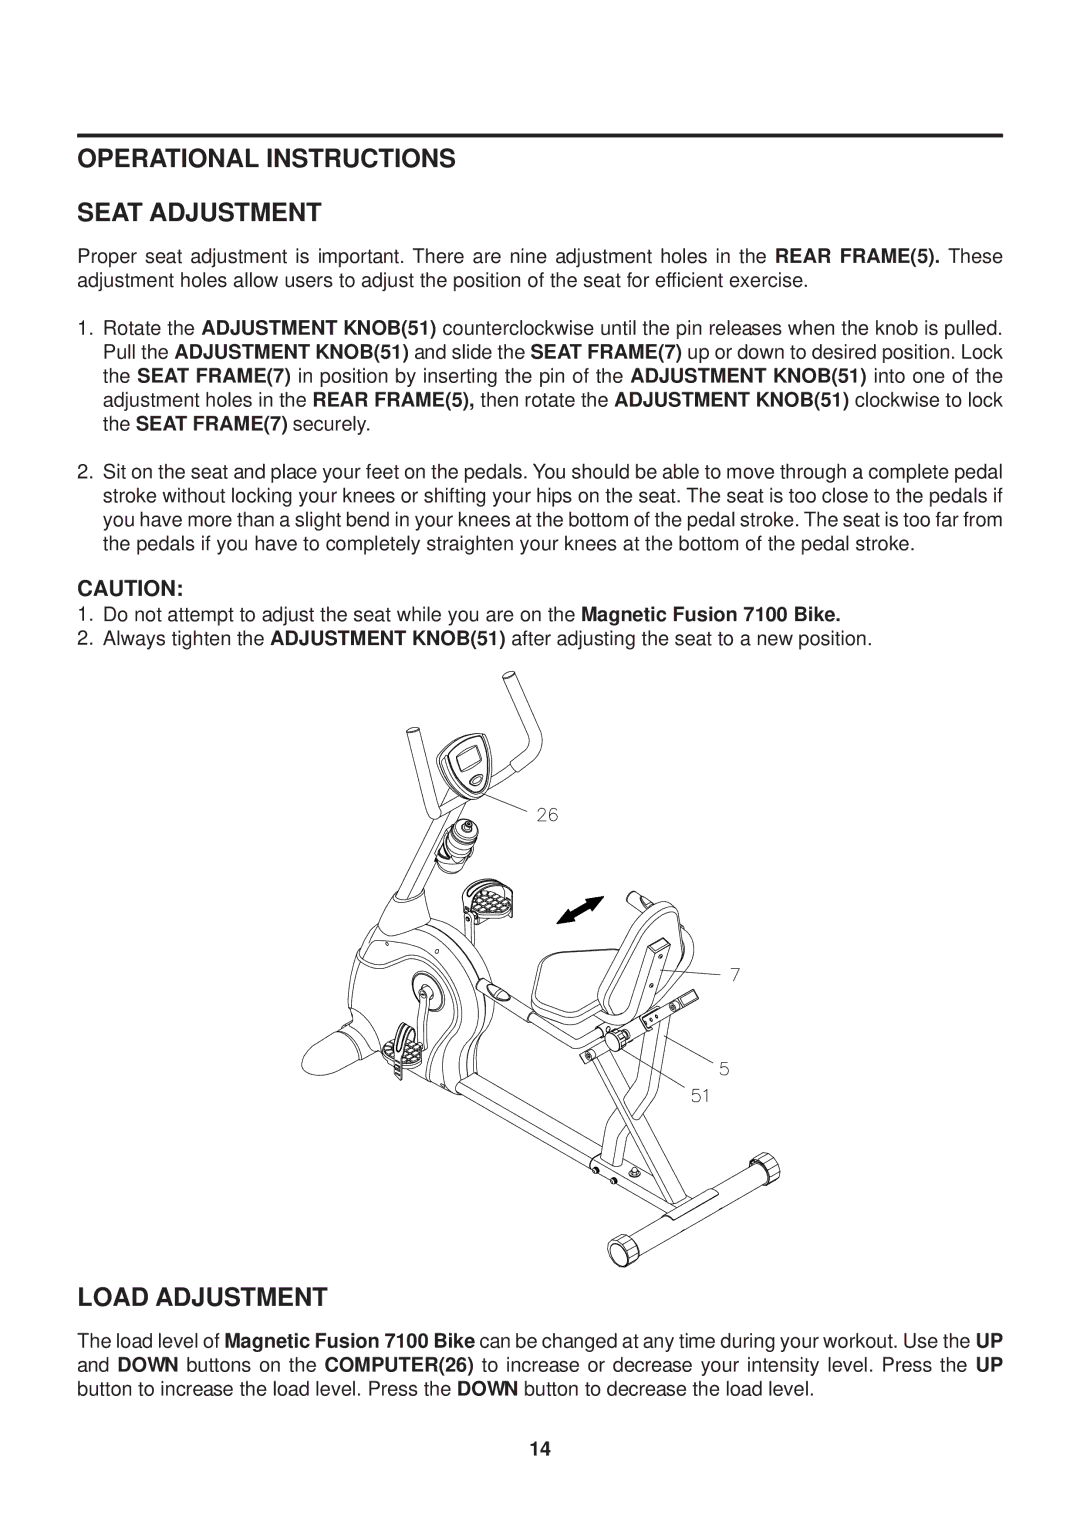
Proper seat adjustment is important. There are nine adjustment holes in the REAR FRAME(5). These adjustment holes allow users to adjust the position of the seat for efficient exercise.
1.Rotate the ADJUSTMENT KNOB(51) counterclockwise until the pin releases when the knob is pulled. Pull the ADJUSTMENT KNOB(51) and slide the SEAT FRAME(7) up or down to desired position. Lock the SEAT FRAME(7) in position by inserting the pin of the ADJUSTMENT KNOB(51) into one of the adjustment holes in the REAR FRAME(5), then rotate the ADJUSTMENT KNOB(51) clockwise to lock the SEAT FRAME(7) securely.
2.Sit on the seat and place your feet on the pedals. You should be able to move through a complete pedal stroke without locking your knees or shifting your hips on the seat. The seat is too close to the pedals if you have more than a slight bend in your knees at the bottom of the pedal stroke. The seat is too far from the pedals if you have to completely straighten your knees at the bottom of the pedal stroke.
CAUTION:
1.Do not attempt to adjust the seat while you are on the Magnetic Fusion 7100 Bike.
2.Always tighten the ADJUSTMENT KNOB(51) after adjusting the seat to a new position.
LOAD ADJUSTMENT
The load level of Magnetic Fusion 7100 Bike can be changed at any time during your workout. Use the UP and DOWN buttons on the COMPUTER(26) to increase or decrease your intensity level. Press the UP button to increase the load level. Press the DOWN button to decrease the load level.
14