CONTROL OVERVIEW M.212
1
15
2 | 14 |
| |
| 13 |
3
12
4
5
6
7
8
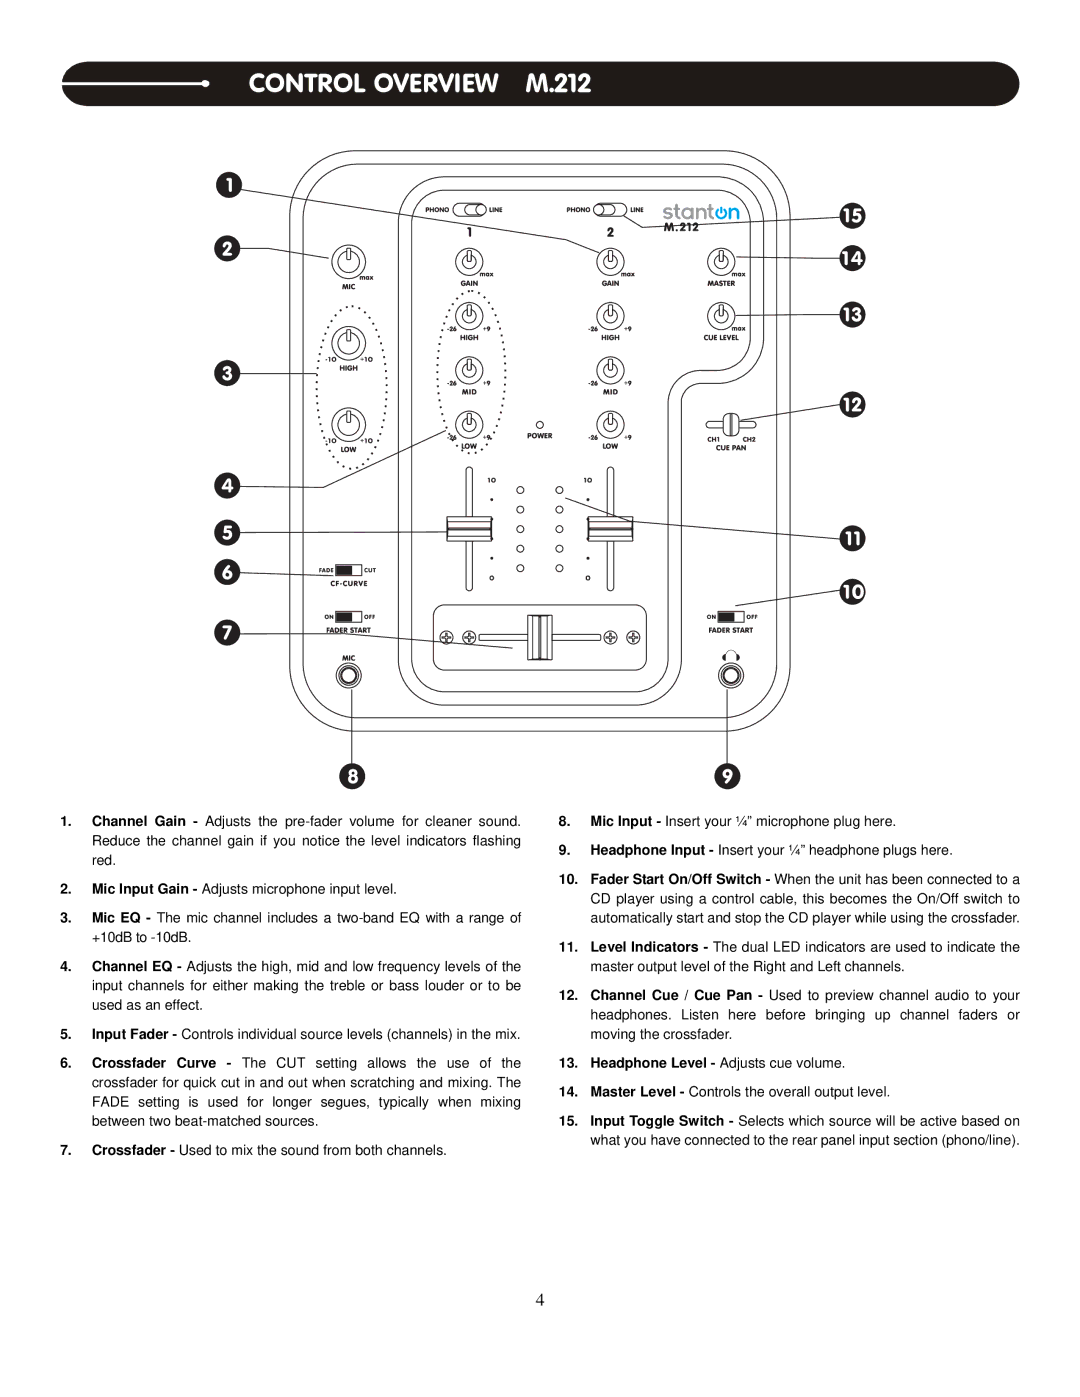
1.Channel Gain - Adjusts the
2.Mic Input Gain - Adjusts microphone input level.
3.Mic EQ - The mic channel includes a
4.Channel EQ - Adjusts the high, mid and low frequency levels of the input channels for either making the treble or bass louder or to be used as an effect.
5.Input Fader - Controls individual source levels (channels) in the mix.
6.Crossfader Curve - The CUT setting allows the use of the crossfader for quick cut in and out when scratching and mixing. The FADE setting is used for longer segues, typically when mixing between two
7.Crossfader - Used to mix the sound from both channels.
![]() 11
11
10
9
8.Mic Input - Insert your ¼” microphone plug here.
9.Headphone Input - Insert your ¼” headphone plugs here.
10.Fader Start On/Off Switch - When the unit has been connected to a CD player using a control cable, this becomes the On/Off switch to automatically start and stop the CD player while using the crossfader.
11.Level Indicators - The dual LED indicators are used to indicate the master output level of the Right and Left channels.
12.Channel Cue / Cue Pan - Used to preview channel audio to your headphones. Listen here before bringing up channel faders or moving the crossfader.
13.Headphone Level - Adjusts cue volume.
14.Master Level - Controls the overall output level.
15.Input Toggle Switch - Selects which source will be active based on what you have connected to the rear panel input section (phono/line).
4