R E M O V I N G FA C E P L AT E
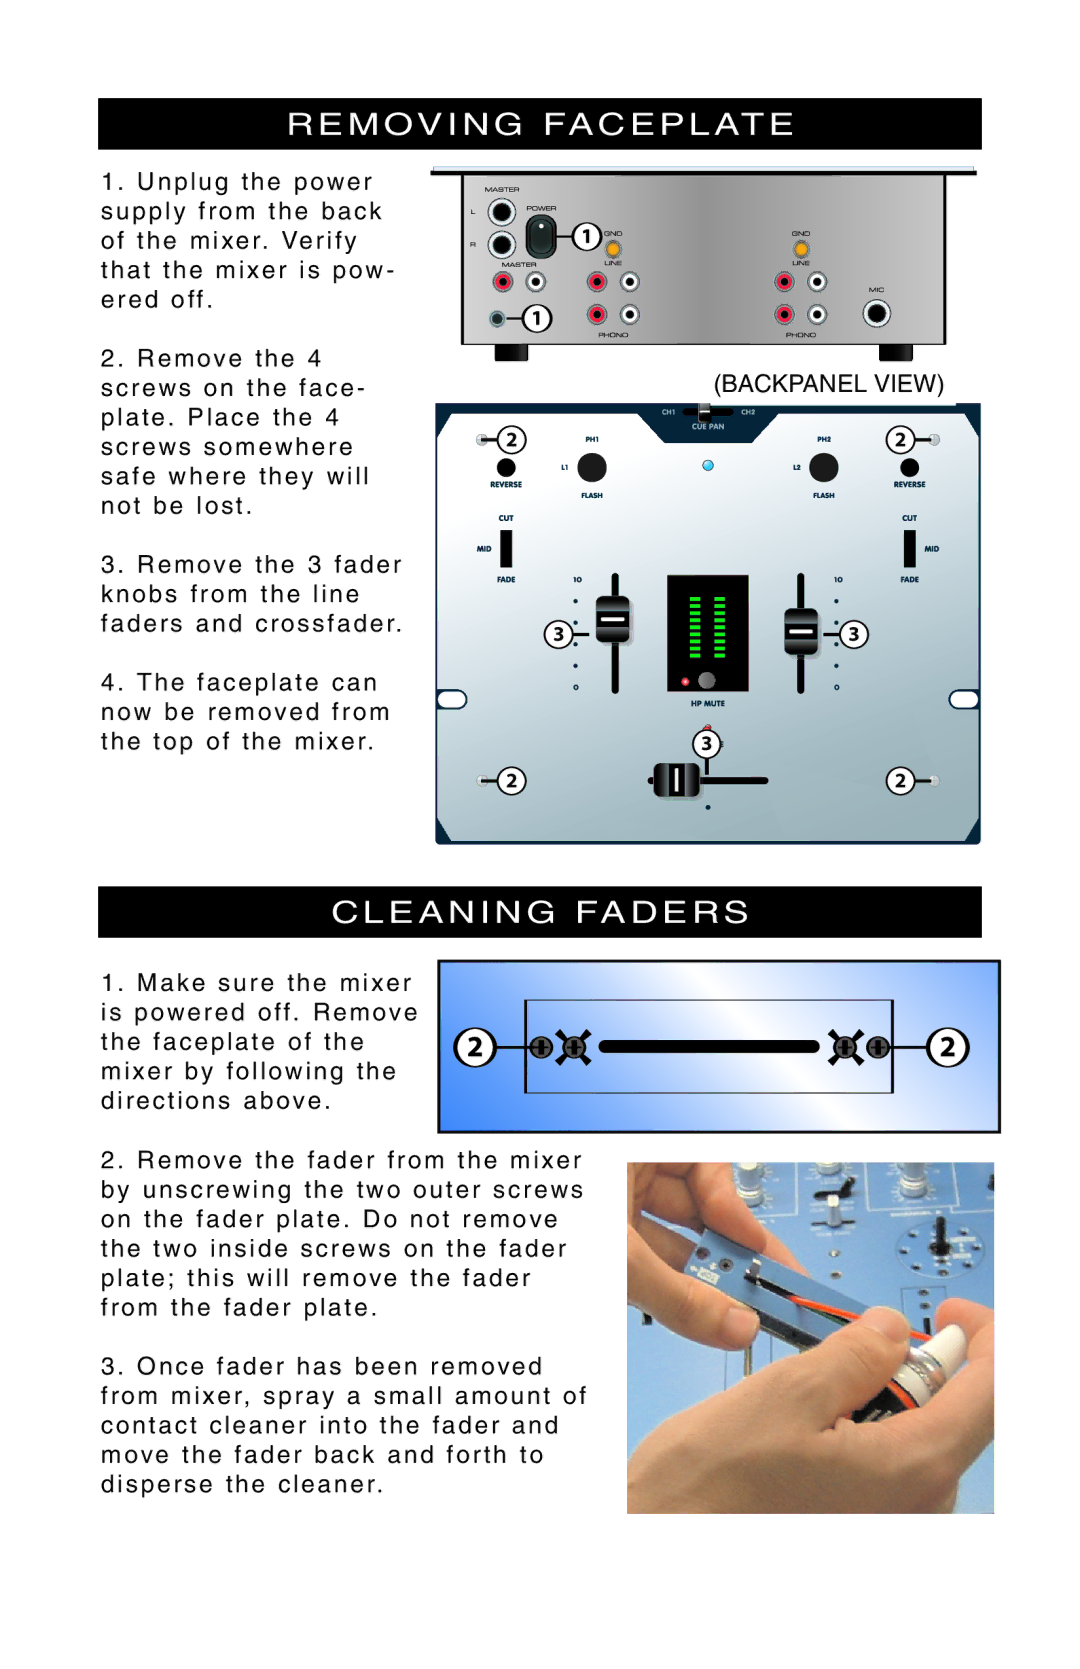
1 . Unplug the power supply from the back of the mixer. Verify that the mixer is pow - ered off .
2 . Remove the 4 screws on the face - plate . Place the 4 screws somewhere safe where they will not be lost .
3 . Remove the 3 fader knobs from the line faders and crossfader.
4 . The faceplate can now be removed from the top of the mixer.
![]()
![]() 2
2
3 ![]()
![]()
![]() 2
2
(BACKPANEL VIEW)
2![]()
![]()
![]()
![]()
![]()
![]()
![]()
![]() 3
3
![]()
![]() 3
3![]()
![]()
![]()
2 ![]()
![]()
![]()
![]()
![]()
C L E A N I N G FA D E R S
1 . Make sure the mixer is powered off . Remove the faceplate of the mixer by following the directions above .
2 . Remove the fader from the mixer by unscrewing the two outer screws on the fader plate . Do not remove the two inside screws on the fader plate; this will remove the fader from the fader plate .
3 . Once fader has been removed from mixer, spray a small amount of contact cleaner into the fader and move the fader back and forth to disperse the cleaner.