3.3Rear Panel
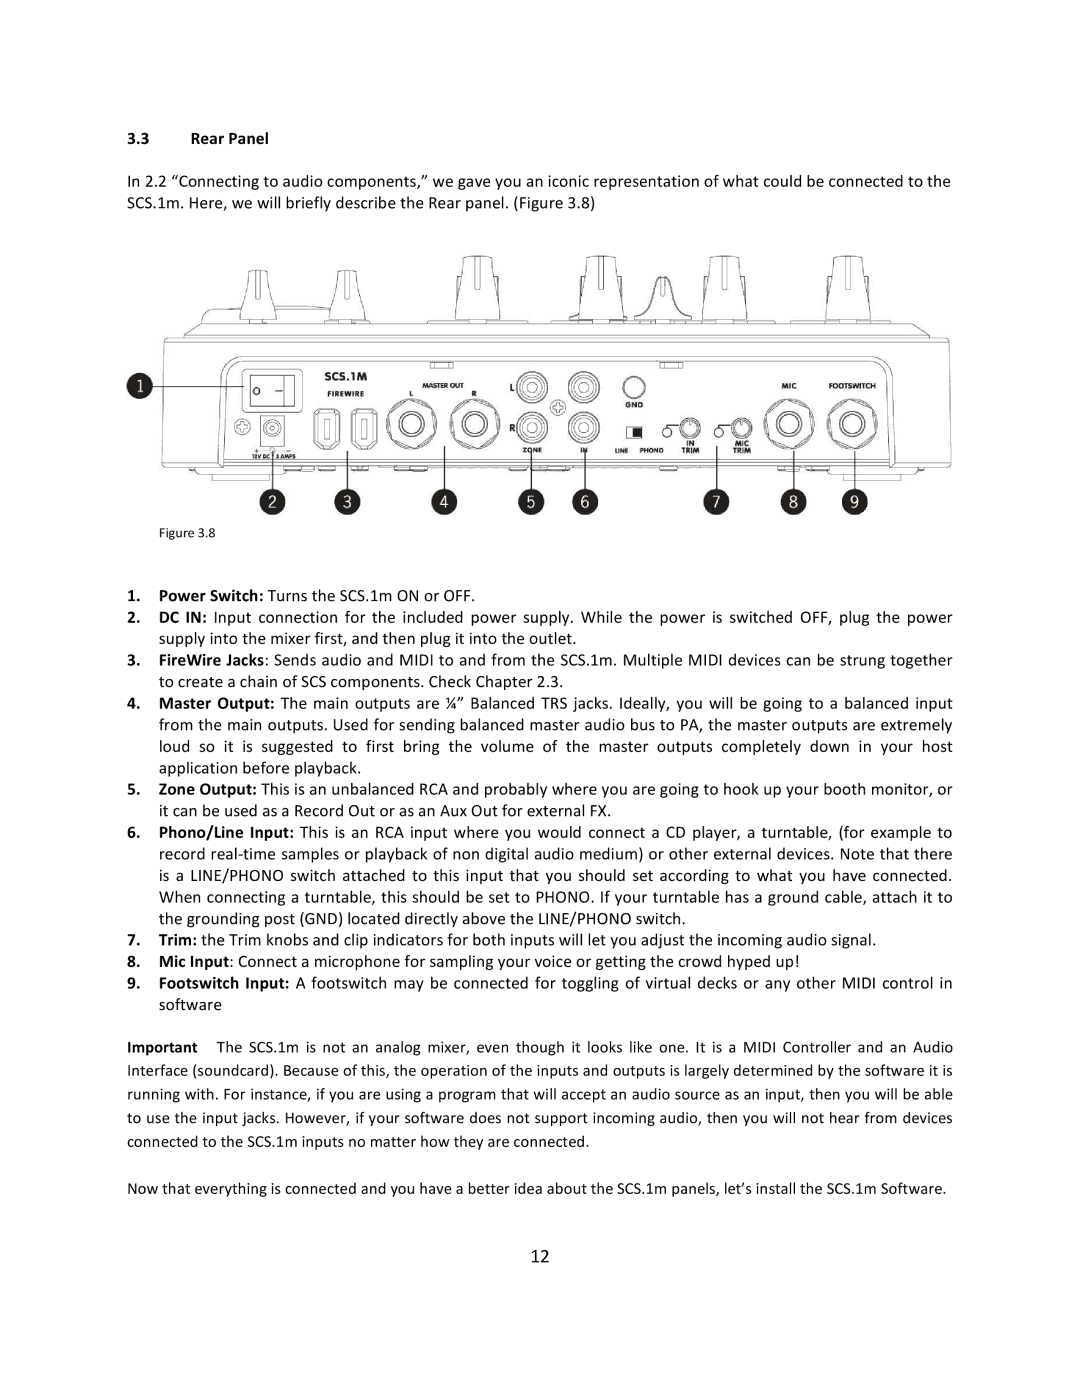
In 2.2 “Connecting to audio components,” we gave you an iconic representation of what could be connected to the SCS.1m. Here, we will briefly describe the Rear panel. (Figure 3.8)
Figure 3.8
1.Power Switch: Turns the SCS.1m ON or OFF.
2.DC IN: Input connection for the included power supply. While the power is switched OFF, plug the power supply into the mixer first, and then plug it into the outlet.
3.FireWire Jacks: Sends audio and MIDI to and from the SCS.1m. Multiple MIDI devices can be strung together to create a chain of SCS components. Check Chapter 2.3.
4.Master Output: The main outputs are ¼” Balanced TRS jacks. Ideally, you will be going to a balanced input from the main outputs. Used for sending balanced master audio bus to PA, the master outputs are extremely loud so it is suggested to first bring the volume of the master outputs completely down in your host application before playback.
5.Zone Output: This is an unbalanced RCA and probably where you are going to hook up your booth monitor, or it can be used as a Record Out or as an Aux Out for external FX.
6.Phono/Line Input: This is an RCA input where you would connect a CD player, a turntable, (for example to record
7.Trim: the Trim knobs and clip indicators for both inputs will let you adjust the incoming audio signal.
8.Mic Input: Connect a microphone for sampling your voice or getting the crowd hyped up!
9.Footswitch Input: A footswitch may be connected for toggling of virtual decks or any other MIDI control in software
Important The SCS.1m is not an analog mixer, even though it looks like one. It is a MIDI Controller and an Audio Interface (soundcard). Because of this, the operation of the inputs and outputs is largely determined by the software it is running with. For instance, if you are using a program that will accept an audio source as an input, then you will be able to use the input jacks. However, if your software does not support incoming audio, then you will not hear from devices connected to the SCS.1m inputs no matter how they are connected.
Now that everything is connected and you have a better idea about the SCS.1m panels, let’s install the SCS.1m Software.
12
