
LS-5 TT, LS-5 EX specifications
Star Micronics, a leader in the development of innovative printing solutions, has introduced its LS-5 TT and LS-5 EX models, revolutionizing the world of receipt and ticket printing. These printers are designed with versatility and efficiency in mind, making them ideal for various applications in retail, hospitality, and entertainment environments.The LS-5 TT and LS-5 EX both share a sleek, compact design that ensures they fit seamlessly into any workspace, whether it's a bustling restaurant or a busy retail counter. Their lightweight construction allows for easy portability, catering to businesses that require on-the-go printing solutions. With a modern aesthetic, these printers not only perform efficiently but also complement any business environment.
One of the standout features of the LS-5 series is its high-speed printing capability. The LS-5 TT boasts a remarkable print speed of up to 250 mm per second, while the LS-5 EX offers an impressive 300 mm per second. This ensures that businesses can handle high volumes of transactions smoothly without frustrating customers with long wait times.
The LS-5 TT and LS-5 EX are equipped with advanced thermal printing technology, eliminating the need for ink cartridges. This cost-effective solution significantly reduces operational expenses and minimizes maintenance requirements. Furthermore, the printers support 80mm and 58mm paper rolls, providing flexibility in printing formats.
In terms of connectivity, the LS-5 series offers a range of options, including USB and Ethernet interfaces, which make them compatible with various POS systems. The models also support Bluetooth and Wi-Fi options, allowing for seamless integration into mobile and wireless environments.
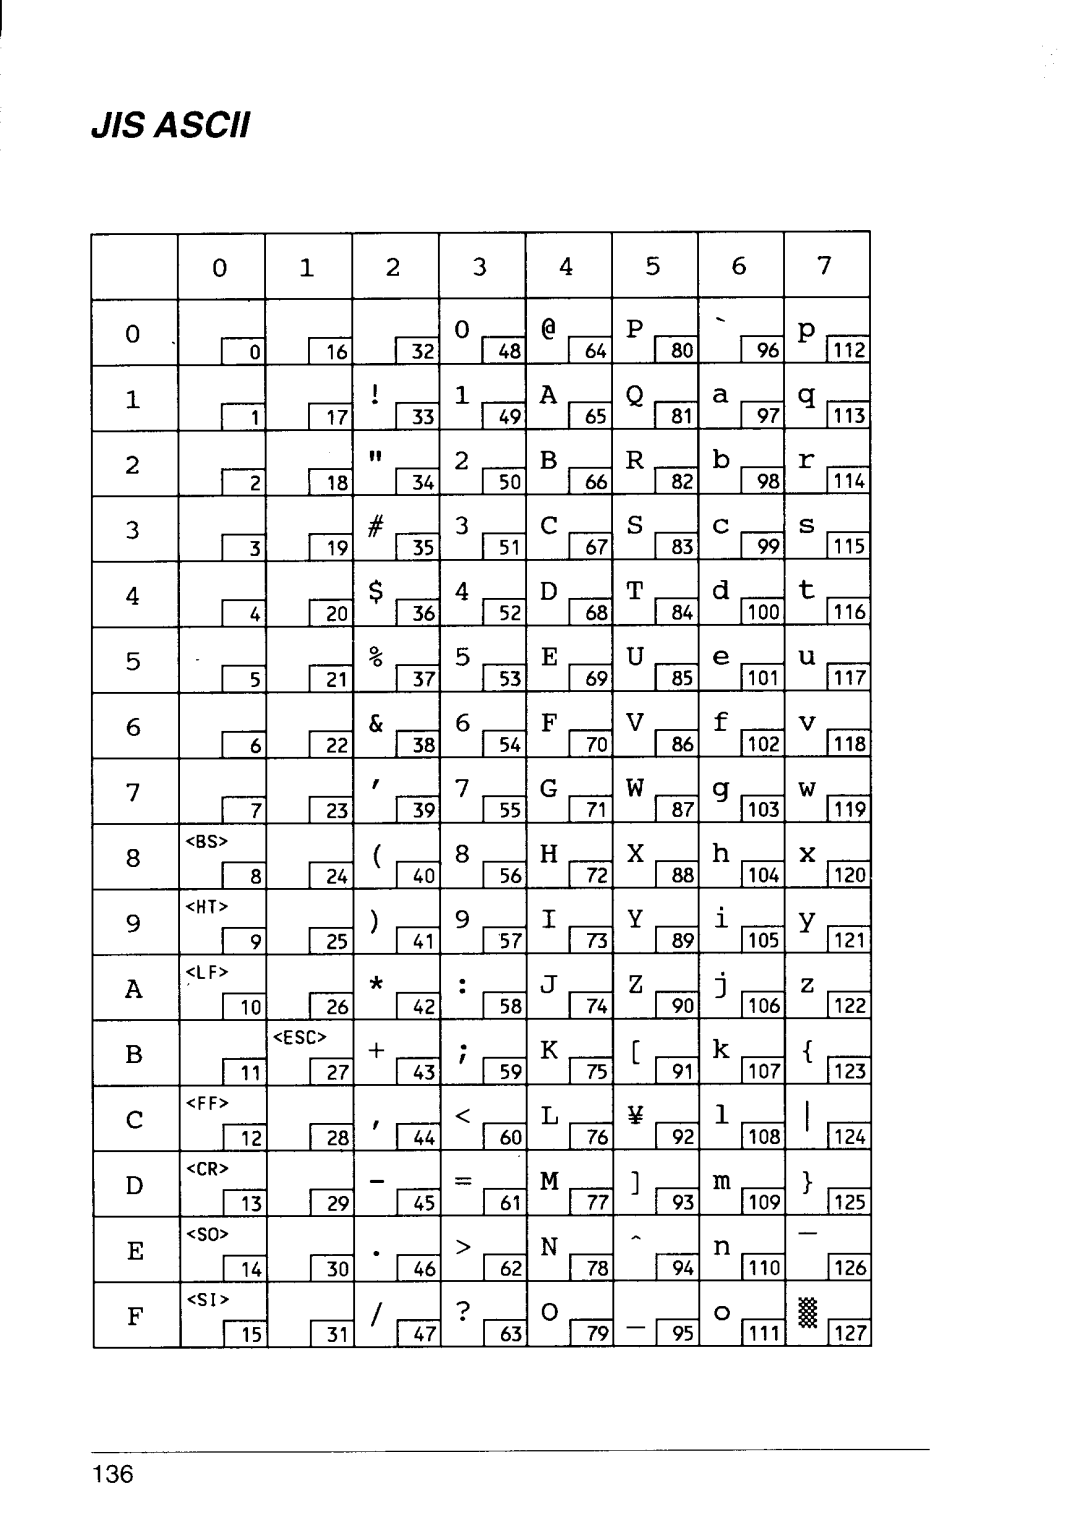
Another impressive feature of these printers is their ability to handle multiple character sets, including ASCII and international character sets, which makes them ideal for global applications. The LS-5 series also supports graphic printing, enabling businesses to include custom logos and promotional content on their receipts and tickets.
In conclusion, Star Micronics' LS-5 TT and LS-5 EX models offer state-of-the-art features, speed, and versatility that make them indispensable tools for modern businesses. Their commitment to high-quality performance combined with user-friendly design ensures that they meet and exceed the demands of today’s fast-paced commercial environments. Businesses seeking efficient and reliable printing solutions will find the LS-5 series to be an exceptional choice that enhances their operational efficiency.