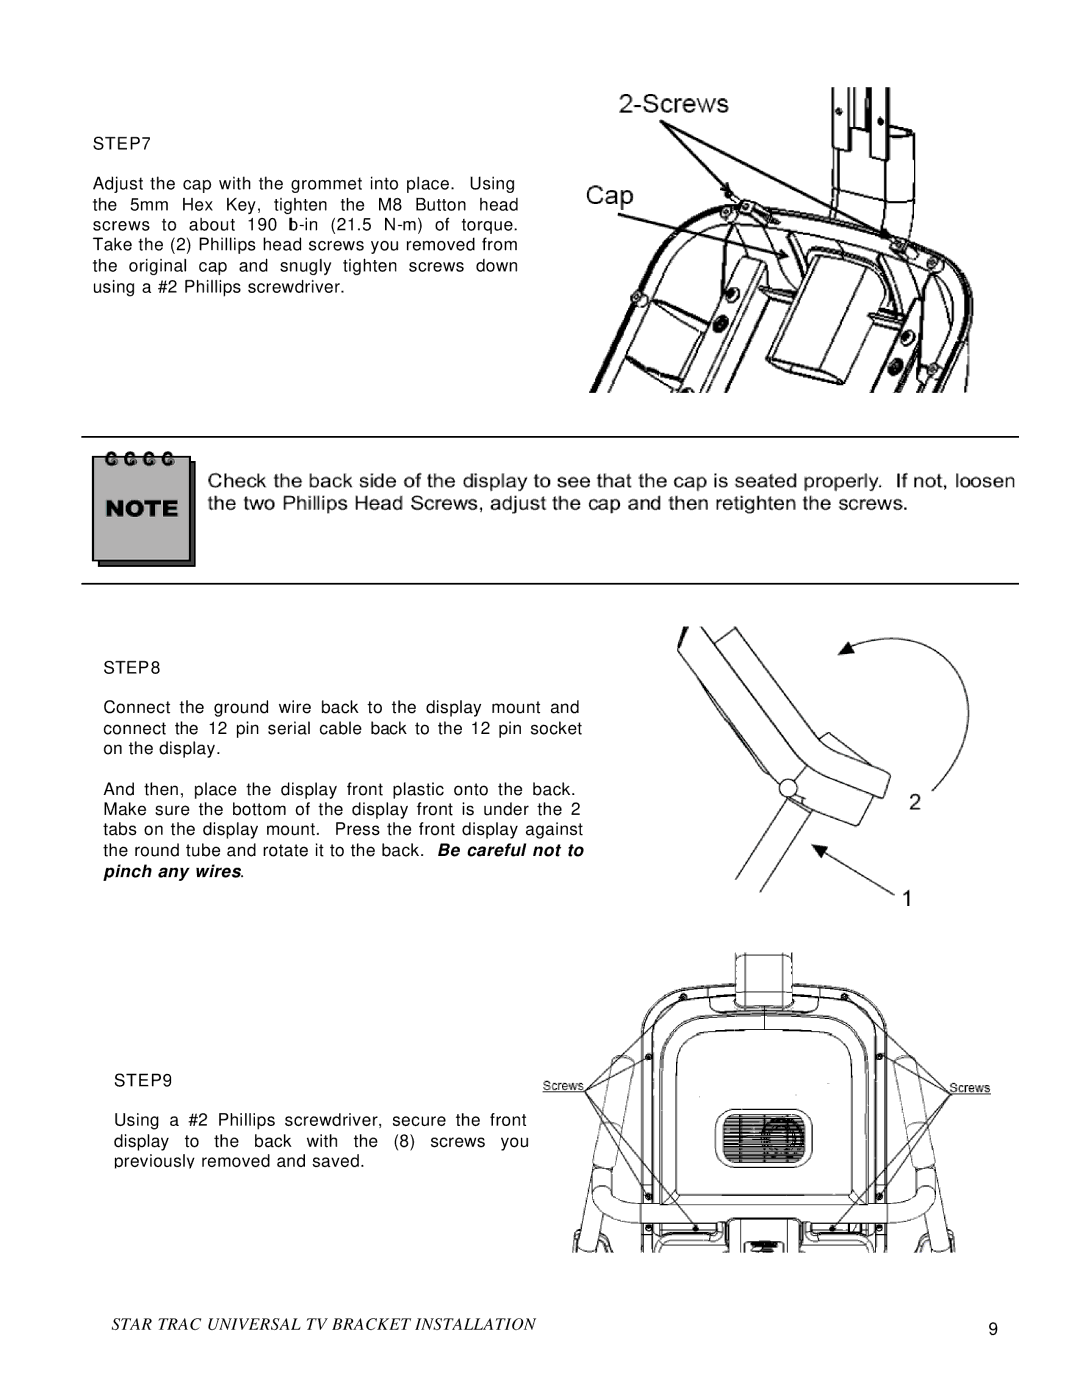
STEP7
Adjust the cap with the grommet into place. Using the 5mm Hex Key, tighten the M8 Button head screws to about 190
STEP8
Connect the ground wire back to the display mount and connect the 12 pin serial cable back to the 12 pin socket on the display.
And then, place the display front plastic onto the back. Make sure the bottom of the display front is under the 2 tabs on the display mount. Press the front display against the round tube and rotate it to the back. Be careful not to pinch any wires.
STEP9
Using a #2 Phillips screwdriver, secure the front display to the back with the (8) screws you previously removed and saved.
STAR TRAC UNIVERSAL TV BRACKET INSTALLATION | 9 |
