To install the TV neck on the E-TR, follows the se steps:
STEP1
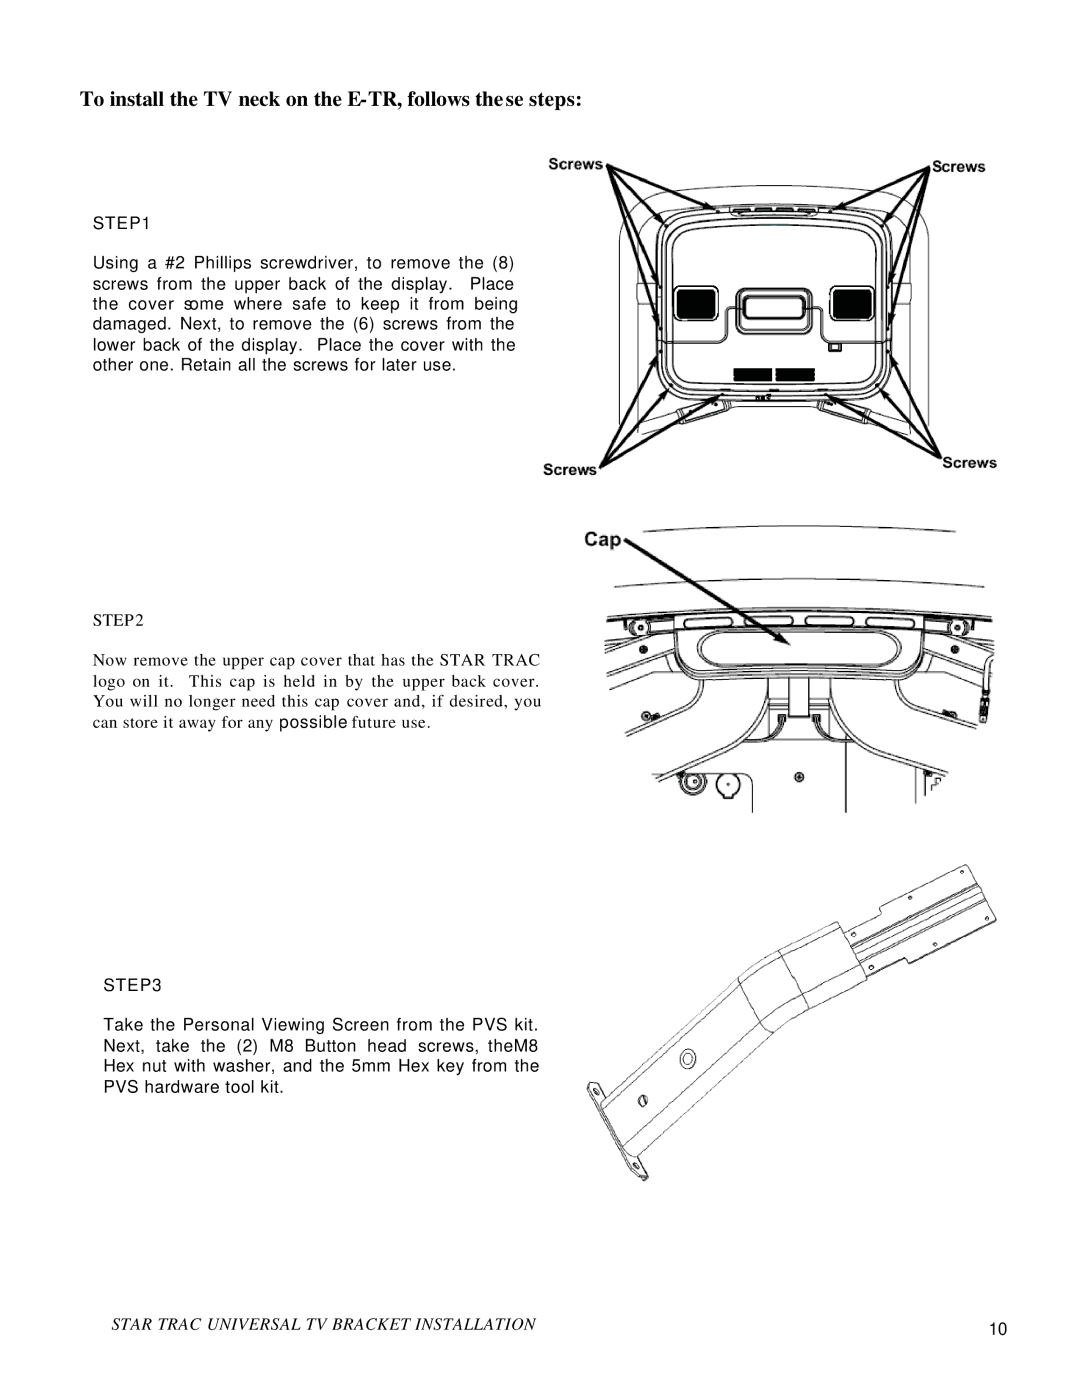
Using a #2 Phillips screwdriver, to remove the (8) screws from the upper back of the display. Place the cover some where safe to keep it from being damaged. Next, to remove the (6) screws from the lower back of the display. Place the cover with the other one. Retain all the screws for later use.
STEP2
Now remove the upper cap cover that has the STAR TRAC logo on it. This cap is held in by the upper back cover. You will no longer need this cap cover and, if desired, you can store it away for any possible future use.
STEP3
Take the Personal Viewing Screen from the PVS kit.
Next, take the (2) M8 Button head screws, theM8
Hex nut with washer, and the 5mm Hex key from the
PVS hardware tool kit.
STAR TRAC UNIVERSAL TV BRACKET INSTALLATION | 10 |
