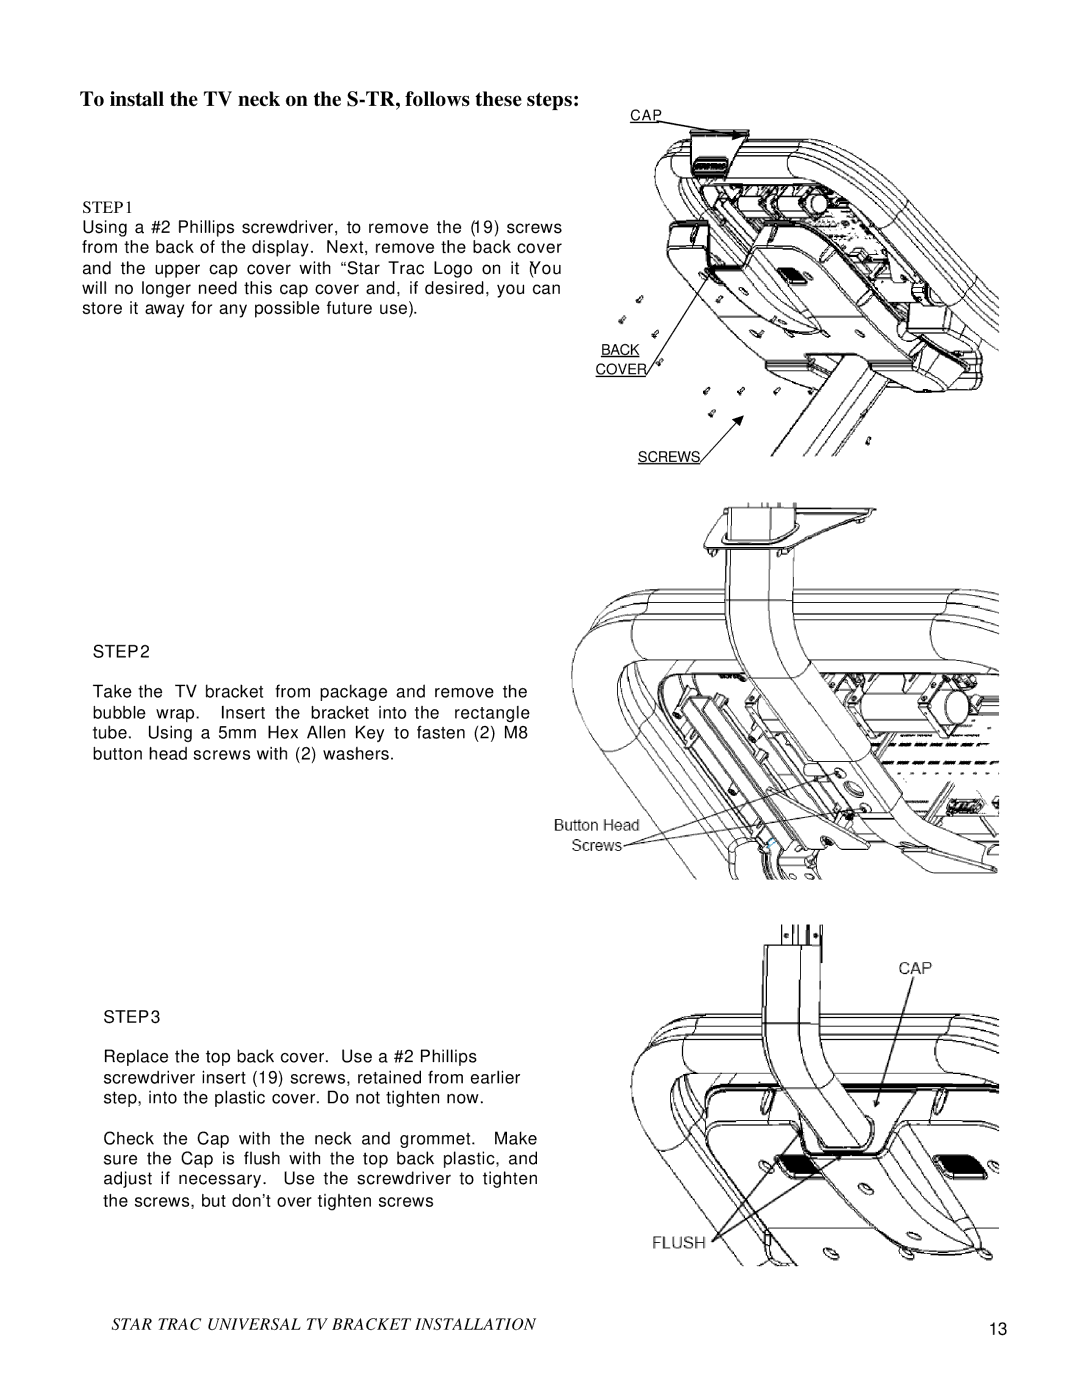
To install the TV neck on the S-TR, follows these steps:
CAP
STEP1
Using a #2 Phillips screwdriver, to remove the (19) screws from the back of the display. Next, remove the back cover and the upper cap cover with “Star Trac Logo on it (You will no longer need this cap cover and, if desired, you can store it away for any possible future use).
BACK
COVER
SCREWS
STEP2
Take the TV bracket from package and remove the bubble wrap. Insert the bracket into the rectangle tube. Using a 5mm Hex Allen Key to fasten (2) M8 button head screws with (2) washers.
STEP3
Replace the top back cover. Use a #2 Phillips screwdriver insert (19) screws, retained from earlier step, into the plastic cover. Do not tighten now.
Check the Cap with the neck and grommet. Make sure the Cap is flush with the top back plastic, and adjust if necessary. Use the screwdriver to tighten the screws, but don’t over tighten screws
STAR TRAC UNIVERSAL TV BRACKET INSTALLATION | 13 |