Schneider Electric Comprehensive Guide to PL7 PRO and SyCon Configuration for Profibus-DP Gateways

Models: LUFP7

1 115
Download 115 pages 53.73 Kb
Page 26
Image 26

4. Software Implementation of the Gateway

4.2. Gateway Configuration under PL7 PRO and SyCon

The Profibus-DP master must be configured so that it has access to all of the data described in chapters 10.2.1 Input Data Memory Area, page 95, and 10.2.2 Output Data Memory Area, page 96.

The following chapters describe the steps in PL7 PRO (version V3.0) and SyCon (version V2.5.0.0) which you will need to go through so that the gateway is correctly recognised by the Profibus-DP master PLC.

The Profibus-DP network which is described in the following chapters only includes one master (TSX 57353 v5.1 + TSX PBY 100) and one slave (LUFP7 gateway). So you will need to adapt the addressing of the inputs and outputs shown below (%IW and %QW) according to any other slaves on the Profibus-DP network which you need to configure.

4.2.1. Setting Up the Hardware Configuration under PL7 PRO

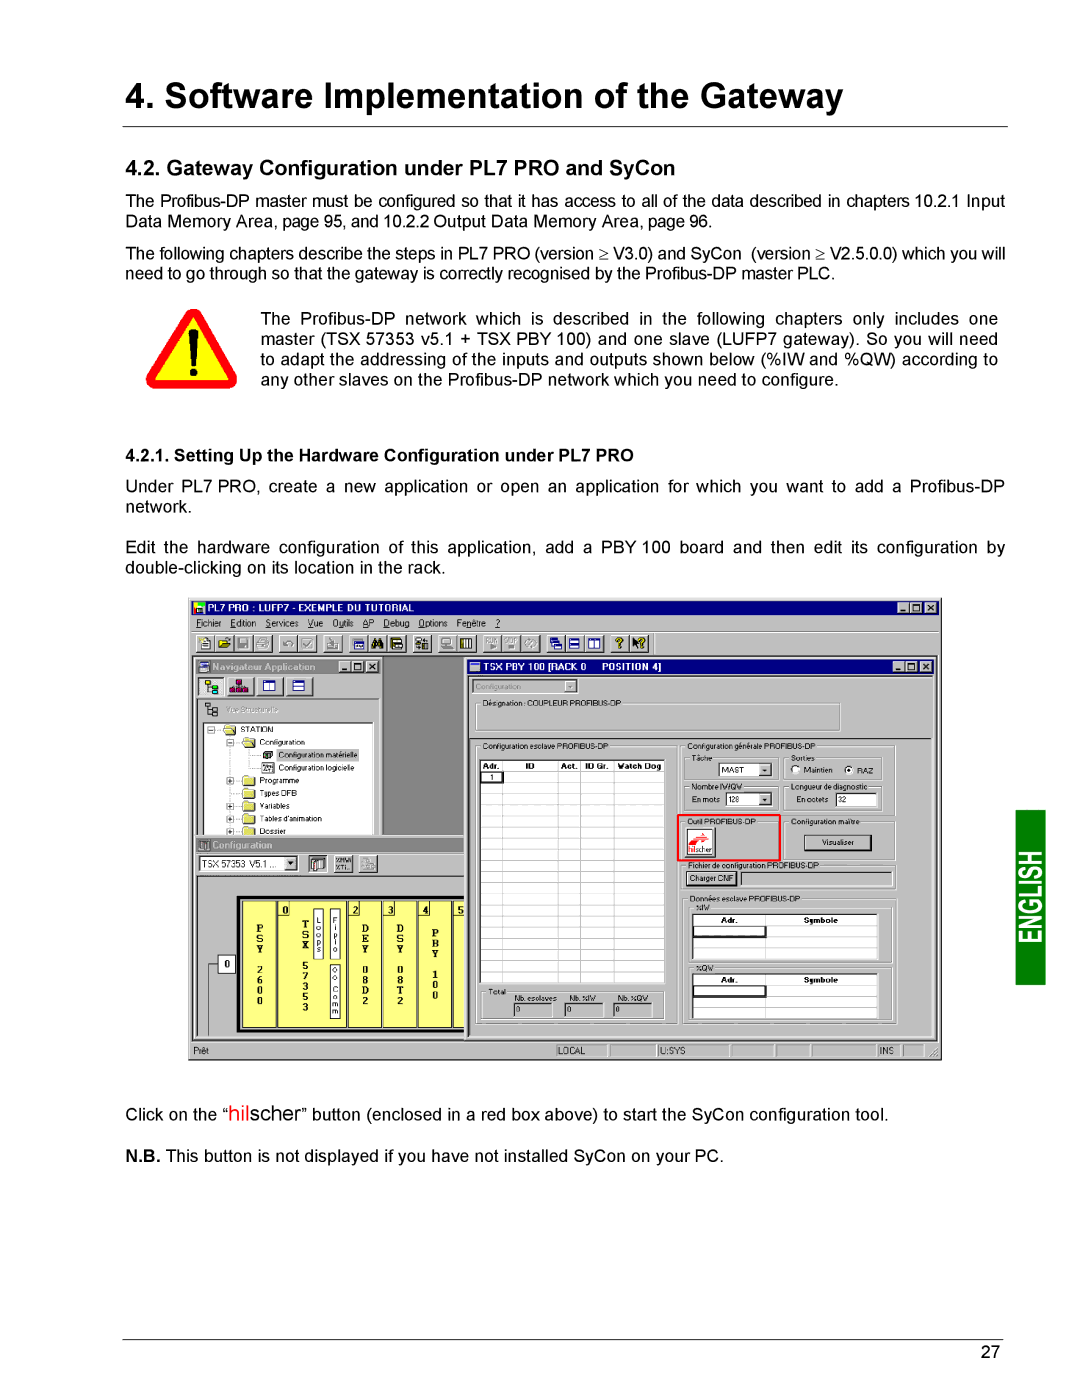
Under PL7 PRO, create a new application or open an application for which you want to add a Profibus-DP network.

Edit the hardware configuration of this application, add a PBY 100 board and then edit its configuration by double-clicking on its location in the rack.

Click on the “hilscher” button (enclosed in a red box above) to start the SyCon configuration tool.

N.B. This button is not displayed if you have not installed SyCon on your PC.

27

Page 26
Image 26
Schneider Electric LUFP7 user manual Gateway Configuration under PL7 PRO and SyCon